
hwadaejongju - Jirisan Ridge traverse 화대종주
📍trailhead
Hwadaejongju (화대종주) – The Jirisan Ridge Traverse
There are hikes you finish and move on from, and then there are hikes that stay with you forever. For me, the Hwadaejongju (the full ridge traverse of Jirisan) was one of those. It’s a journey that demands effort but rewards with an unforgettable summit sunrise, unexpected friendships, and fantastic views.
Trail Stats At a glance
Route: Hwadaejongju (Hwaeomsa → Daewonsa)
Distance: ~49 km
Duration: 3 days, 2 nights
Total Elevation Gain: ~3,500 m
Highest Point: Cheonwangbong Peak (천왕봉, 1,915 m)
Side Summits (optional): Banyabong (1,732 m), Nogodan (1,507 m)
Shelters Stayed: Yeonhacheon → Jangteomok → finish at Daewonsa
Difficulty: Challenging (long distance + elevation, but well-marked)
Best For: Hikers looking for Korea’s most iconic multi-day ridge traverse
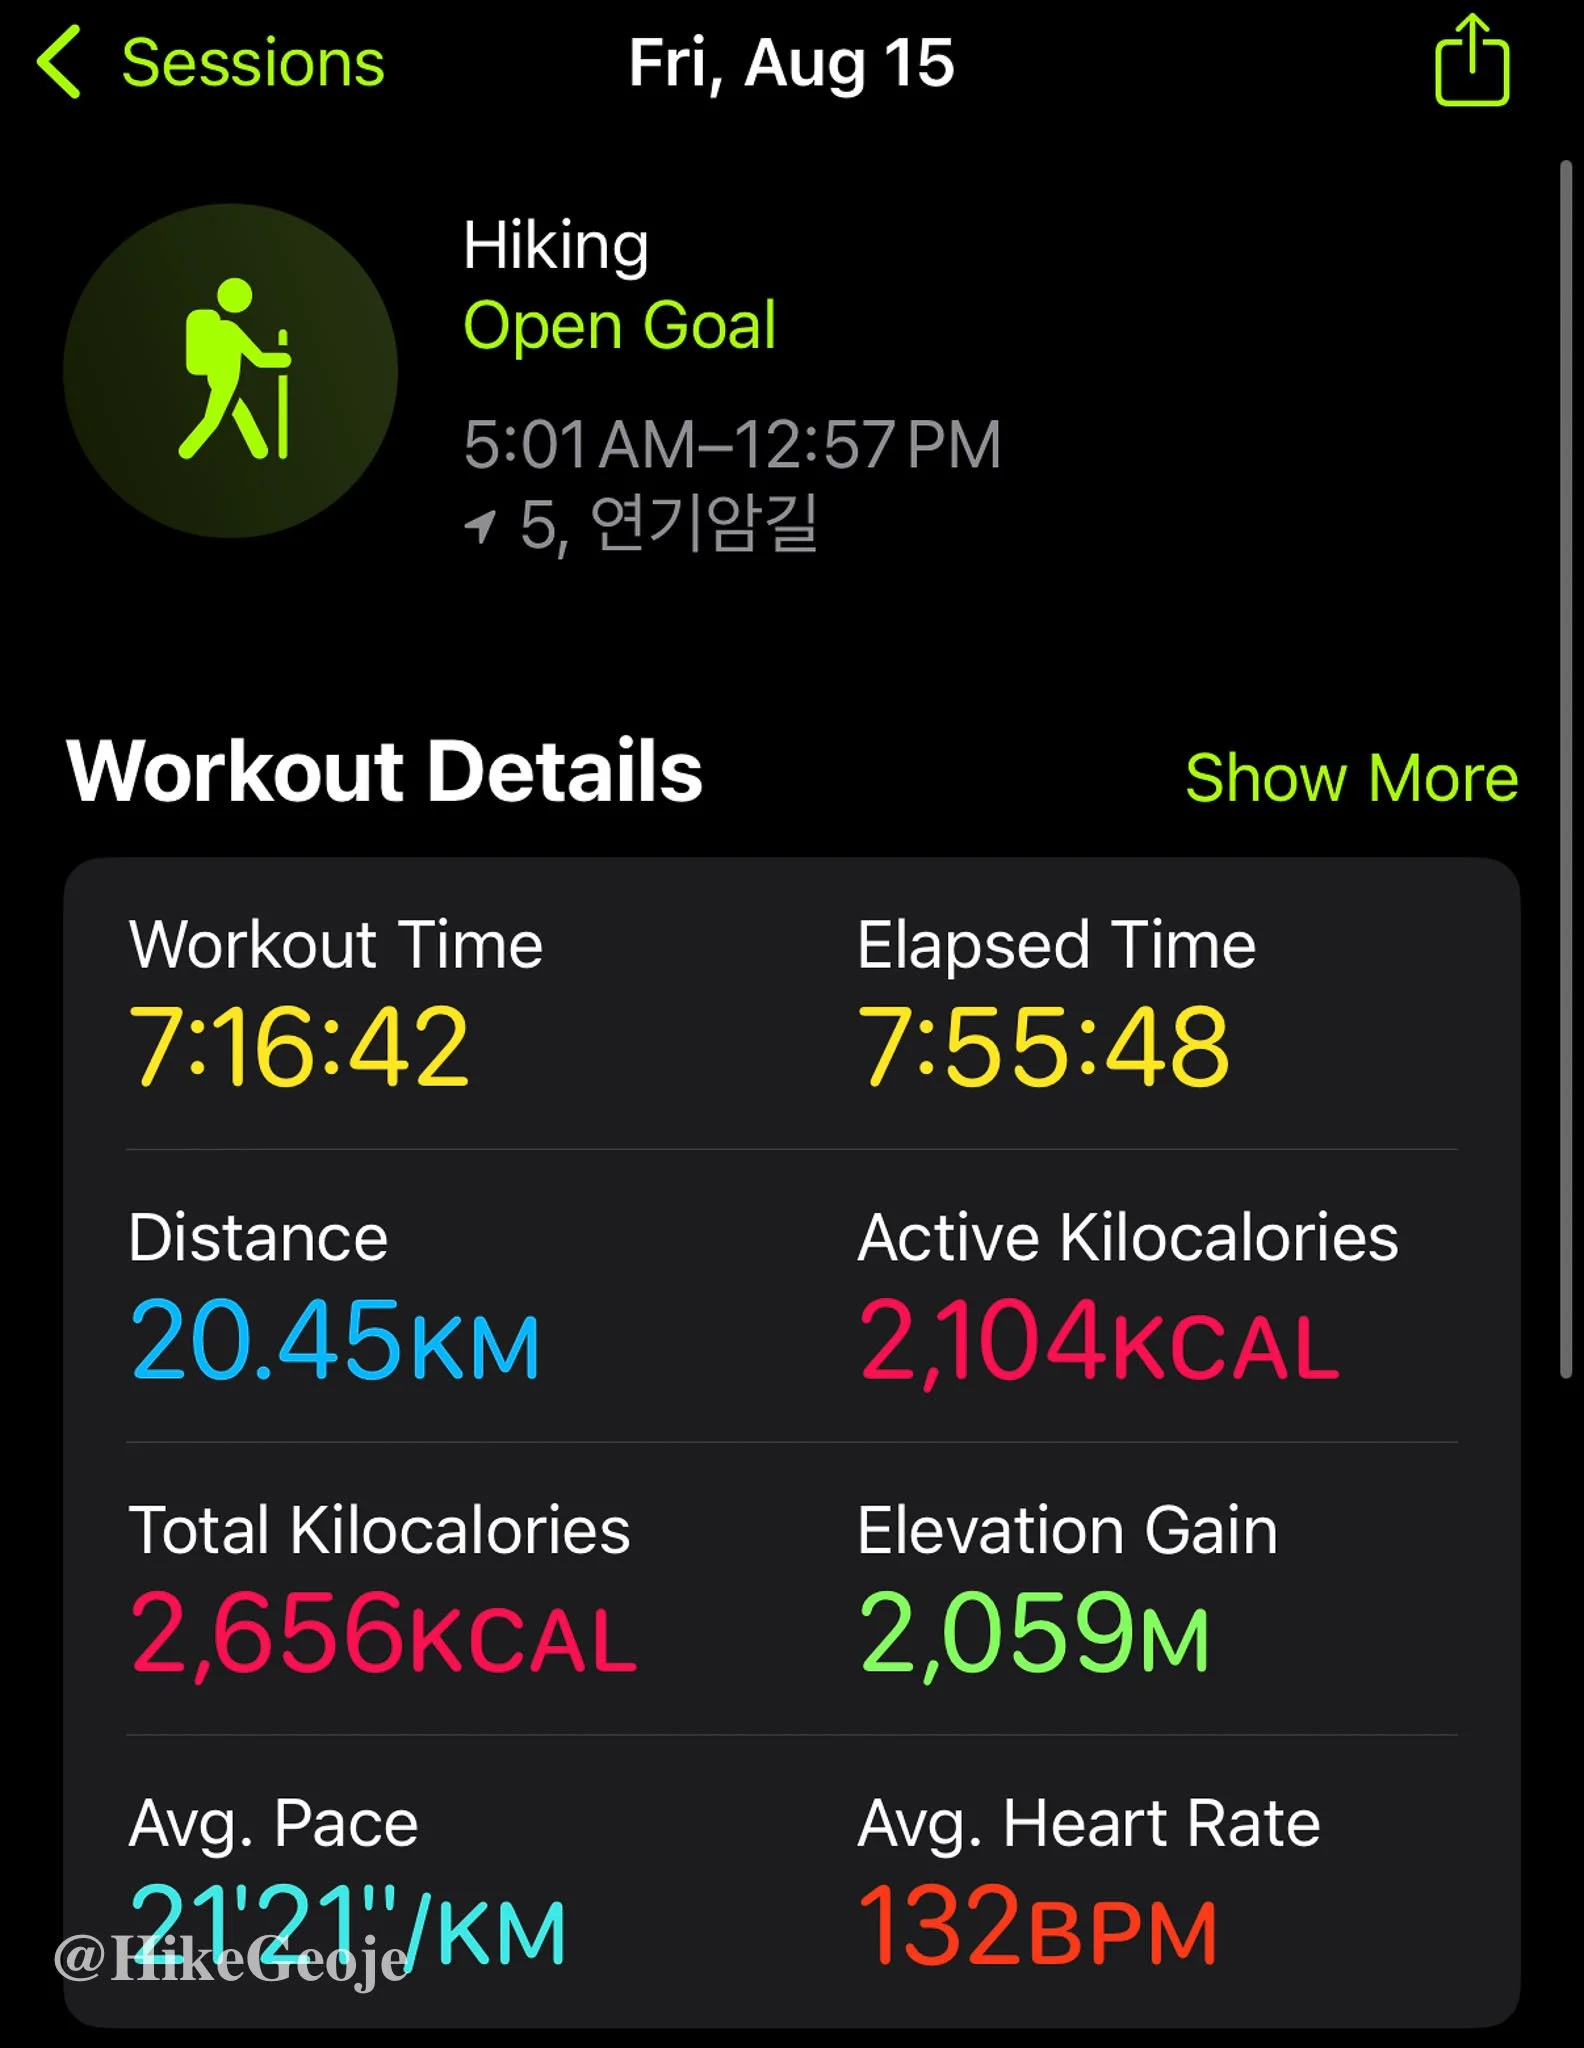
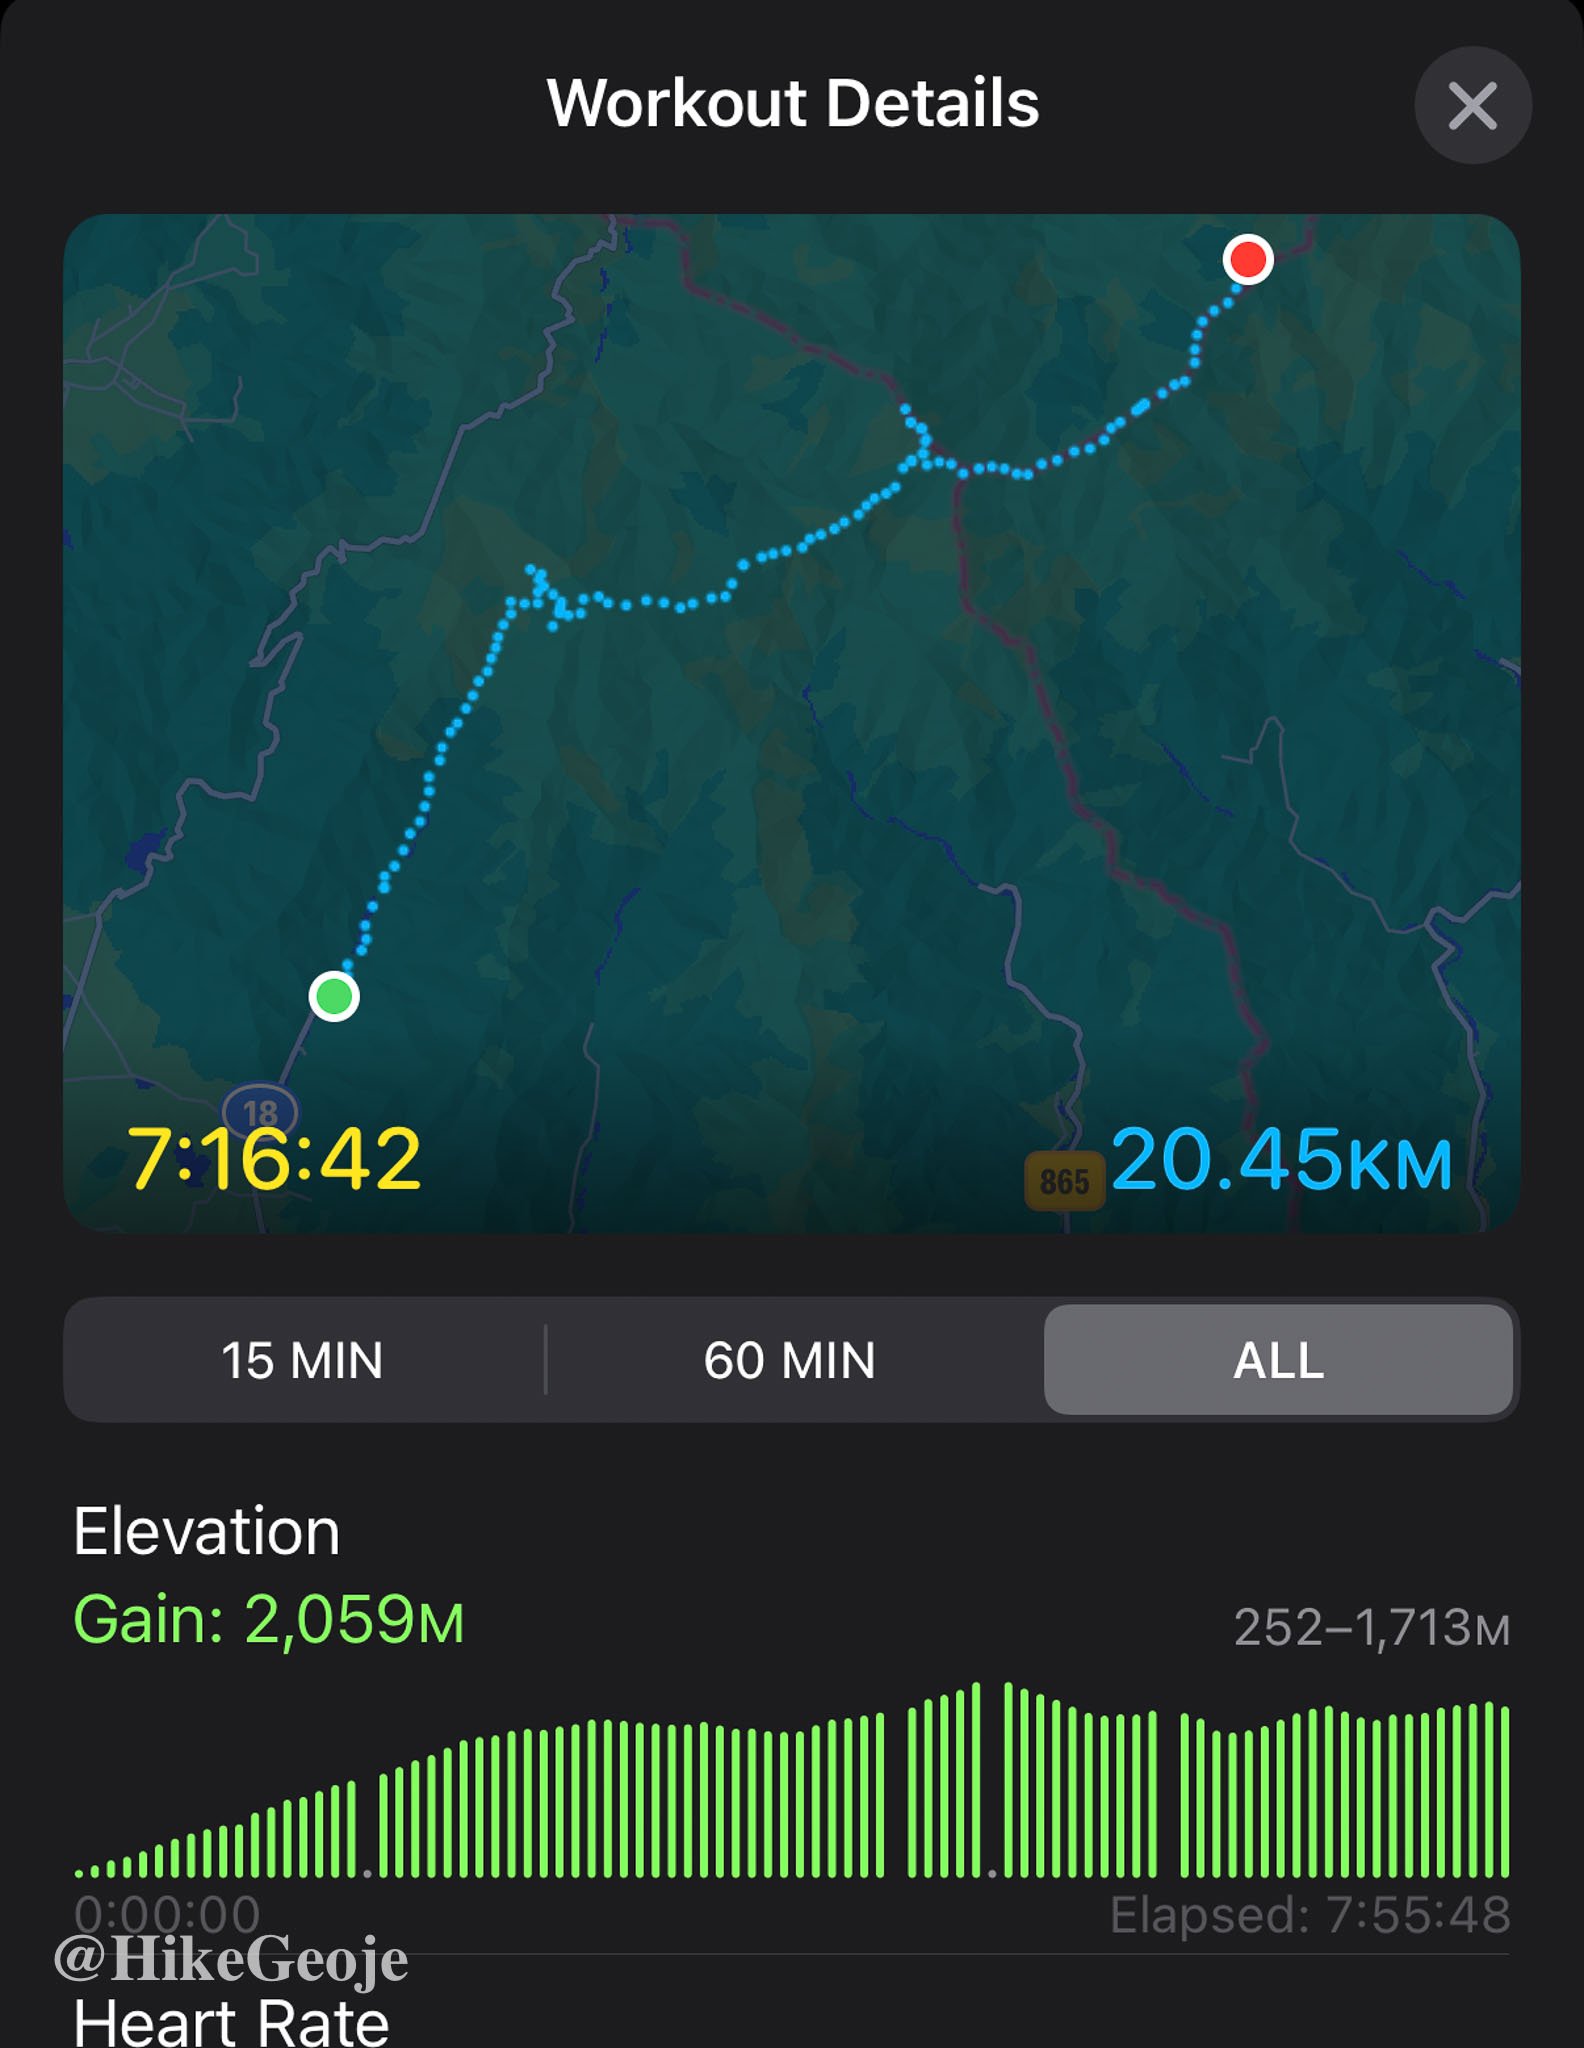
Day 1 – Hwaeomsa → Yeonhacheon Shelter
Distance: 20.45 km
Time: 7 hrs 55 min
Elevation Gain: 2,058 m
Highlights: Pre-dawn start from Hwaeomsa, vending-machine coffee at Nogodan Shelter, side trip to Banyabong, meeting Yejin at Yeonhacheon.
Day 1
Day 1
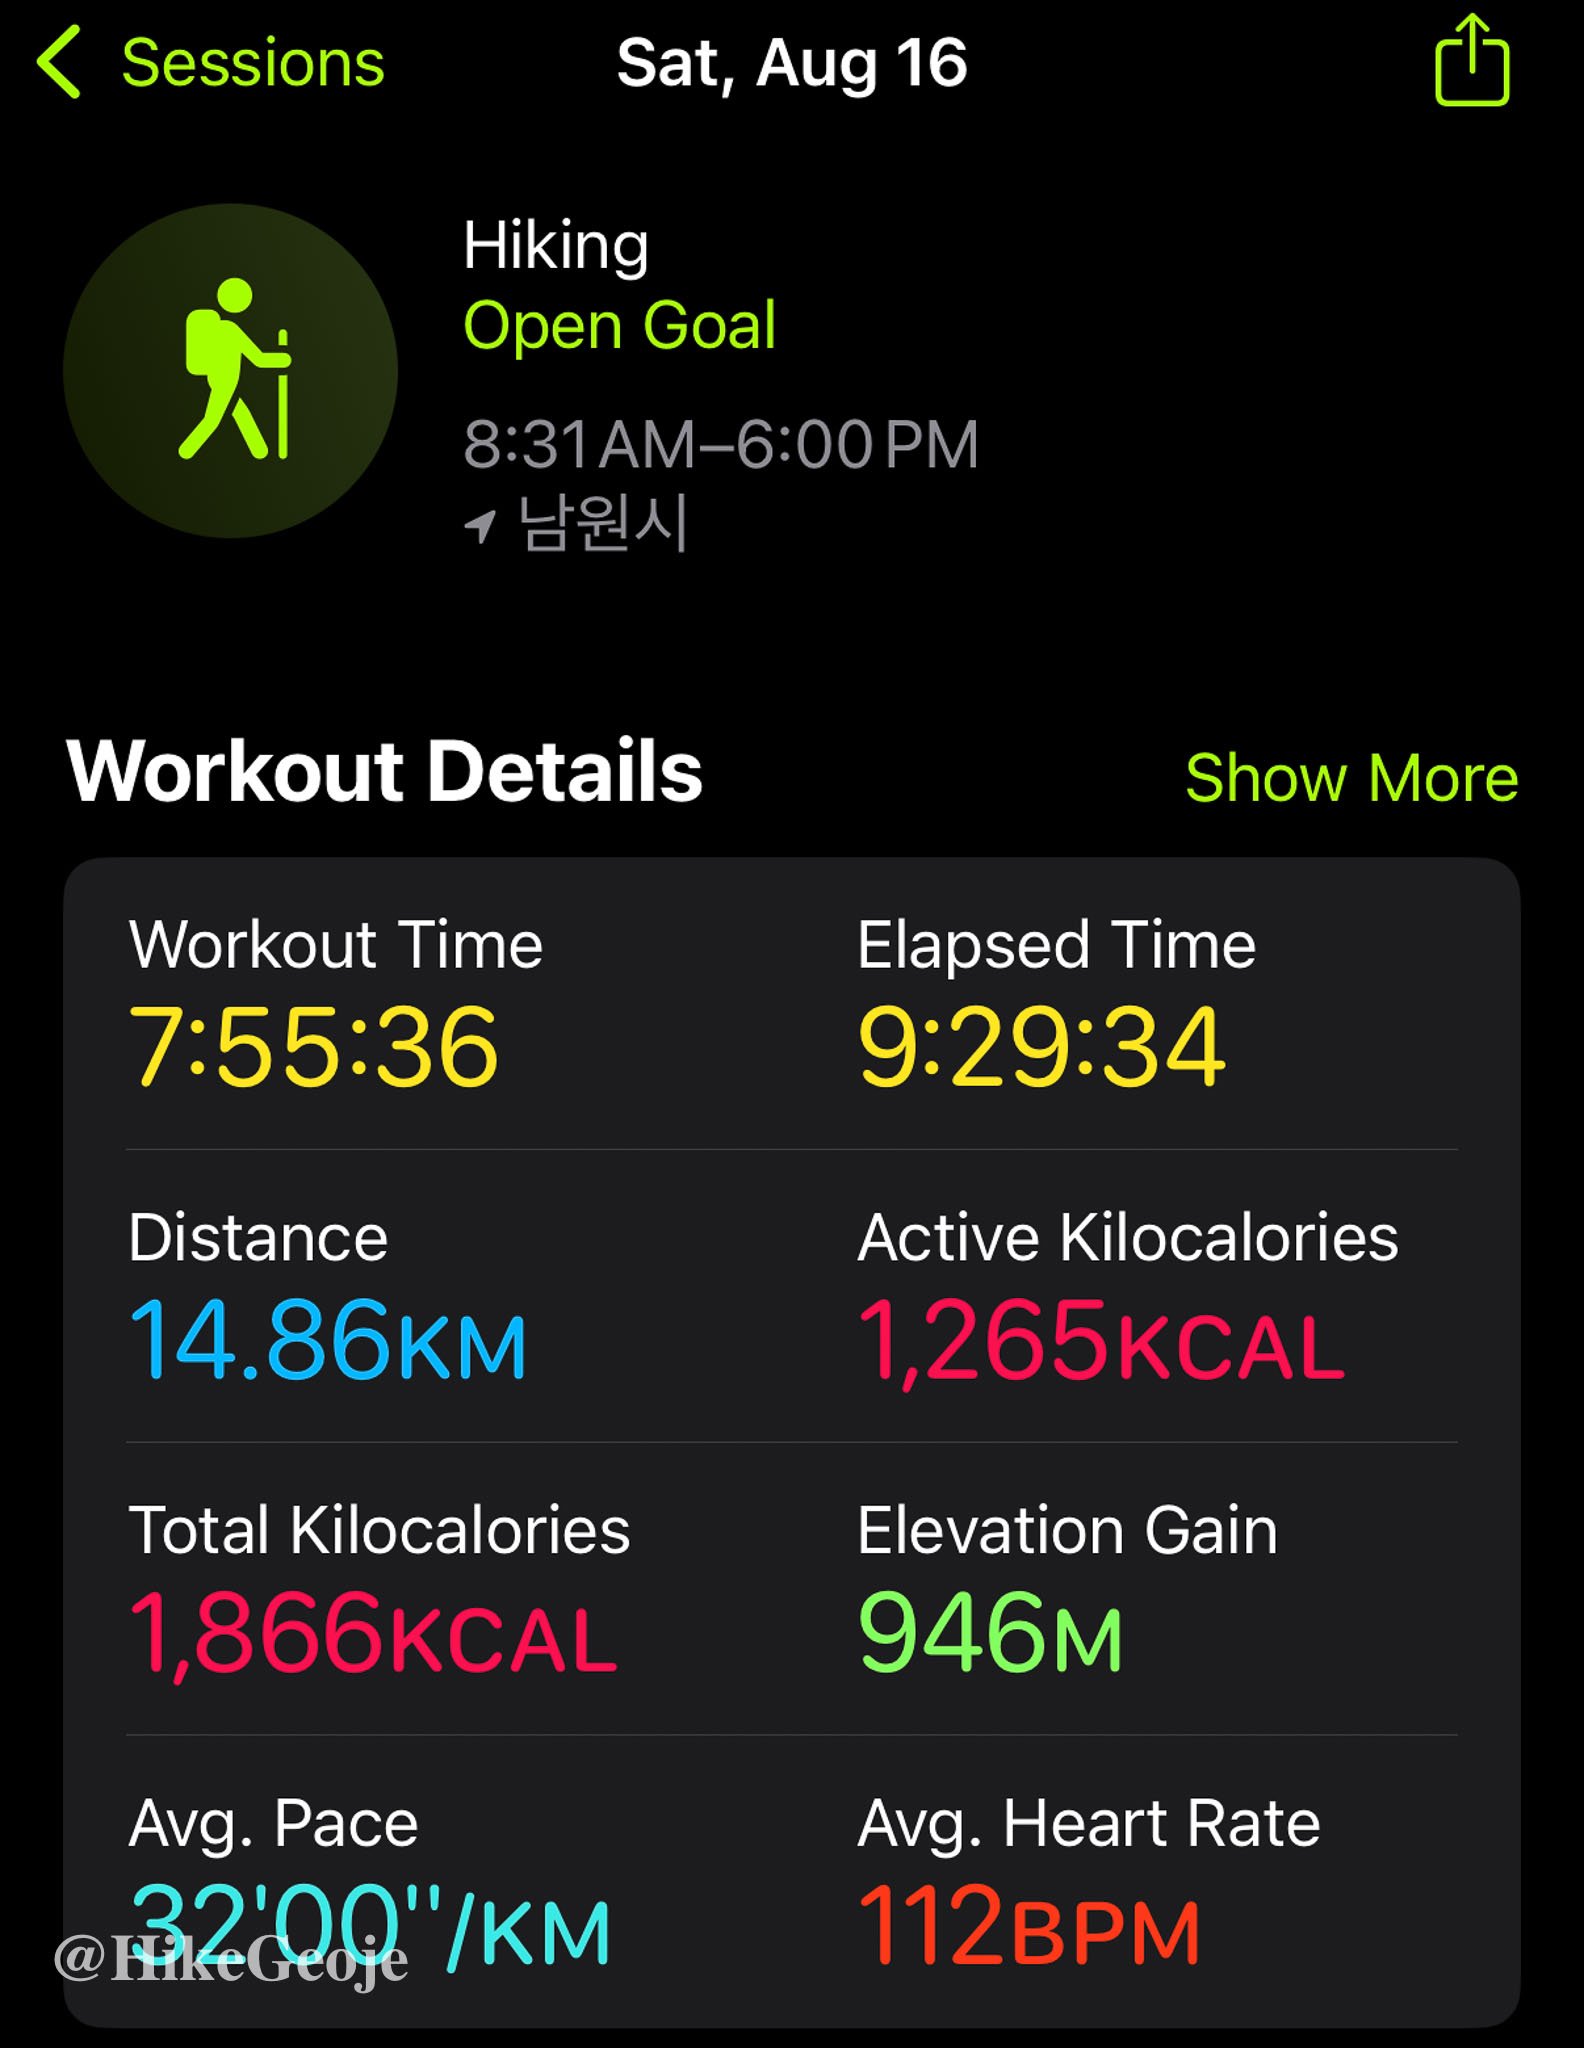
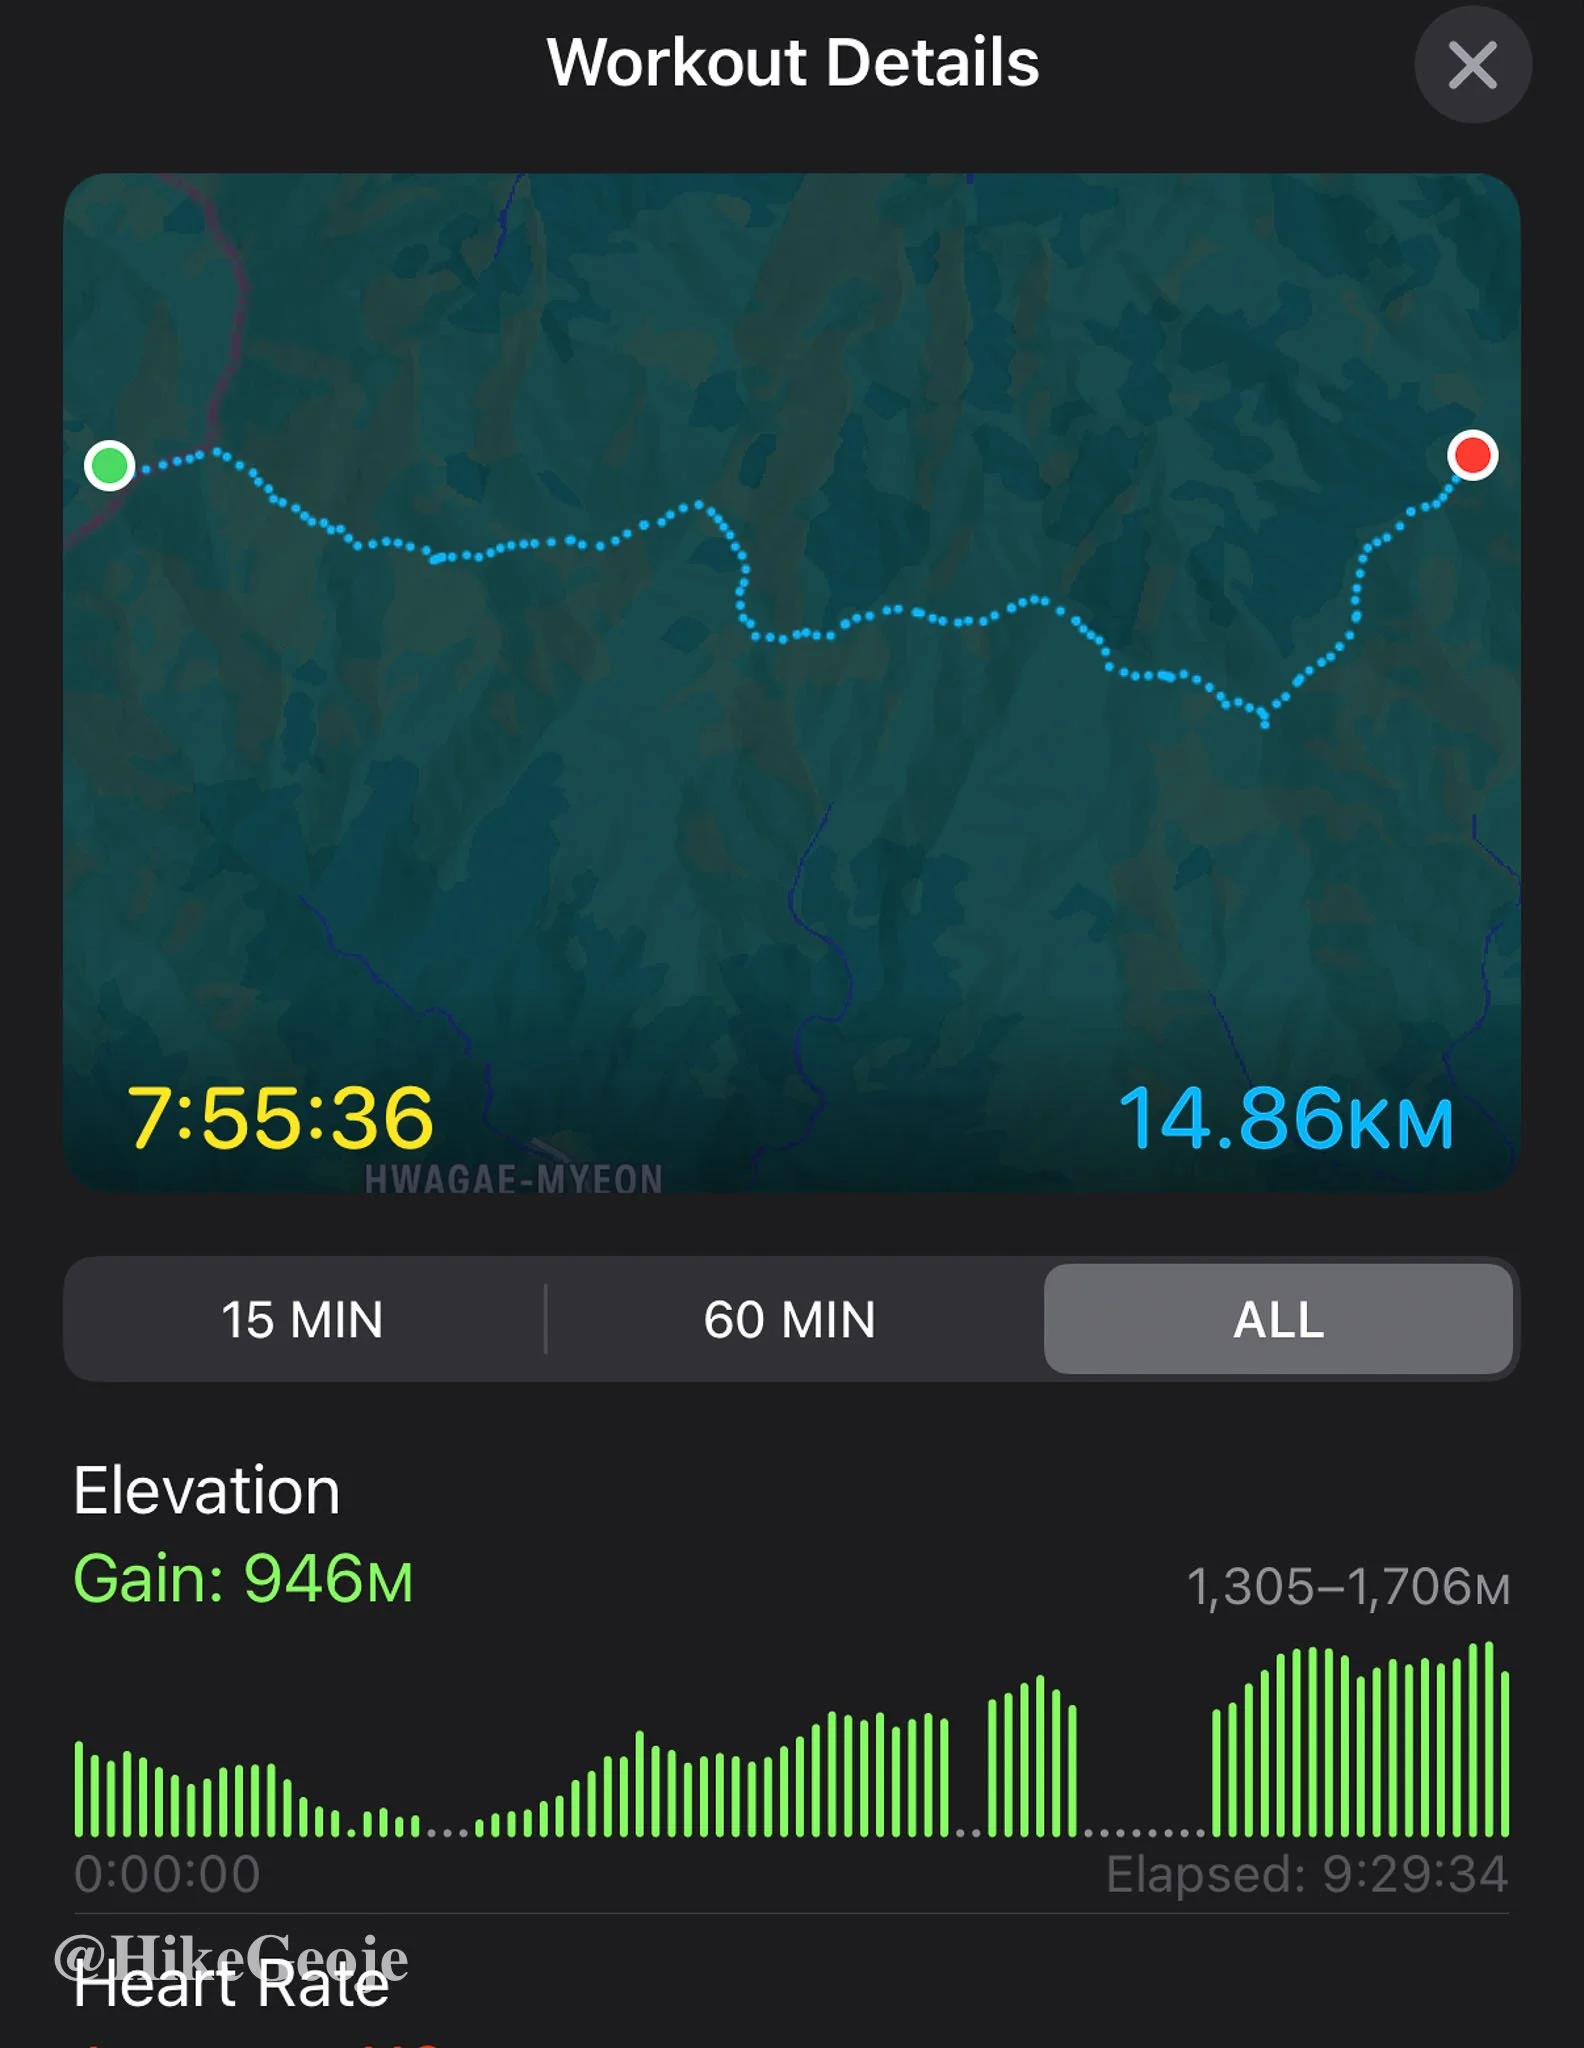
Day 2 – Yeonhacheon → jangteomok Shelter
Distance: 14.86 km
Time: 9 hrs 29 min (lots of photo stops)
Elevation Gain: 946 m
Highlights: Clear skies and sea views, Samdobong tri-province marker, rock scrambles at Chotdaebong, gorgeous sunset from Jangteomok.
Day 2
Day 2
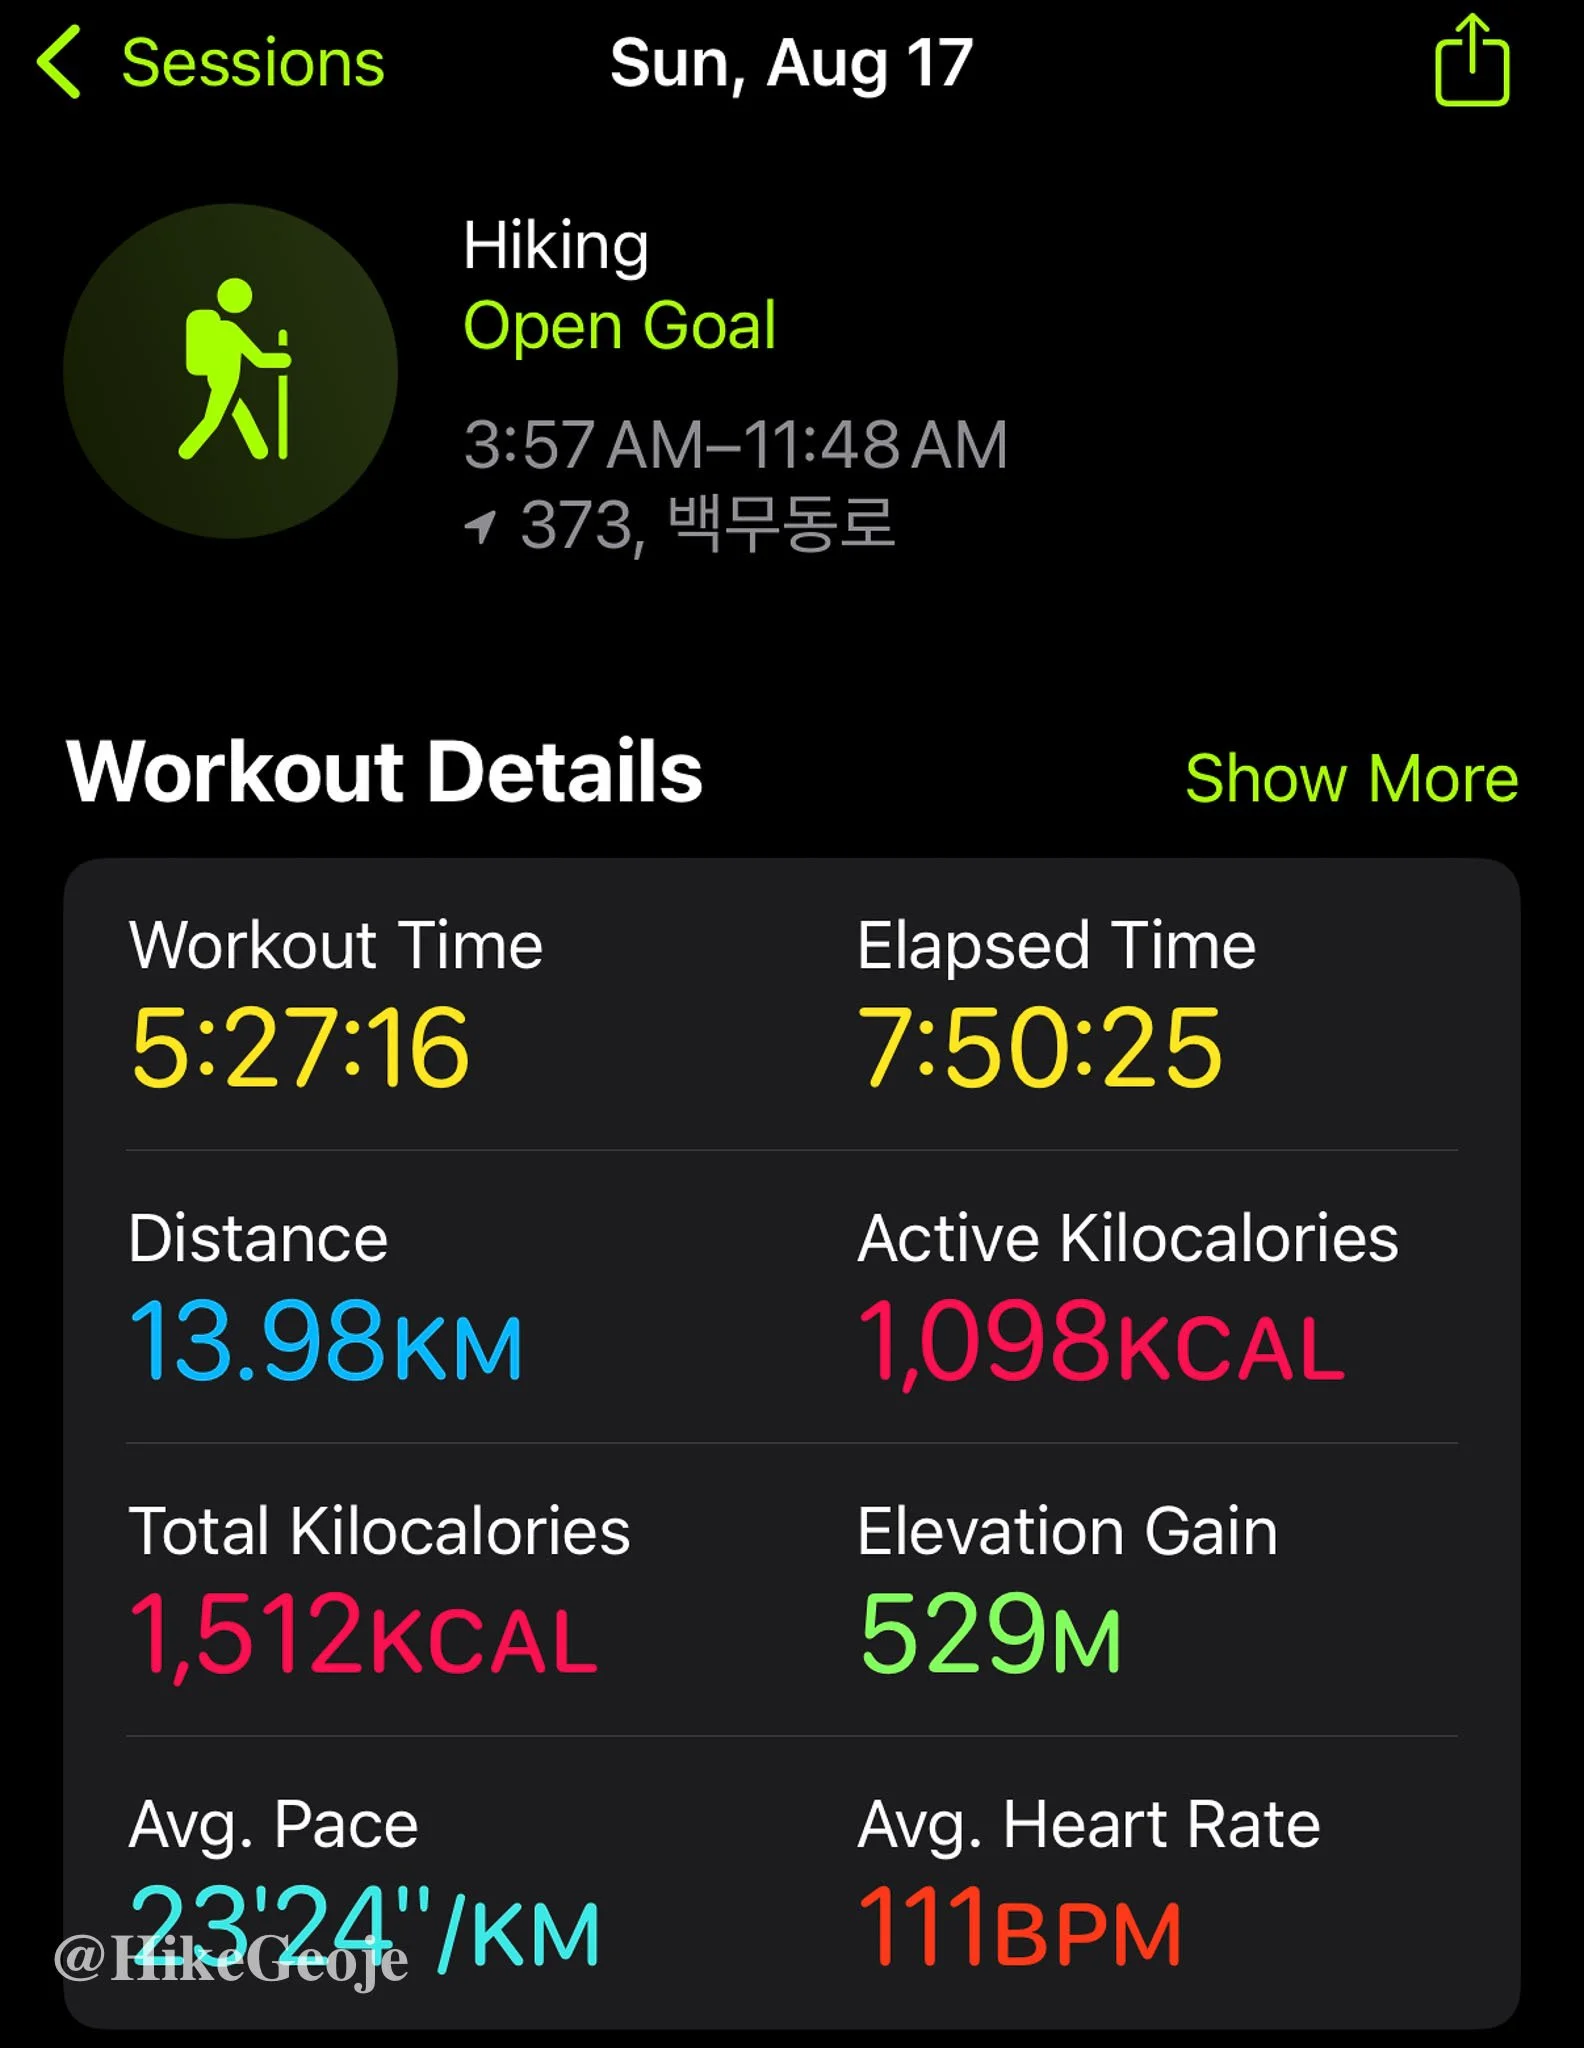
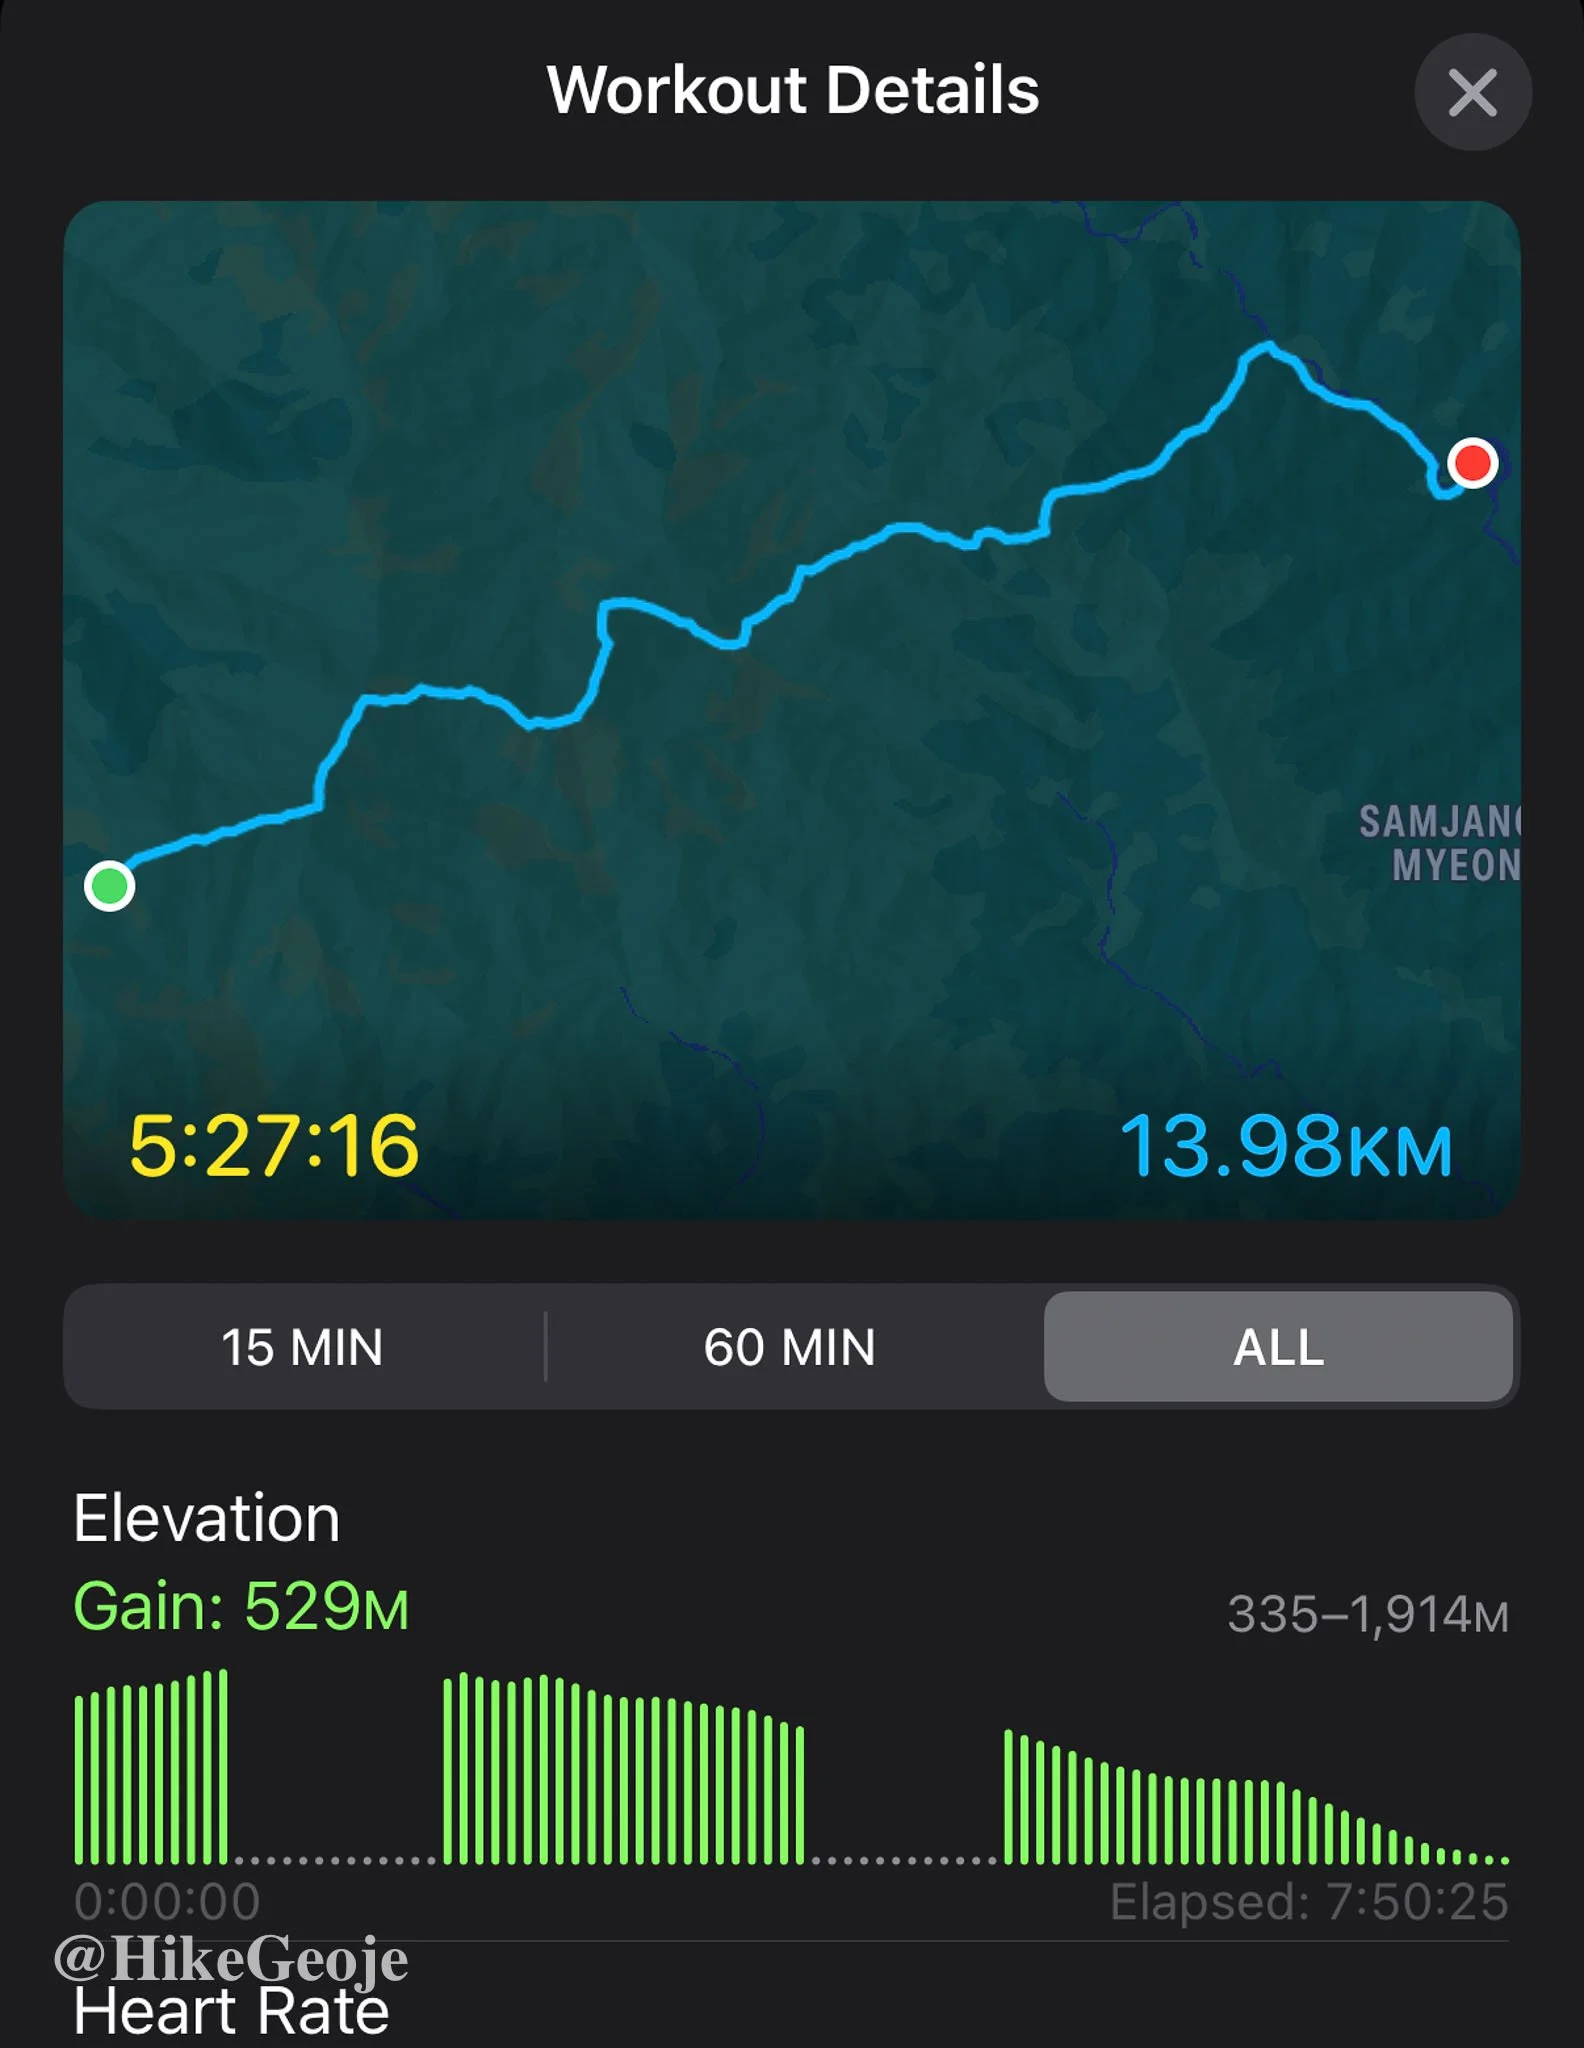
Day 3 – jangteomok → Daewonsa Temple
Distance: 13.98 km
Time: 7 hrs 50 min
Elevation Gain: 529 m
Highlights: Starry night sky, sunrise on Cheonwangbong (Korea’s second highest peak), quiet jungly descent, finishing triumphantly at Daewonsa.
The Full Journey
2025 has been a big year of hiking milestones for me. I officially started the Black Yak 100 Mountain Challenge, which reignited my spark for hiking trips and got me off Geoje Island to explore new (and old) mountains. I was also among the first to complete the Geoje Santa Go 11 Mountain Challenge (거제산타GO), and I finally checked Daechongbong and Dinosaur Ridge off my bucket list.
But my biggest hiking milestone ever (so far) has been the Hwadaejongju (화대종주) - hiking the entire Jirisan ridgeline over three days in August 2025.
What is a “Jongju”?
Until earlier this year, I hadn’t even heard the word jongju. In Korean hiking culture, it describes an end-to-end ridge or mountain range traverse, usually done over multiple days. The HwaDaeJongju, named because it runs from Hwaeomsa Temple (화엄사) to Daewonsa Temple (대원사), covers the full Jirisan ridgeline, about 45 km long. Most hikers finish it in 2 - 3 days since there are cut off times to contend with and limited hours for when the trail is open to hikers.
Attempt #1 (with Mat)
Originally, my hiking buddy Mat and I planned to tackle it together. We checked in at Hotel Jirisan Sunlight (which I can’t recommend enough). It’s close to the park entrance, the owner speaks English well, there’s a café on-site, and the terrace views toward Nogodan were spectacular.
Terrace views! That’s Nogodan in the distance!
We spent the evening on the terrace with chimaek (chicken and beer), checking our packs. Even after trimming down, mine still weighed 10 kg…heavier than I’d like for such a long hike.
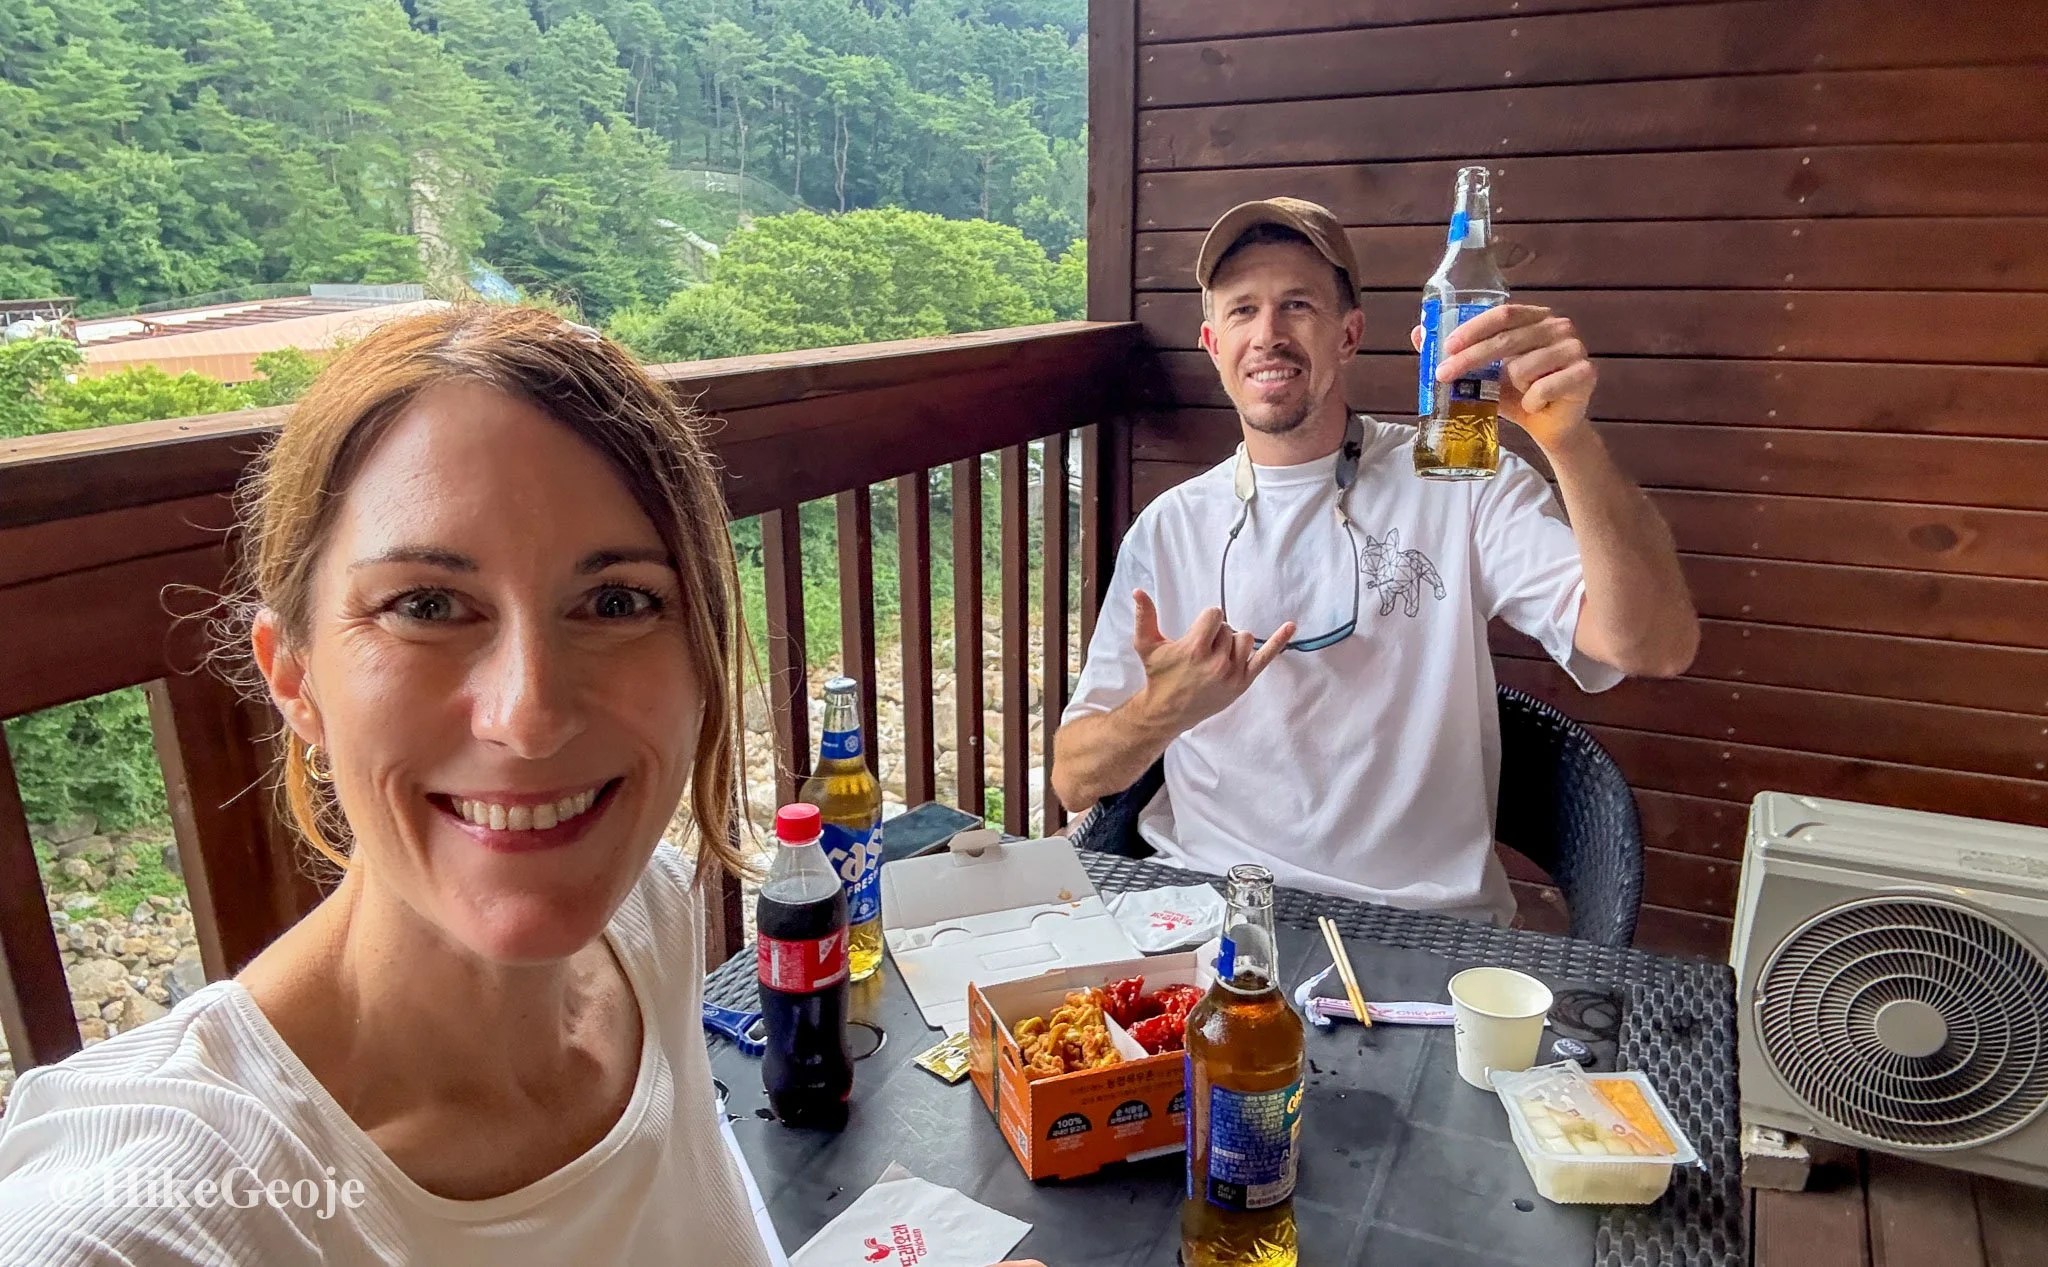
Gotta fuel up!
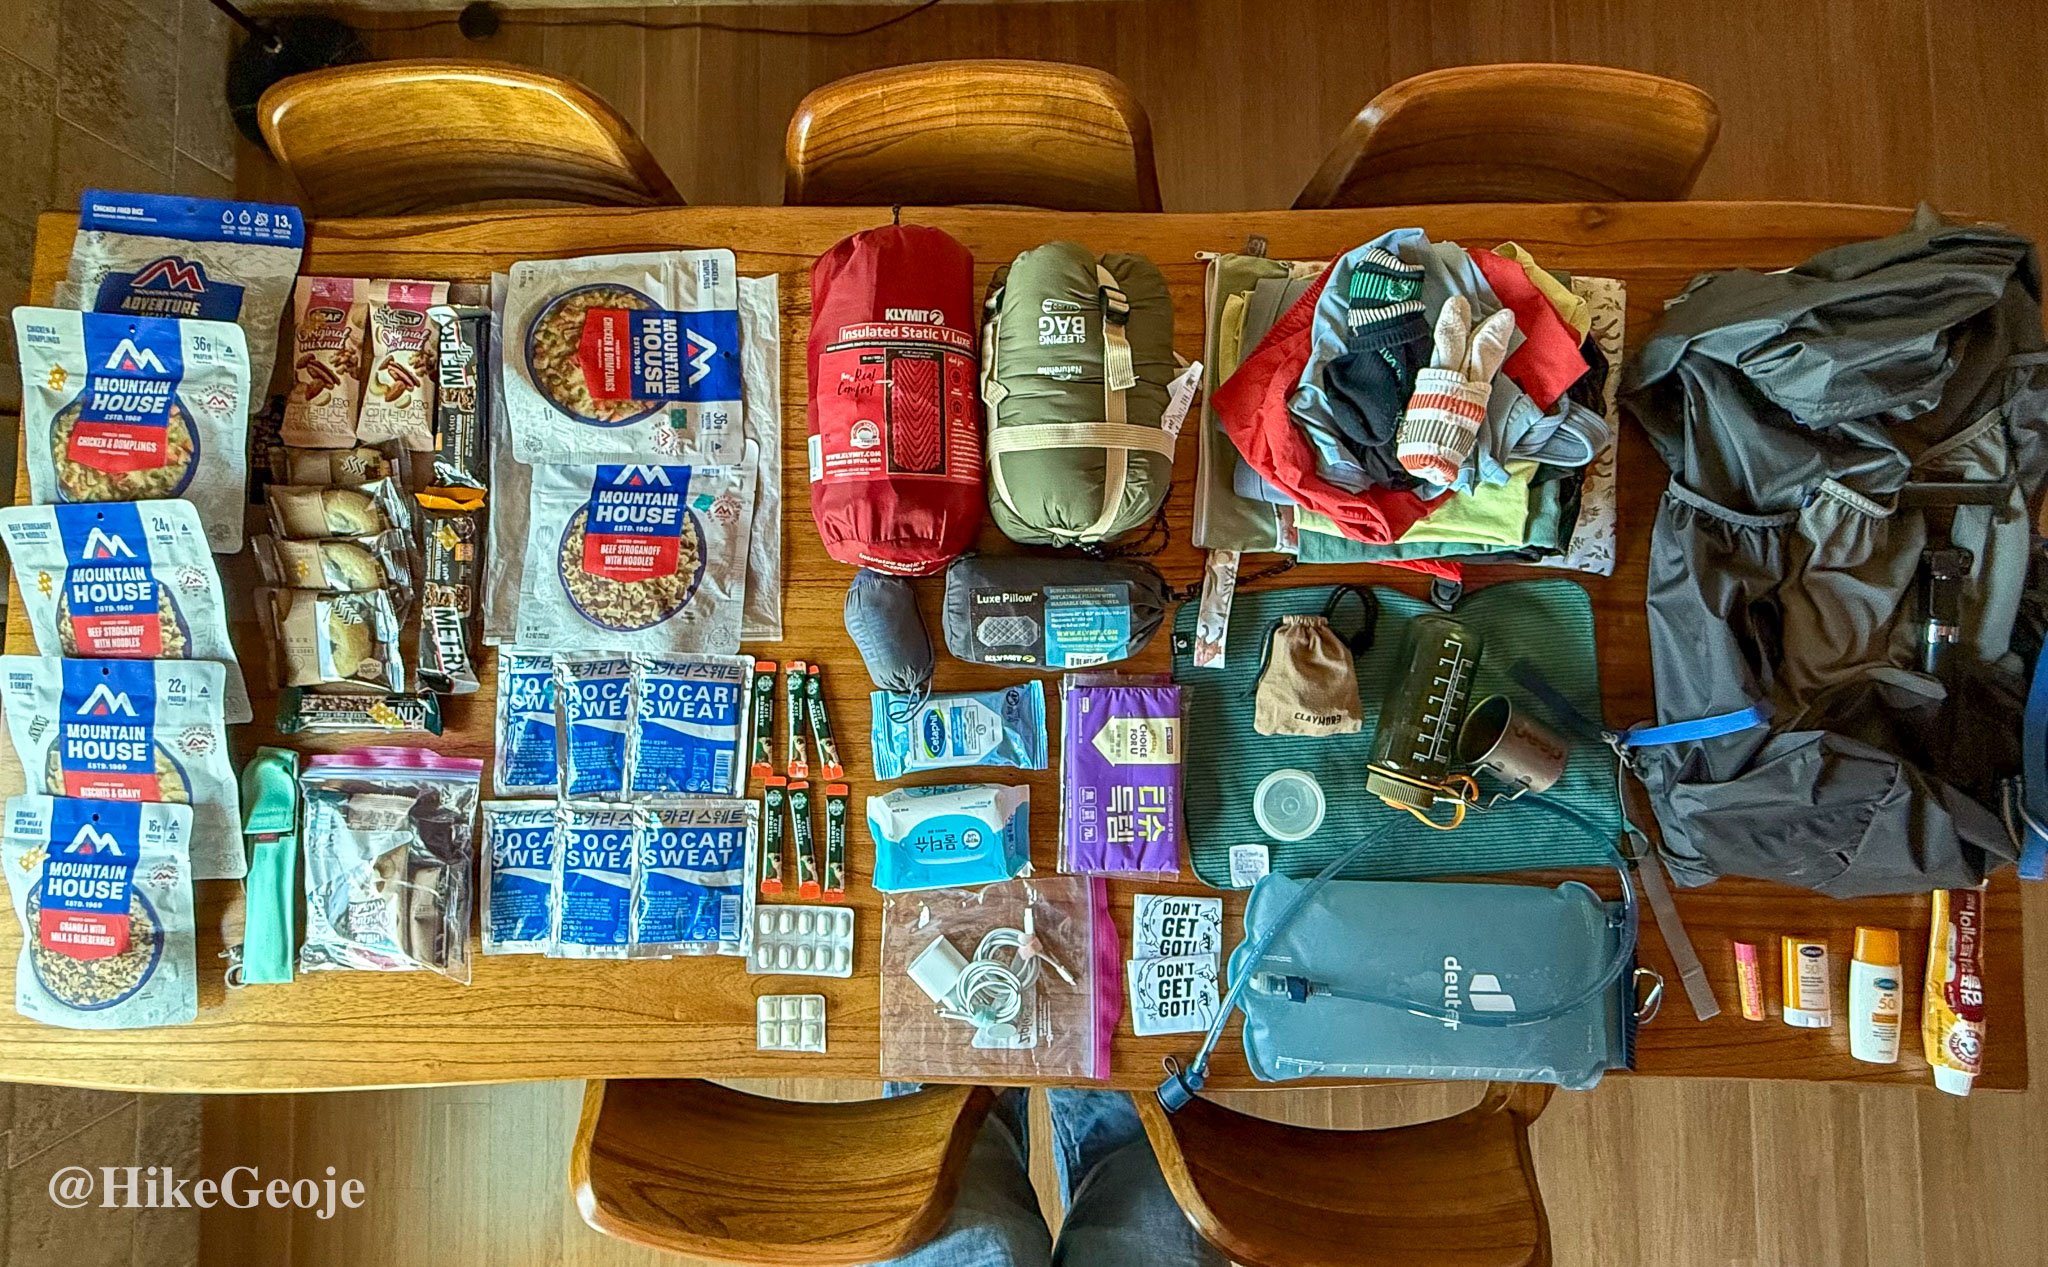
My first trial pack at home.
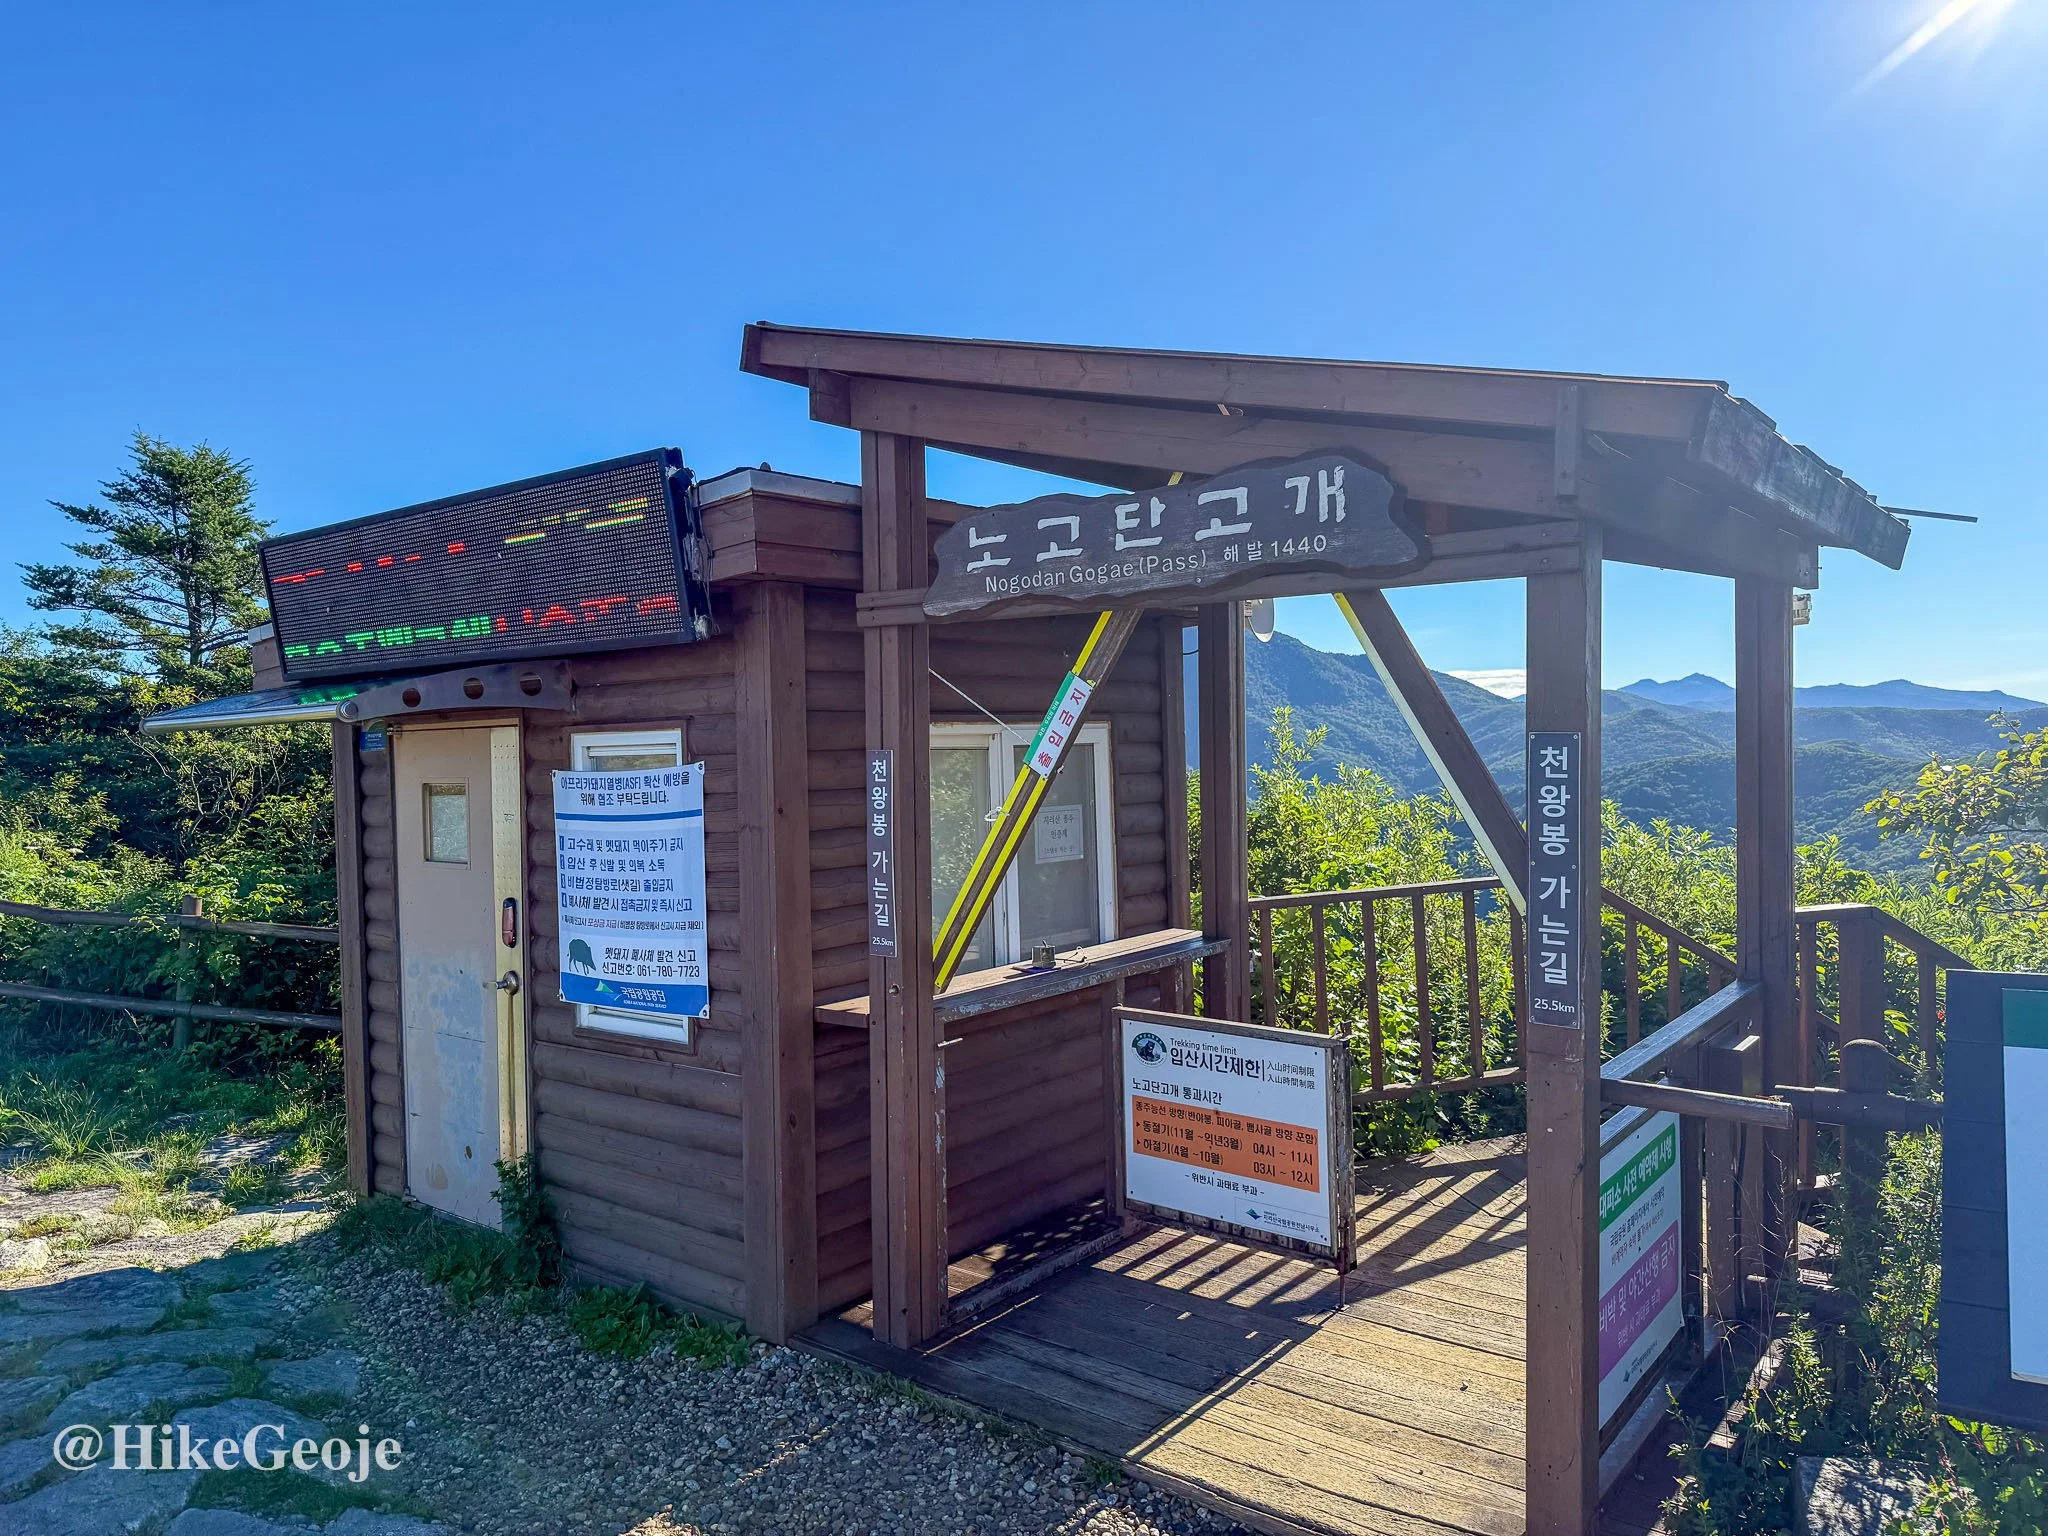
The next morning, we hit the trail at 5 am with headlamps glowing. By mid-morning, we reached Nogodan Shelter, dropped our packs, and hiked up to Nogodan Peak (which requires a reservation through the National Park website).
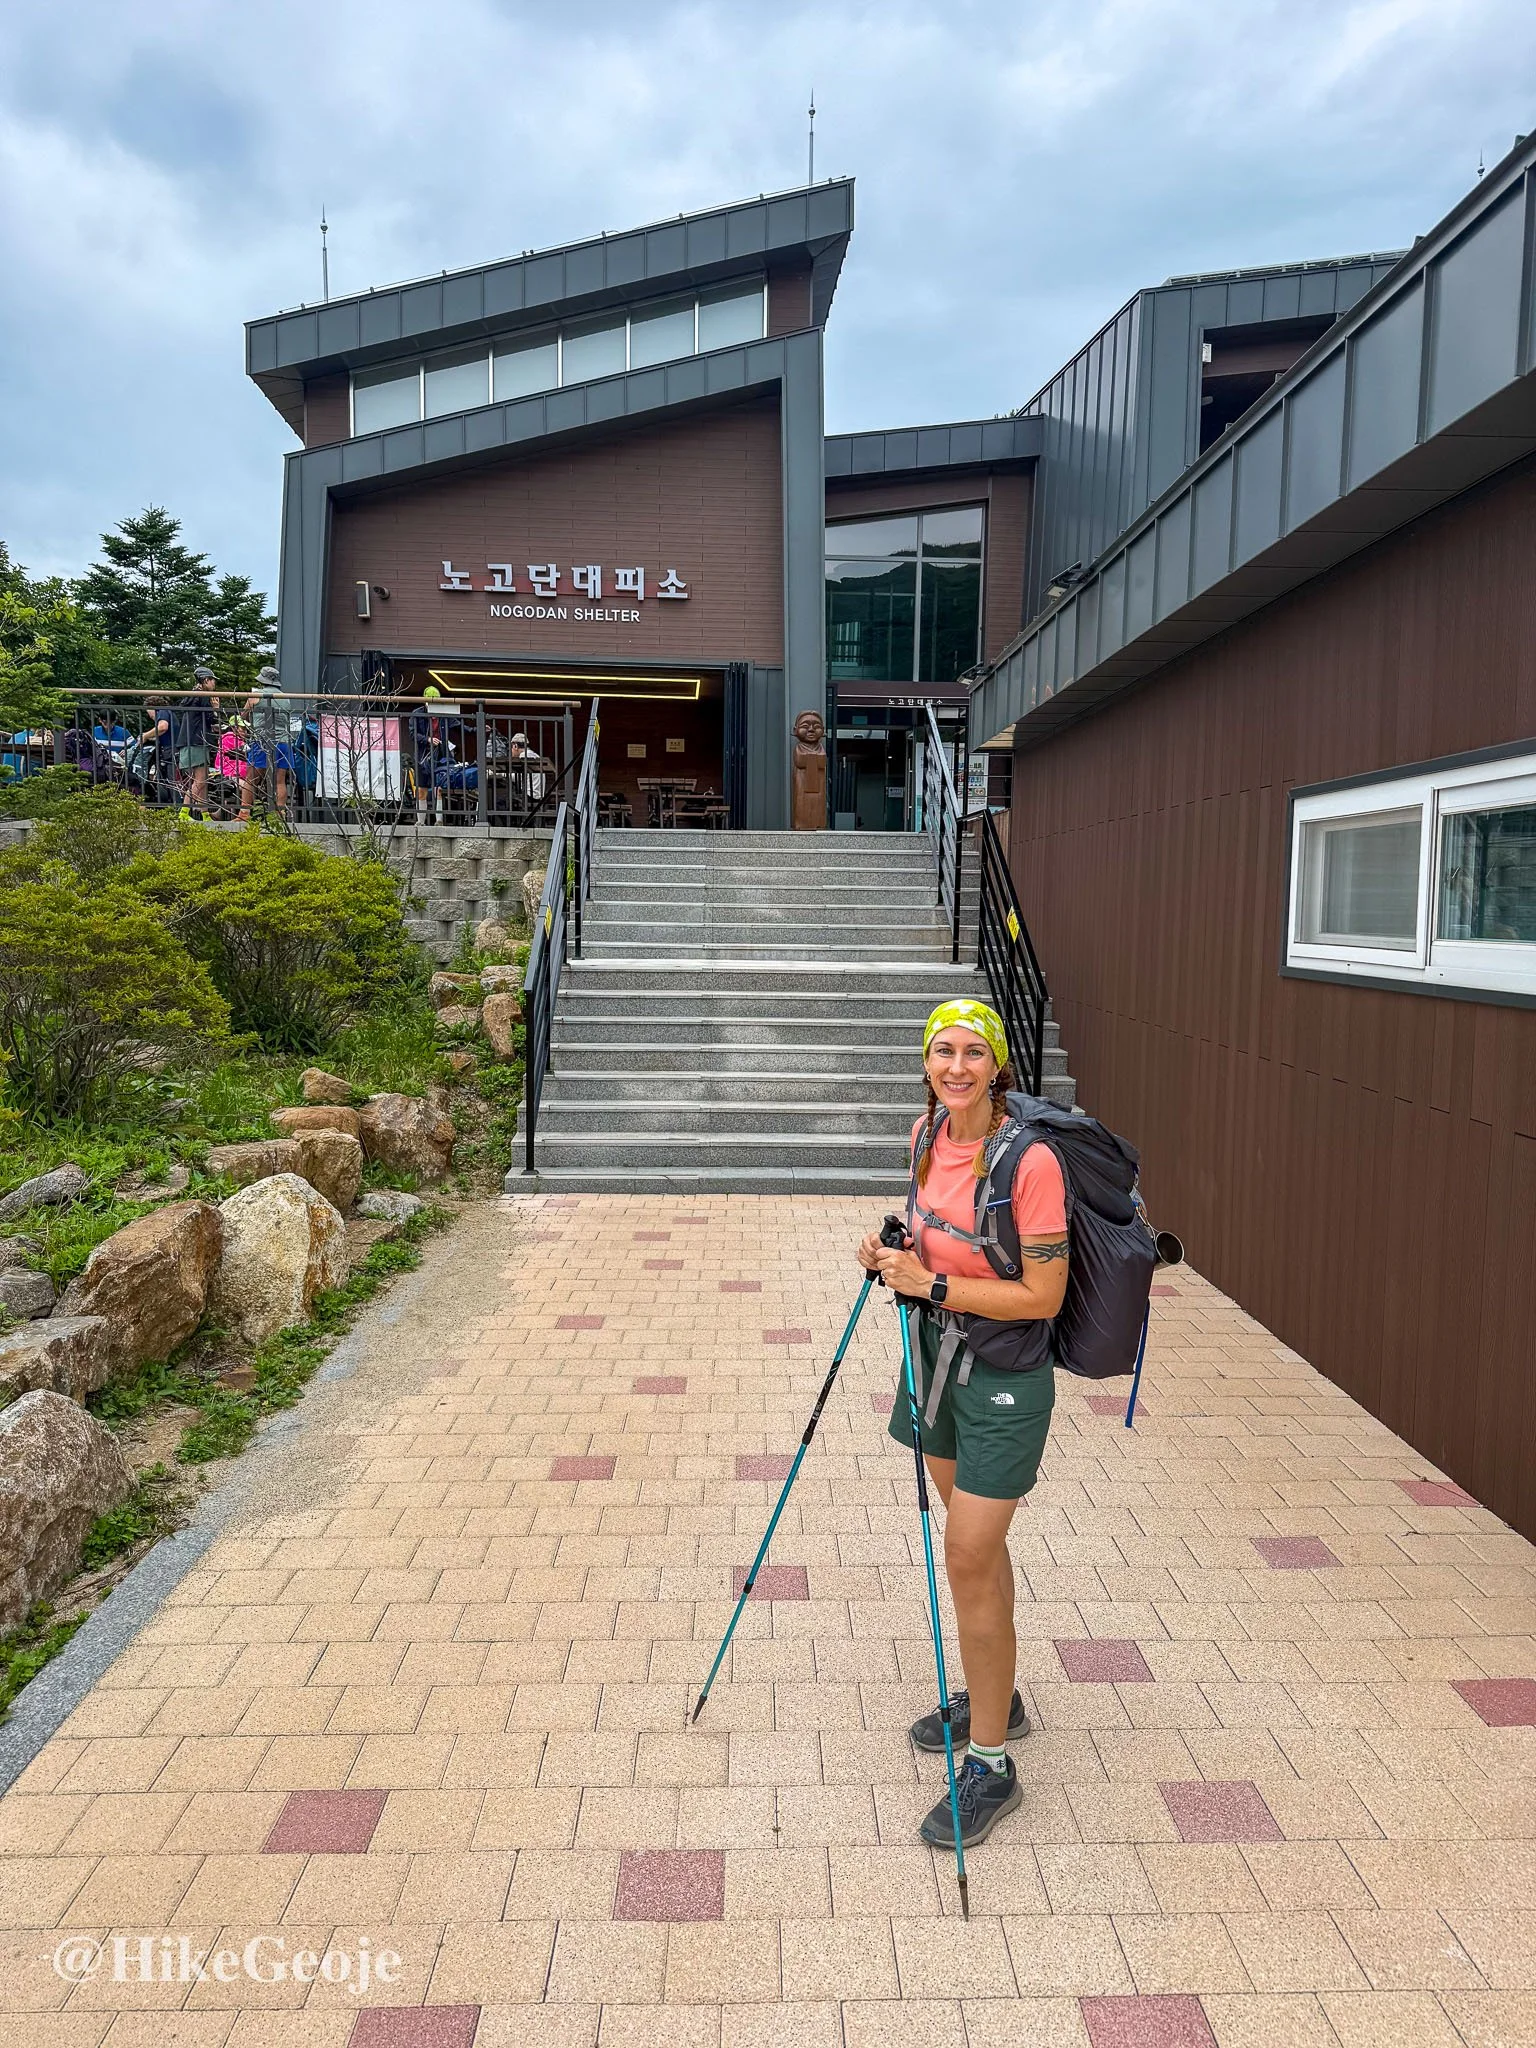
Nogodan Shelter
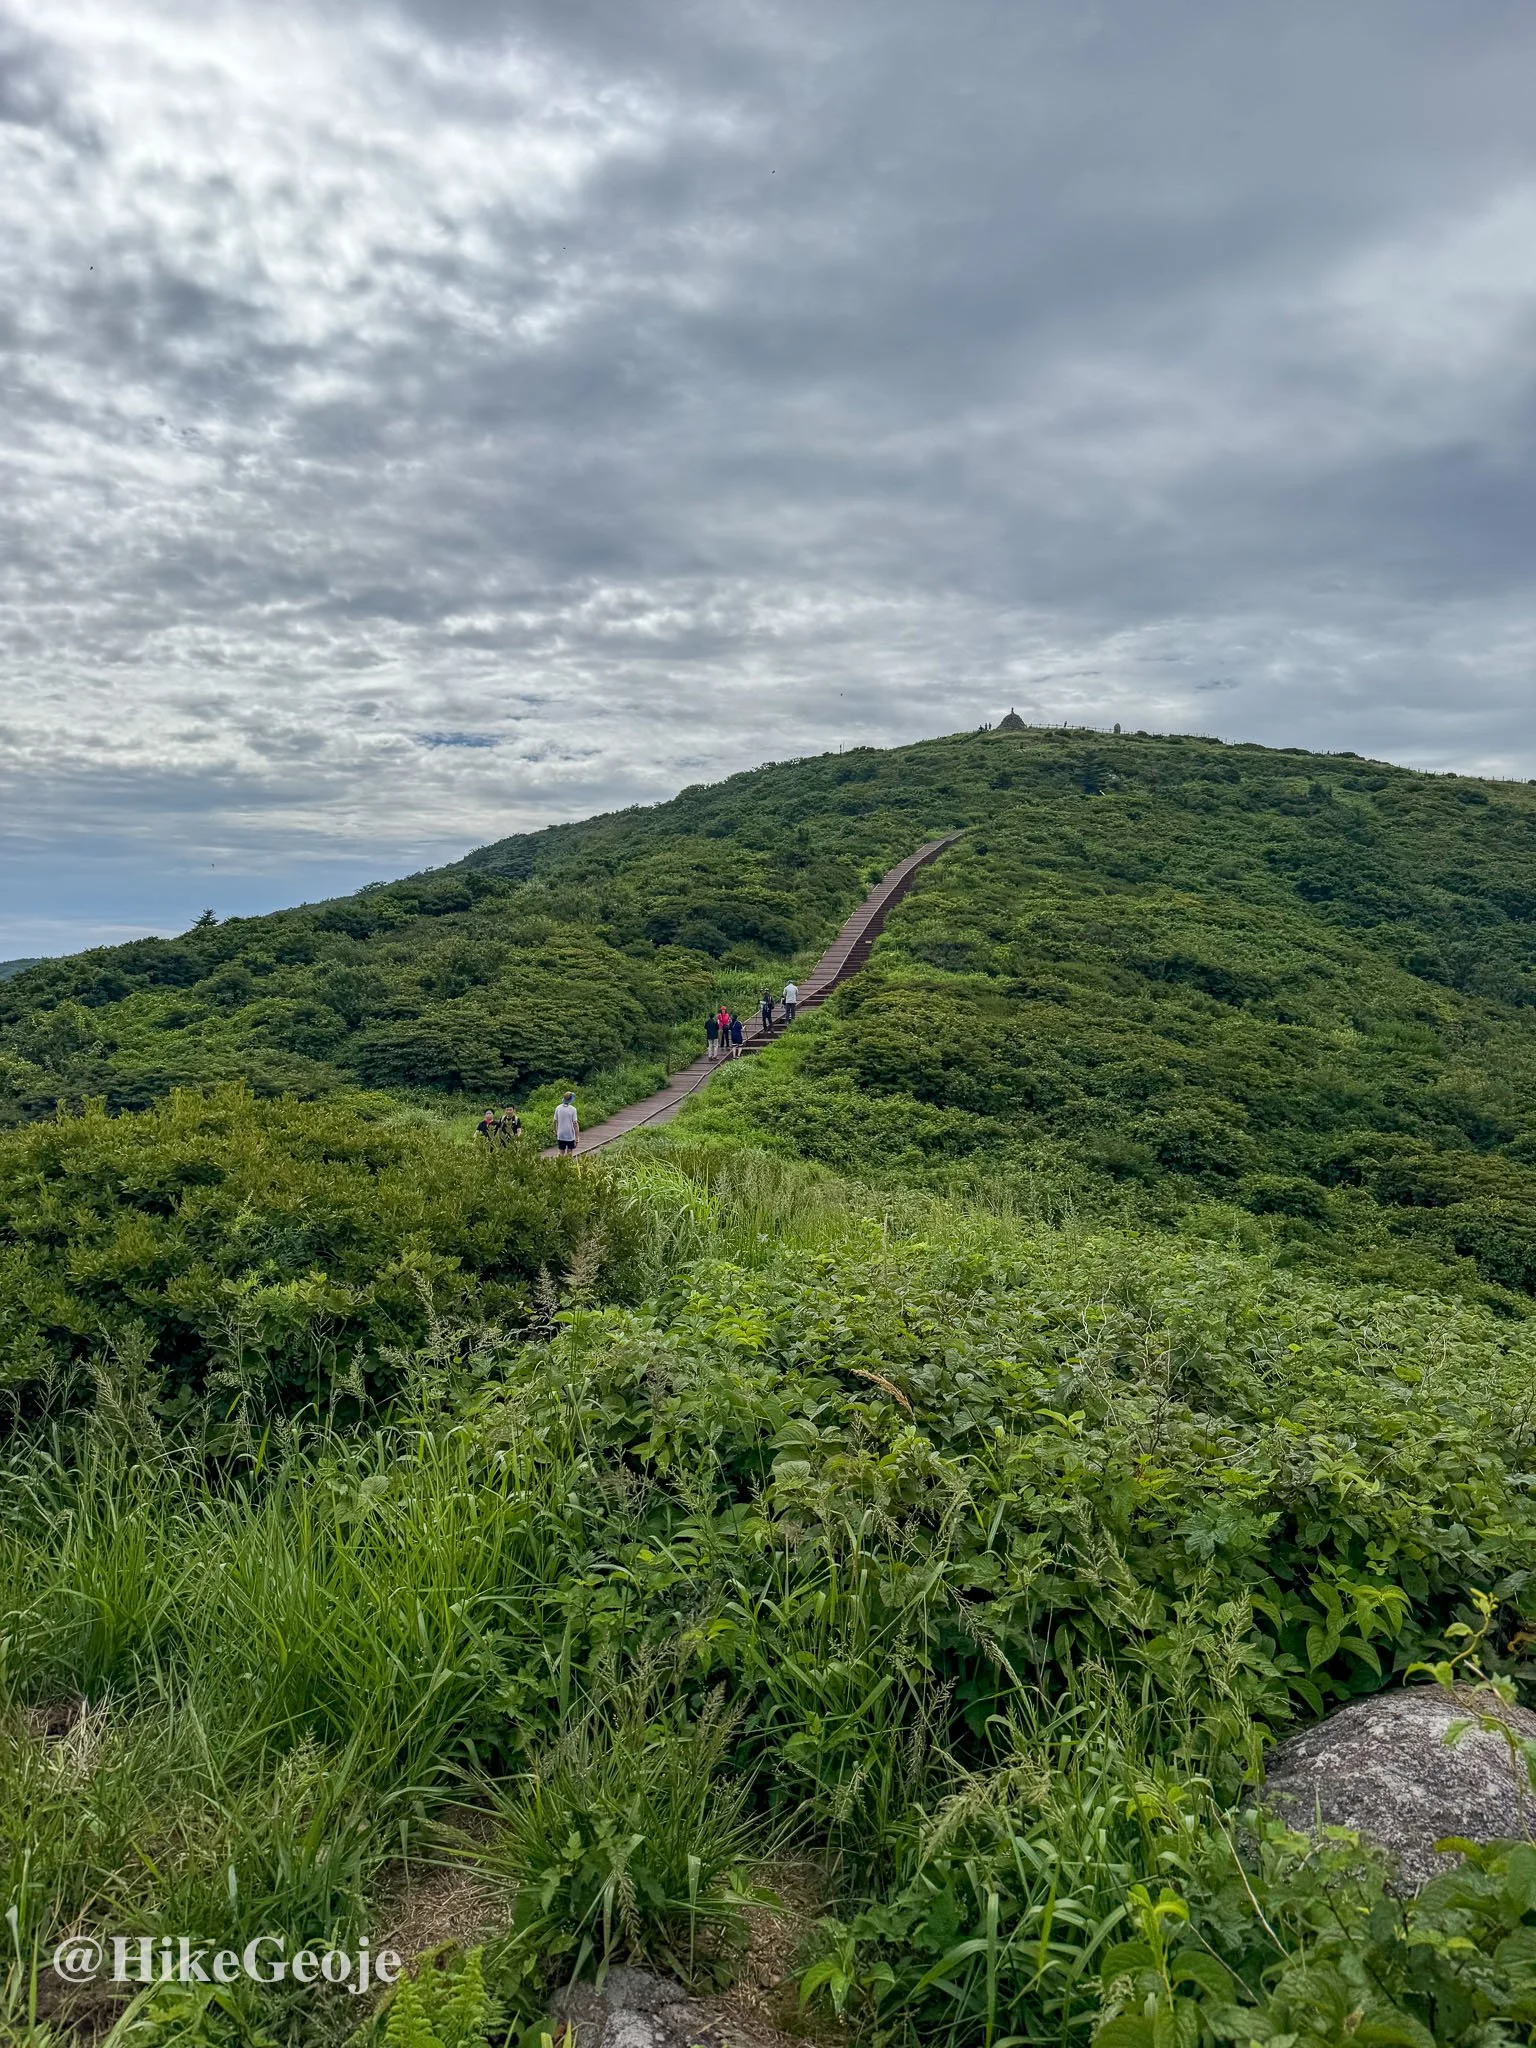
On the way to Nogodan Peak
Nogodan Peak
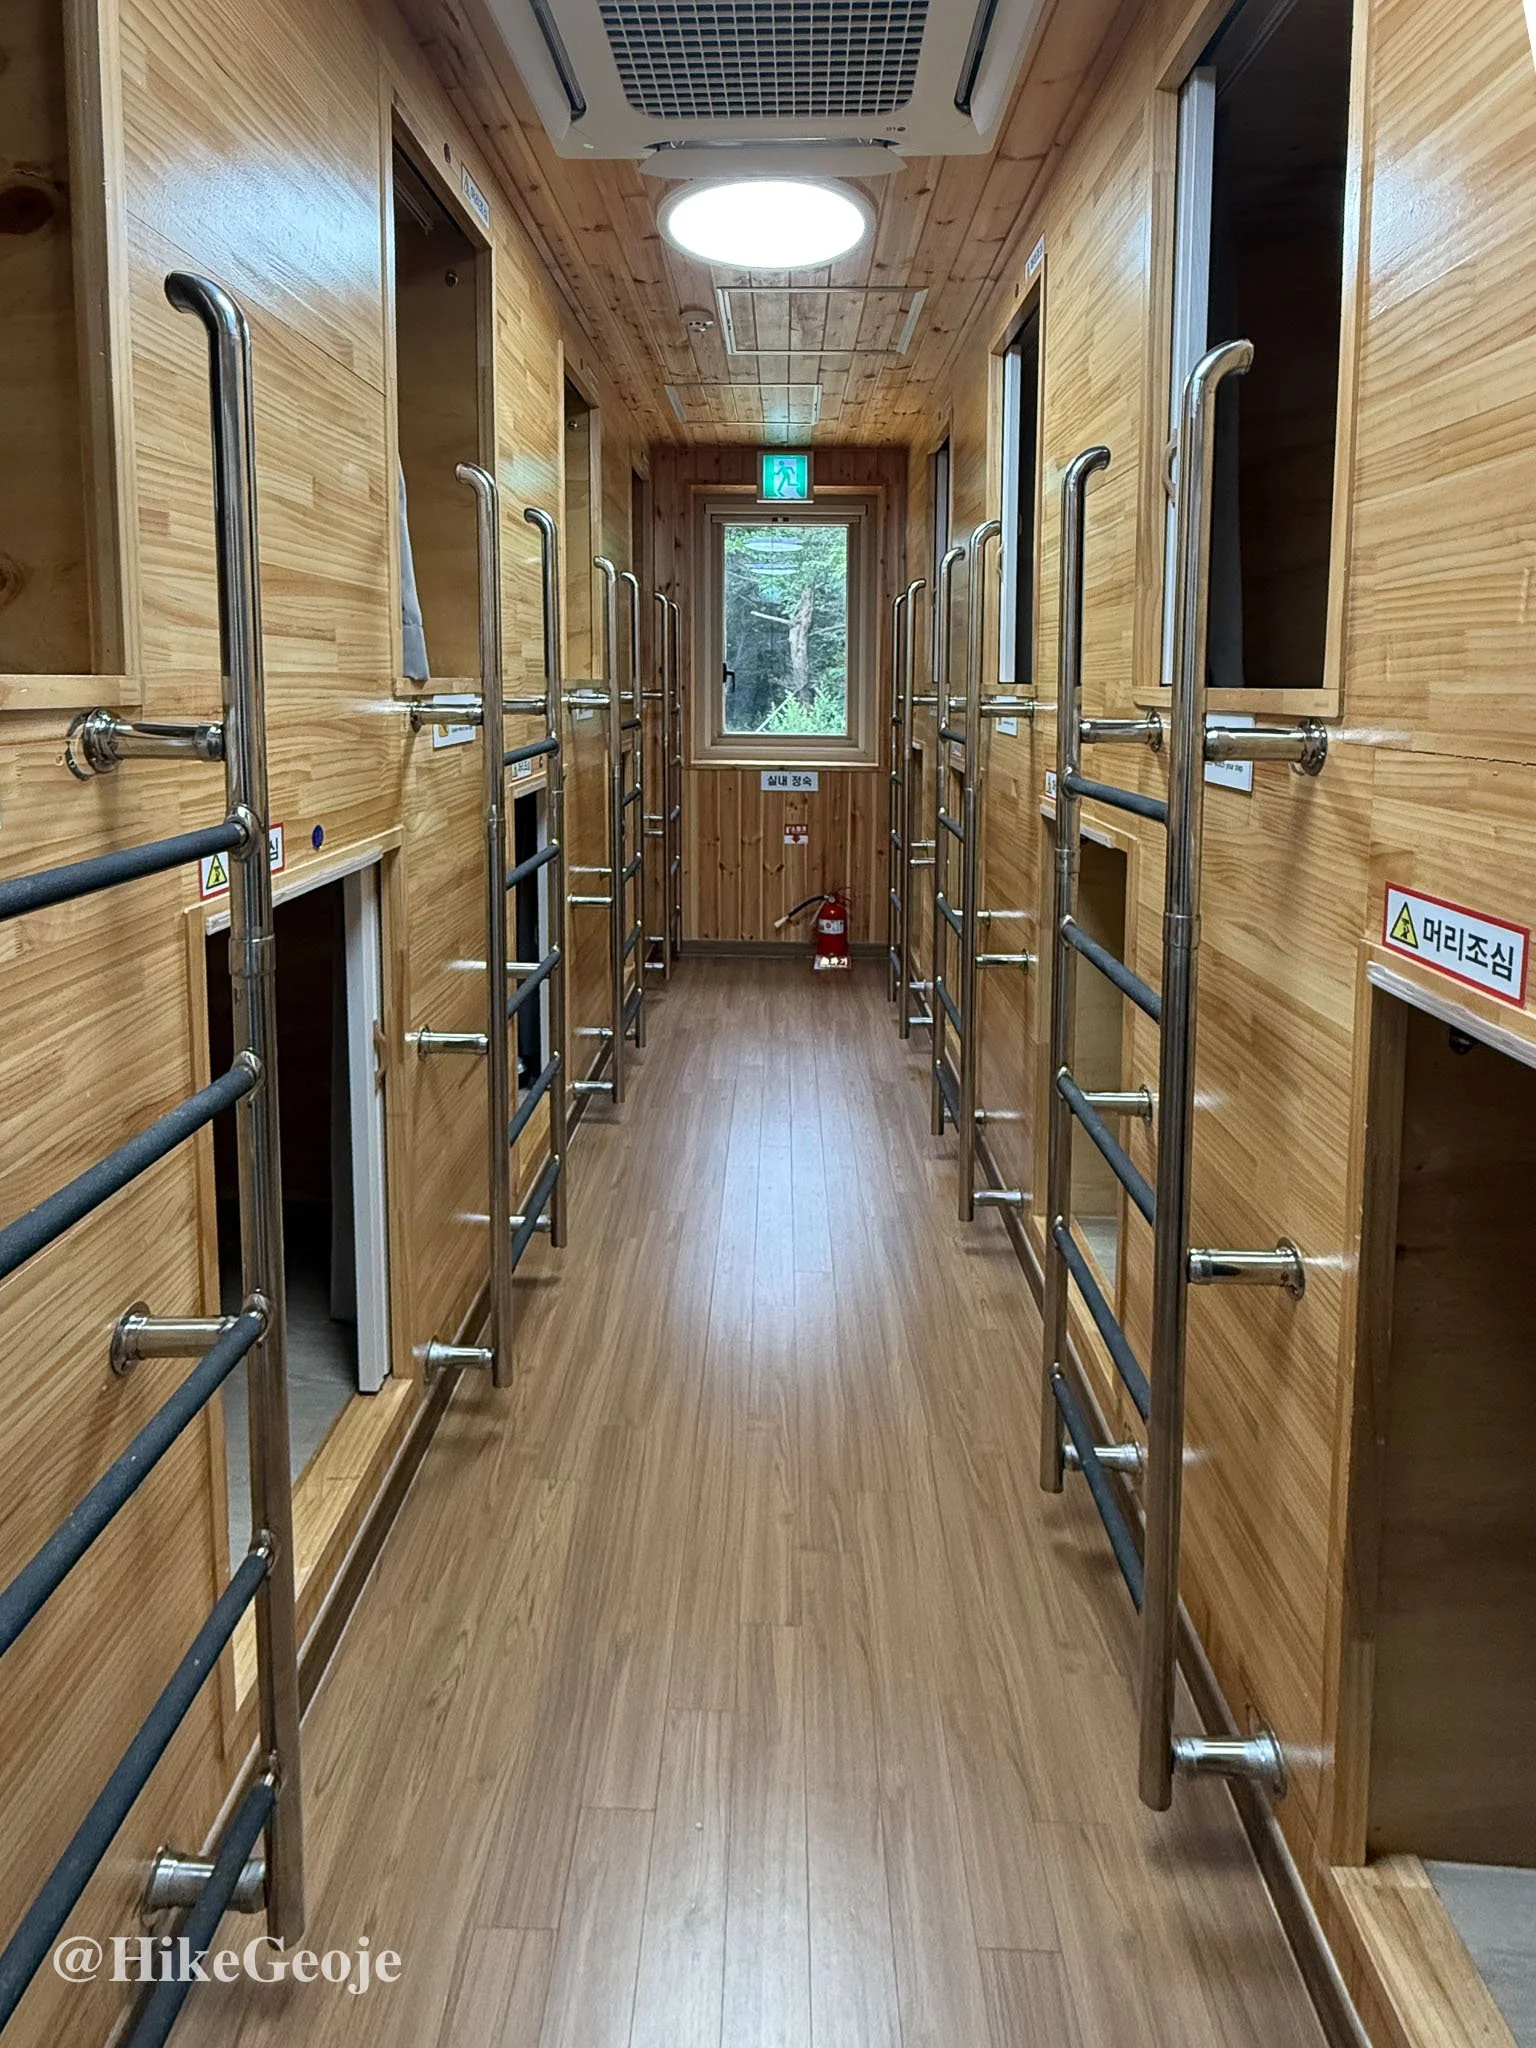
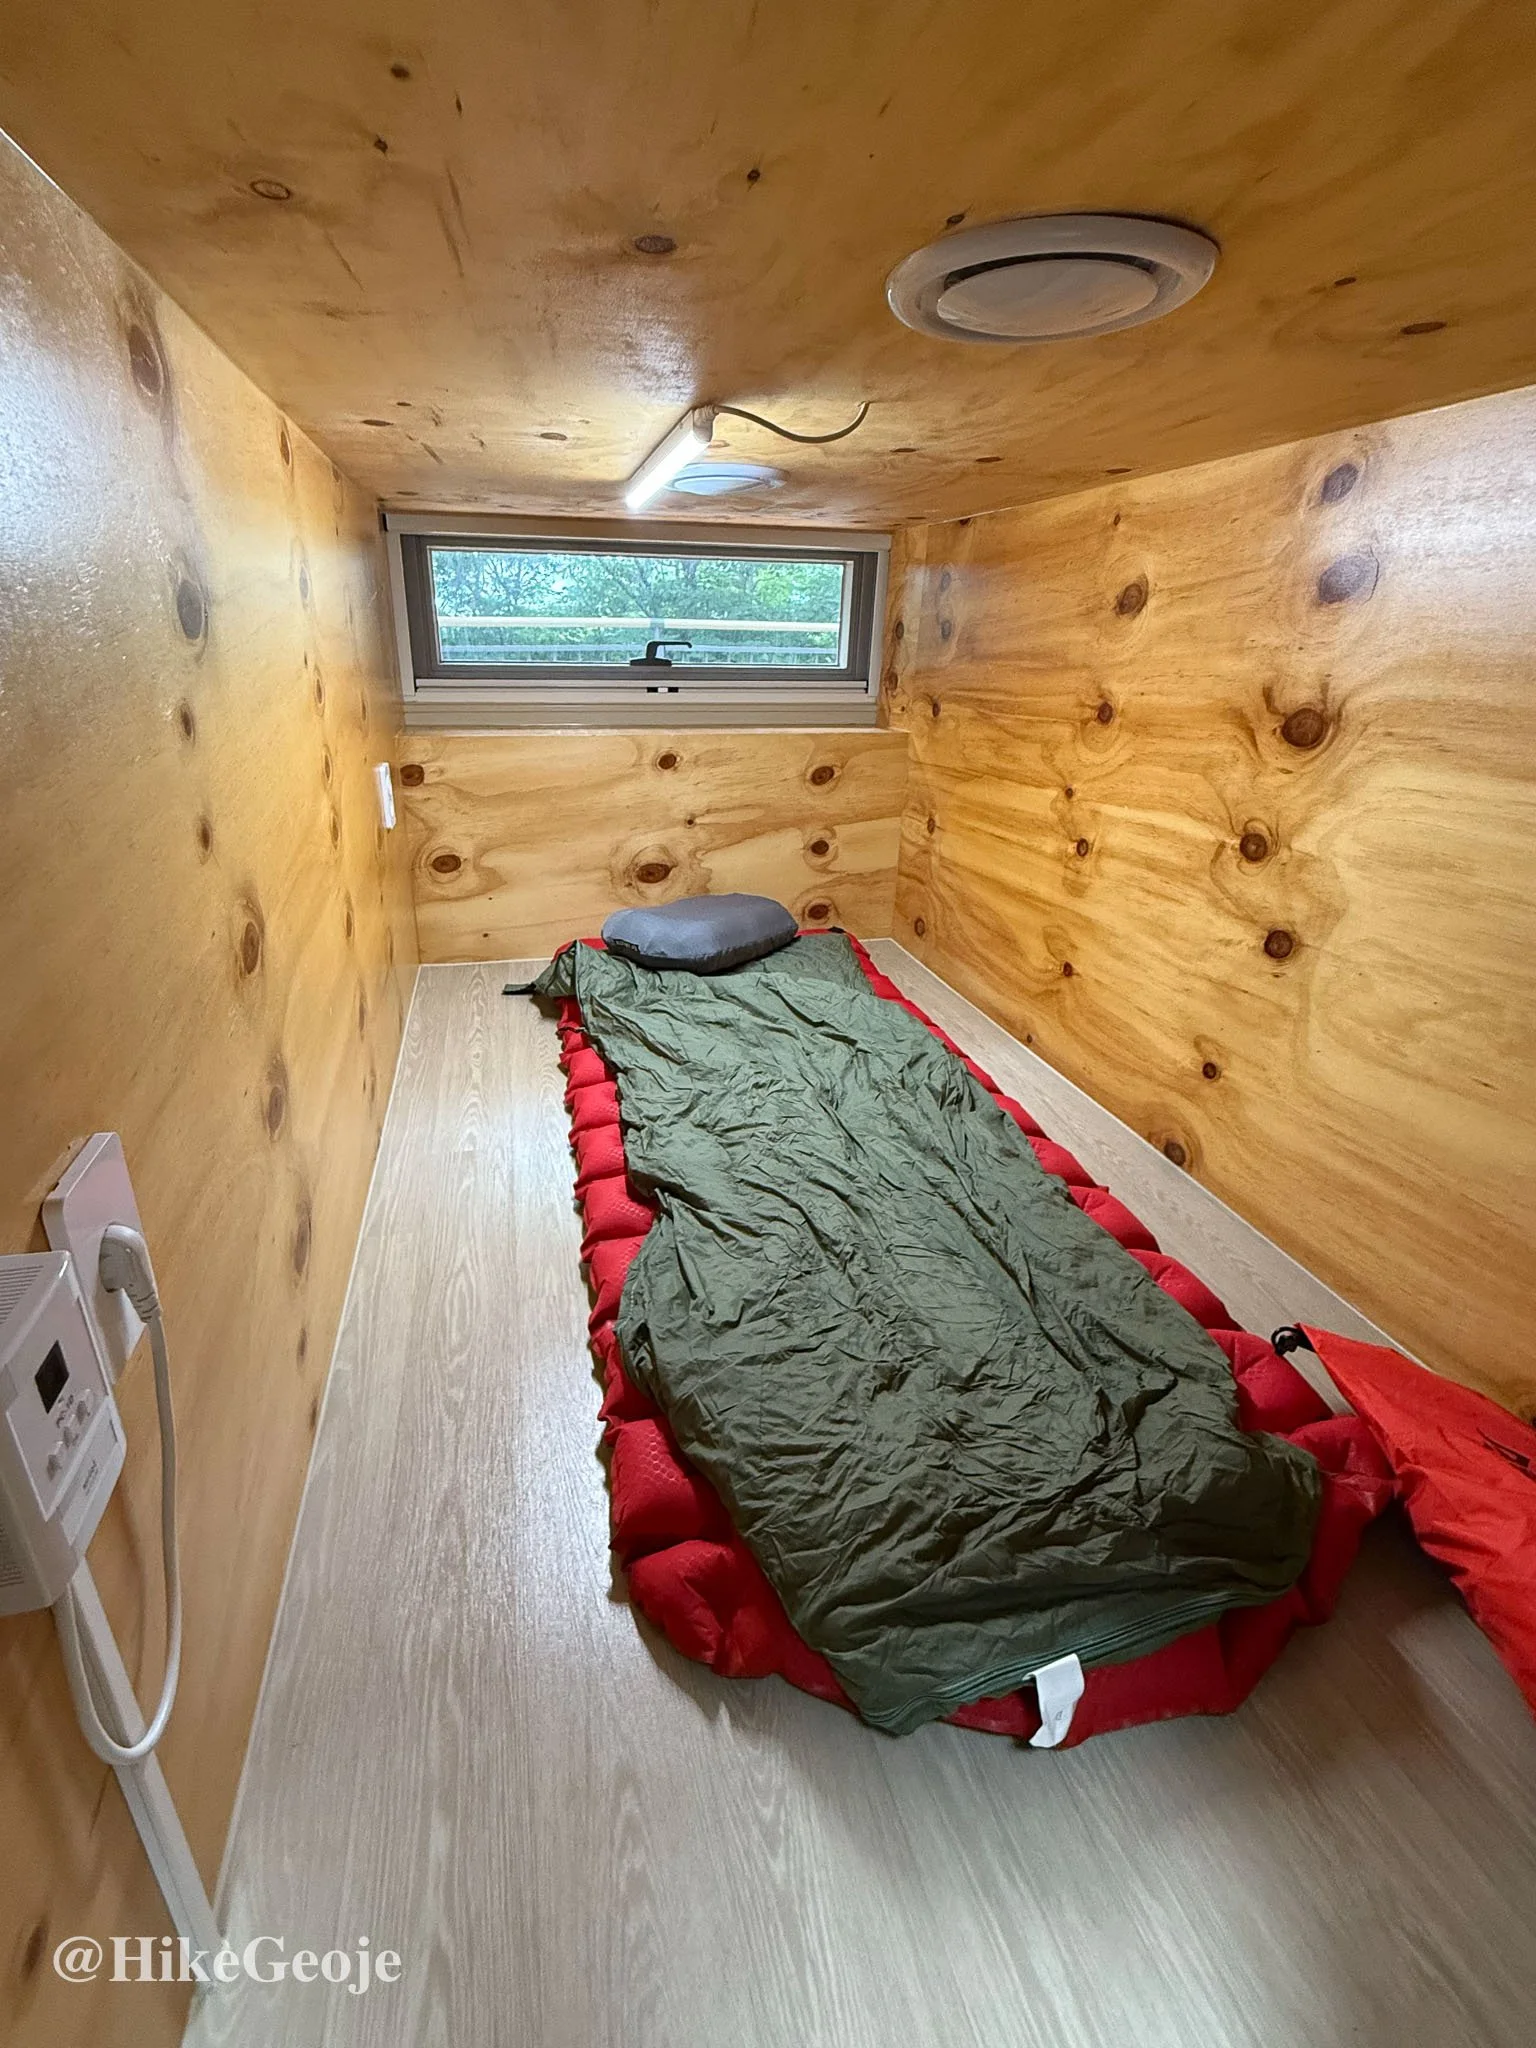
We were booked for Nogodan Shelter the first night and Seseok Shelter the second, which would’ve made Day 1 short and Days 2–3 much longer. The shelter impressed me: capsule-style bunks, flush toilets, even a vending machine with cold drinks.
We spent a lazy afternoon with coffee, food, and card games…until the ranger brought bad news.
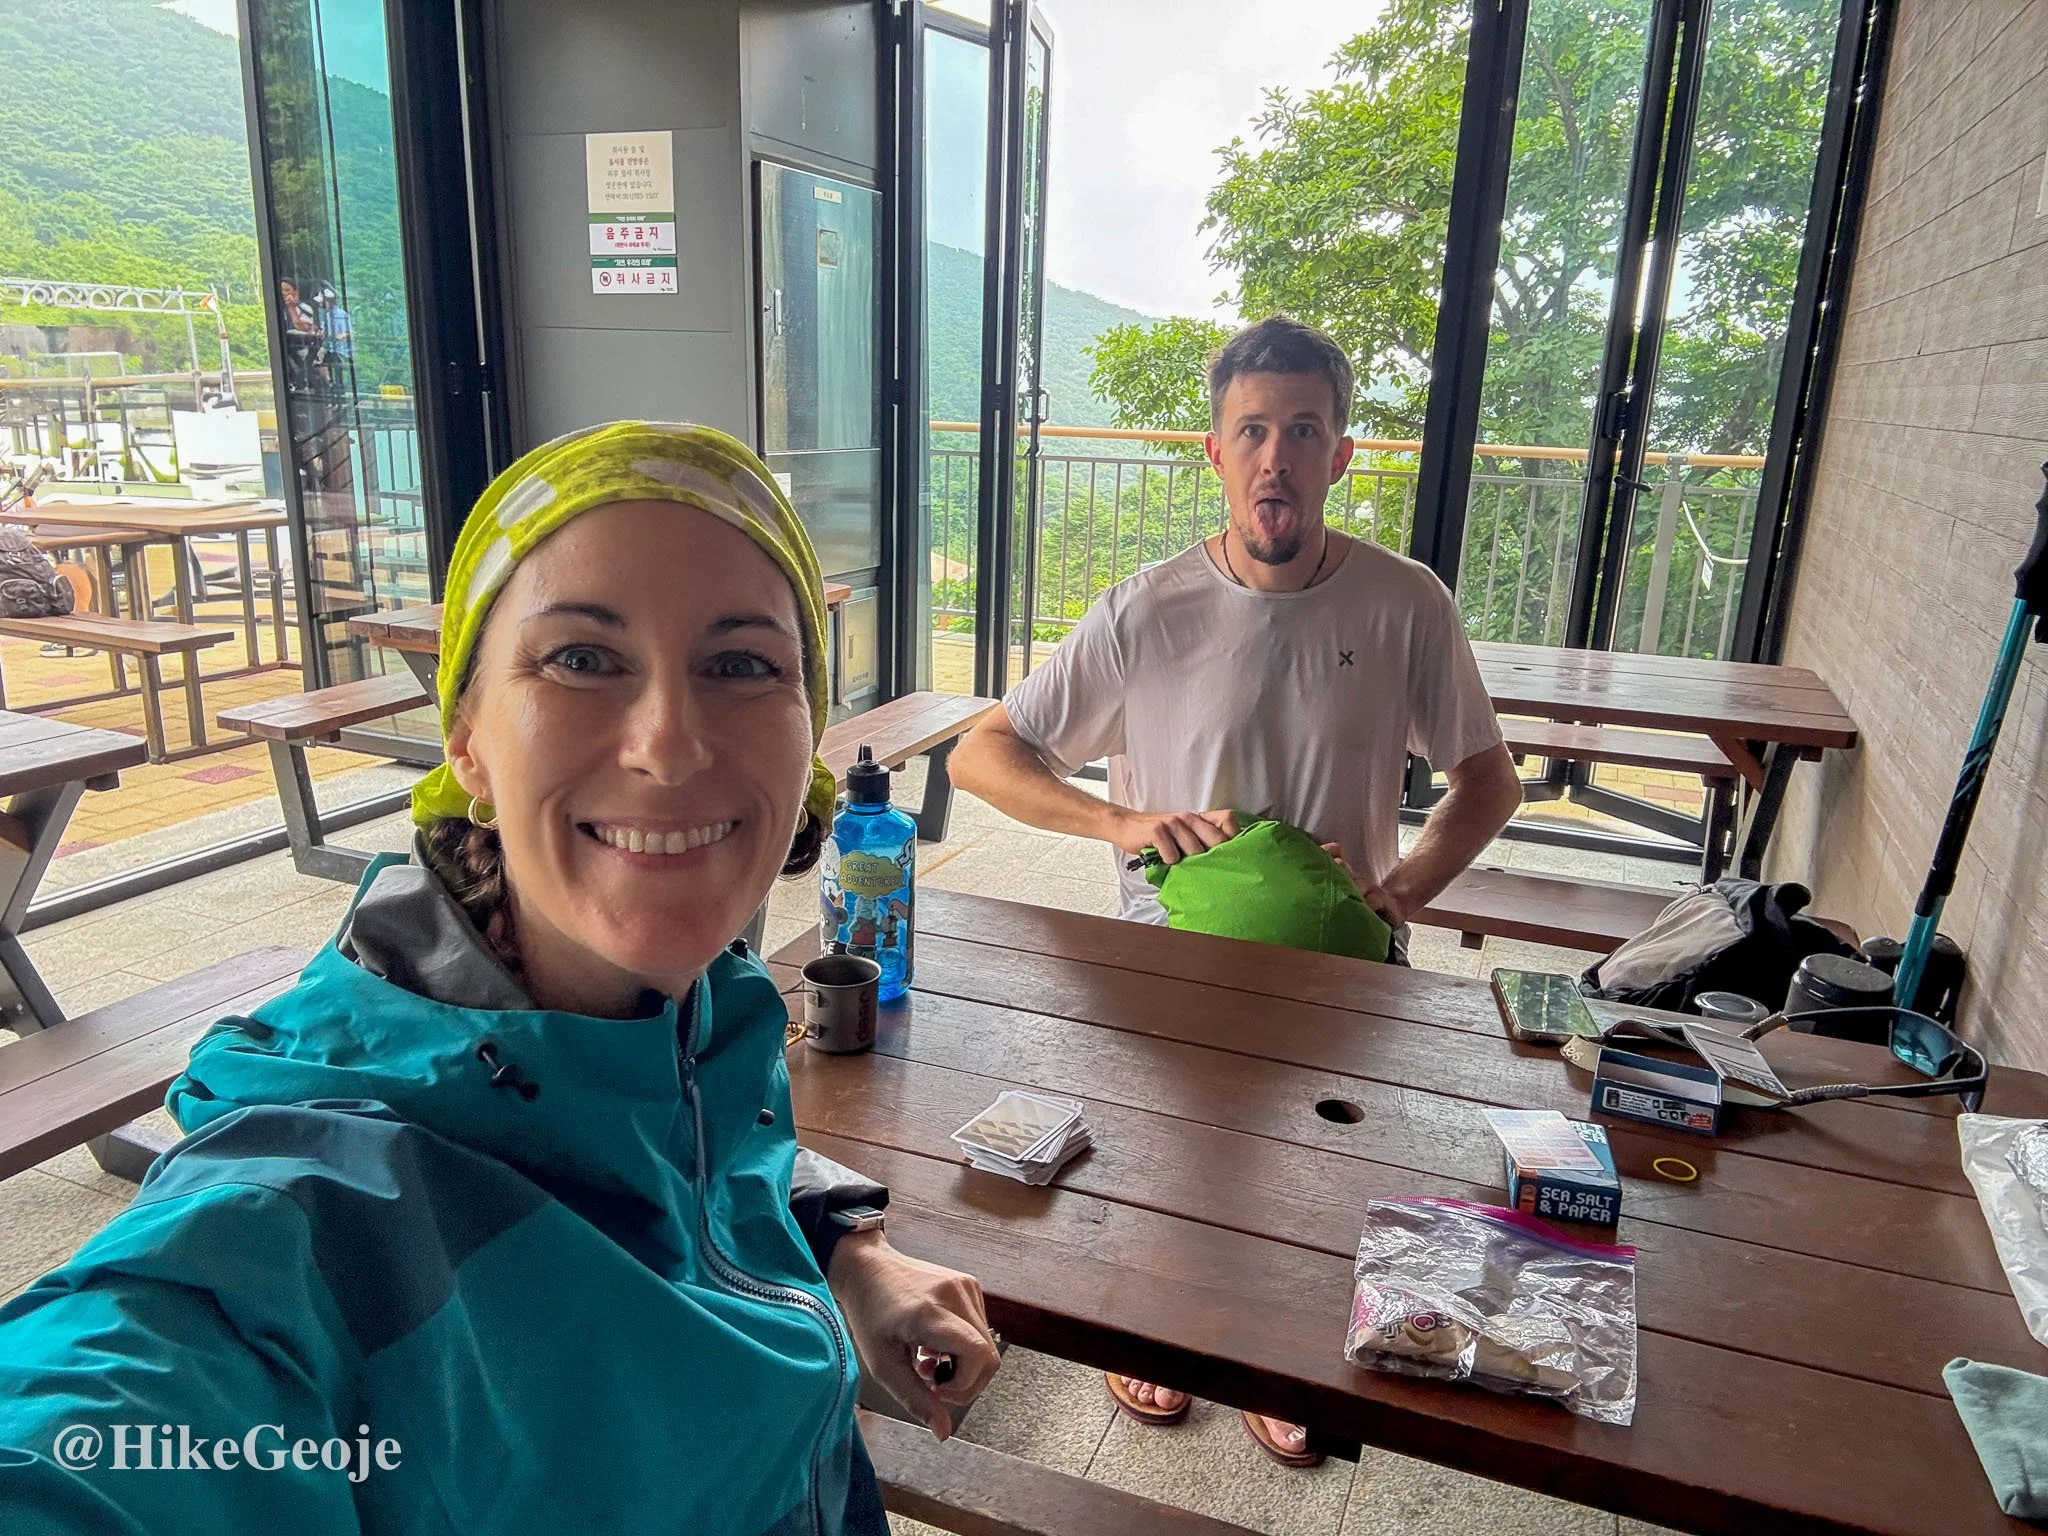
Heavy rain was forecast: 250 mm overnight. Sure enough, the park closed the next morning, and our journey ended before it really began.
Take Two – Solo
A few weeks later, I got a second chance. August gifted a three-day weekend, so I rebooked shelters and planned to go solo since Mat had other hikes already in the works. This time I aimed for Yeonhacheon Shelter (Day 1) and Jangteomok Shelter (Day 2) to even out the distances. (I ended up on a waiting list for Jangteomok but was lucky to snag a spot right away.)
Looking back, I think these shelters were the best choice for breaking up the trail. Mat started the hike the day I finished, staying at Byeoksoryeong Shelter instead of Yeonhacheon. Byeoksoryeong Shelter has better views, but I’ll always be glad I stayed at Yeonhacheon because that’s where I met Yejin. :)
Day 1 – Hwaeomsa → Yeonhacheon
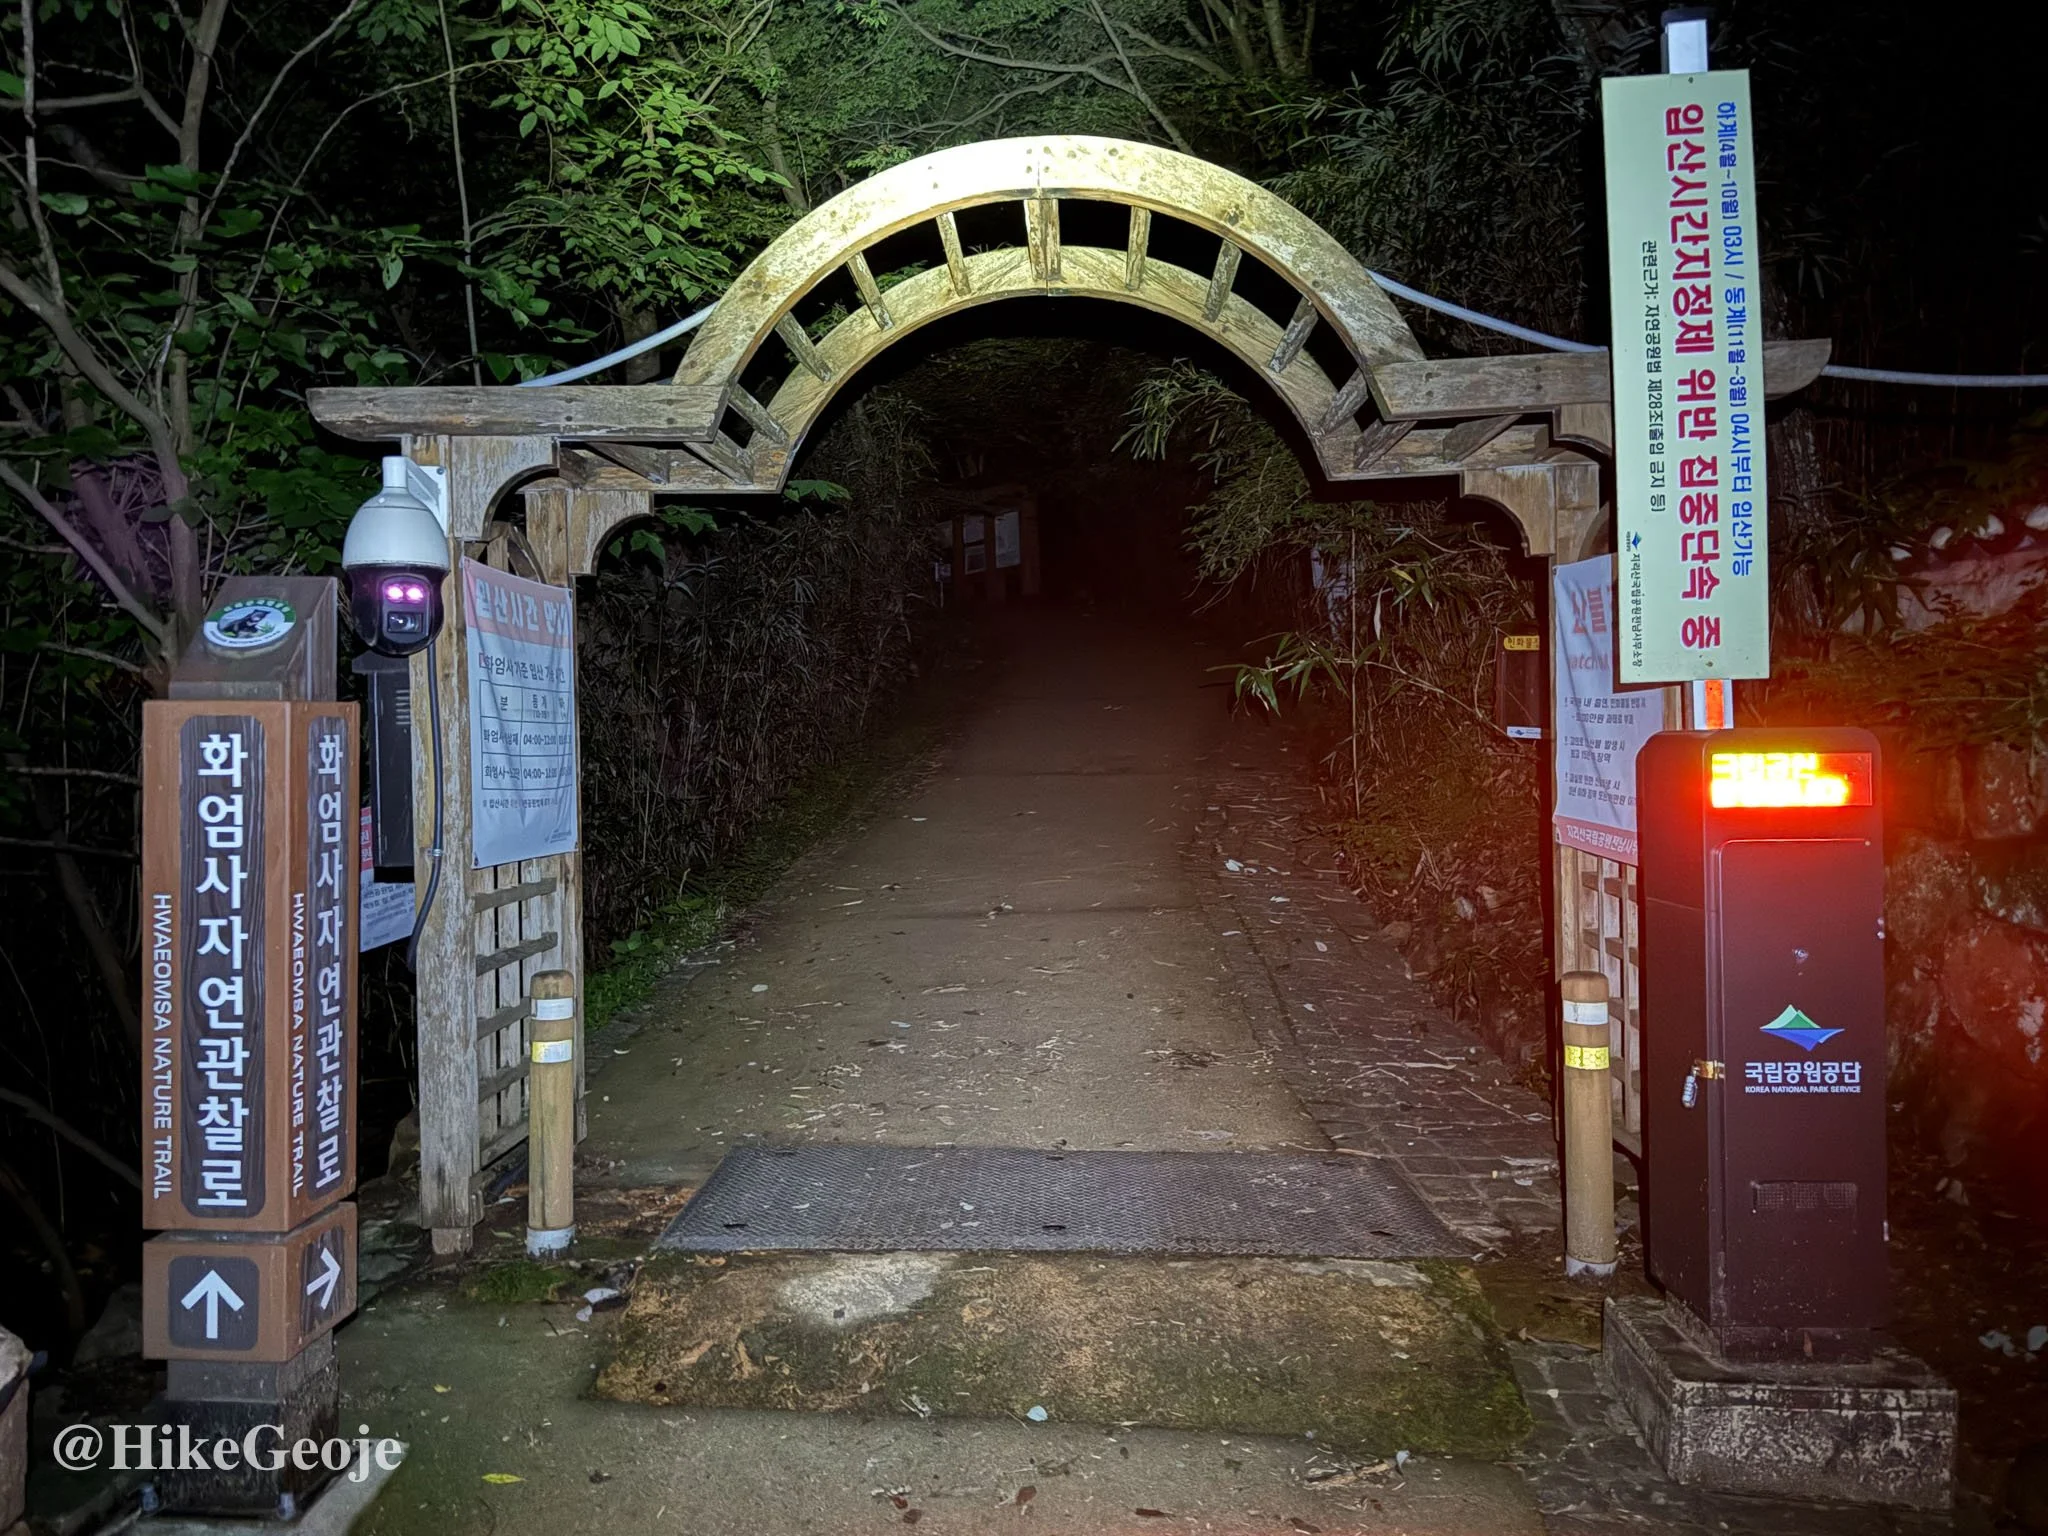
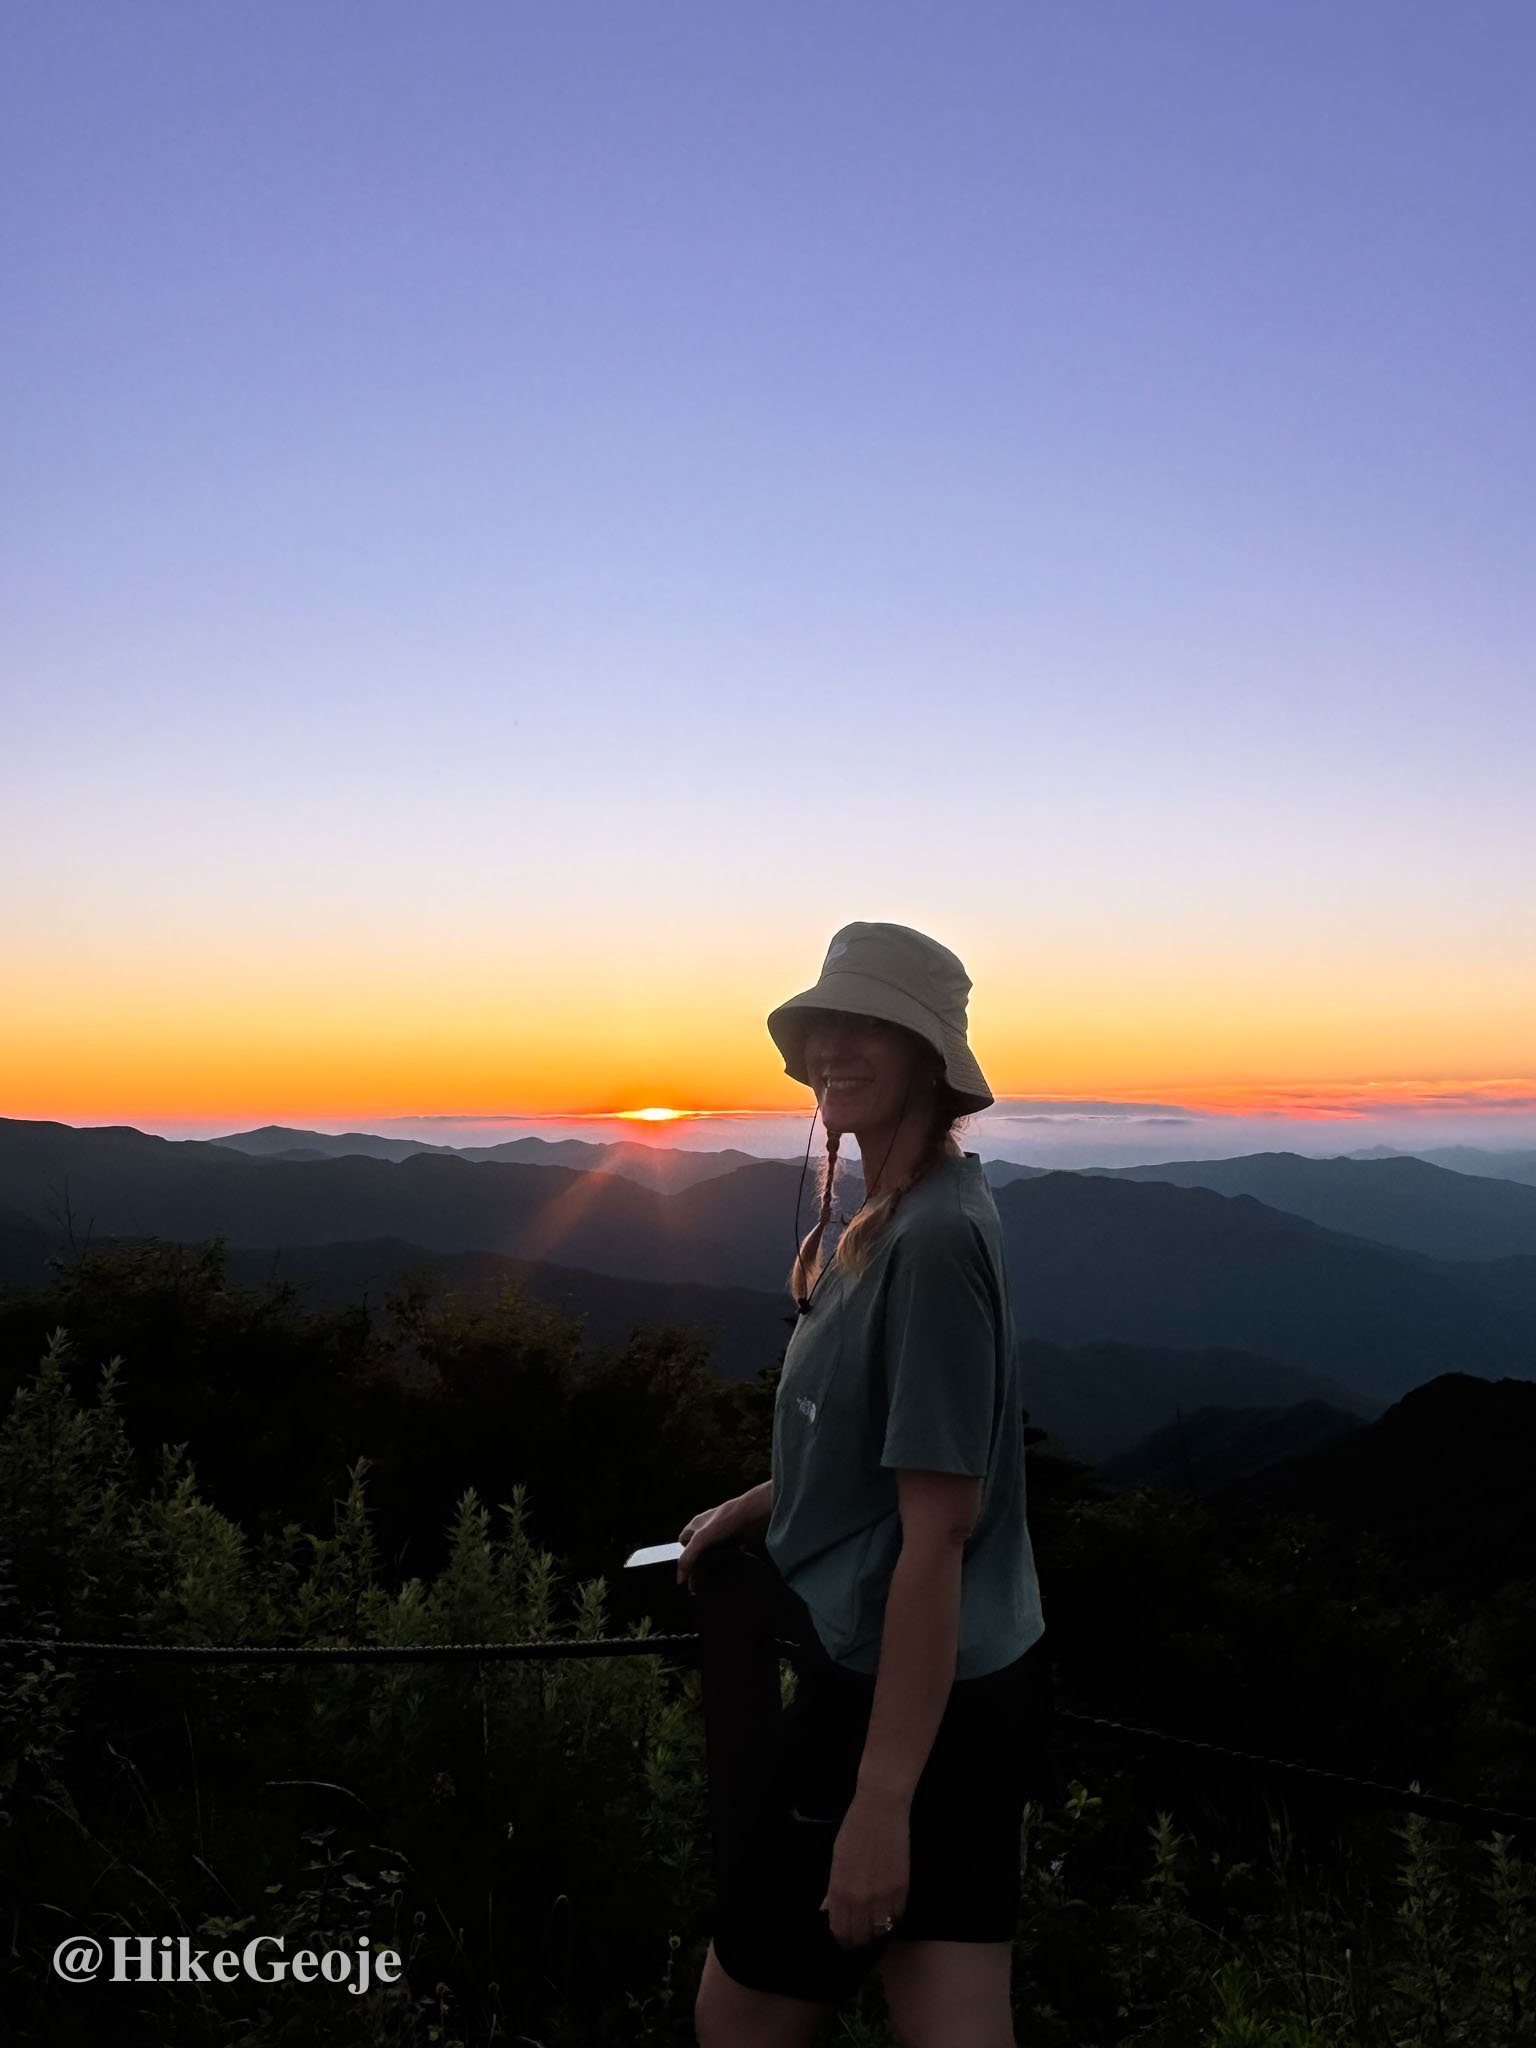
The day began in the dark, climbing straight out of Hwaeomsa.
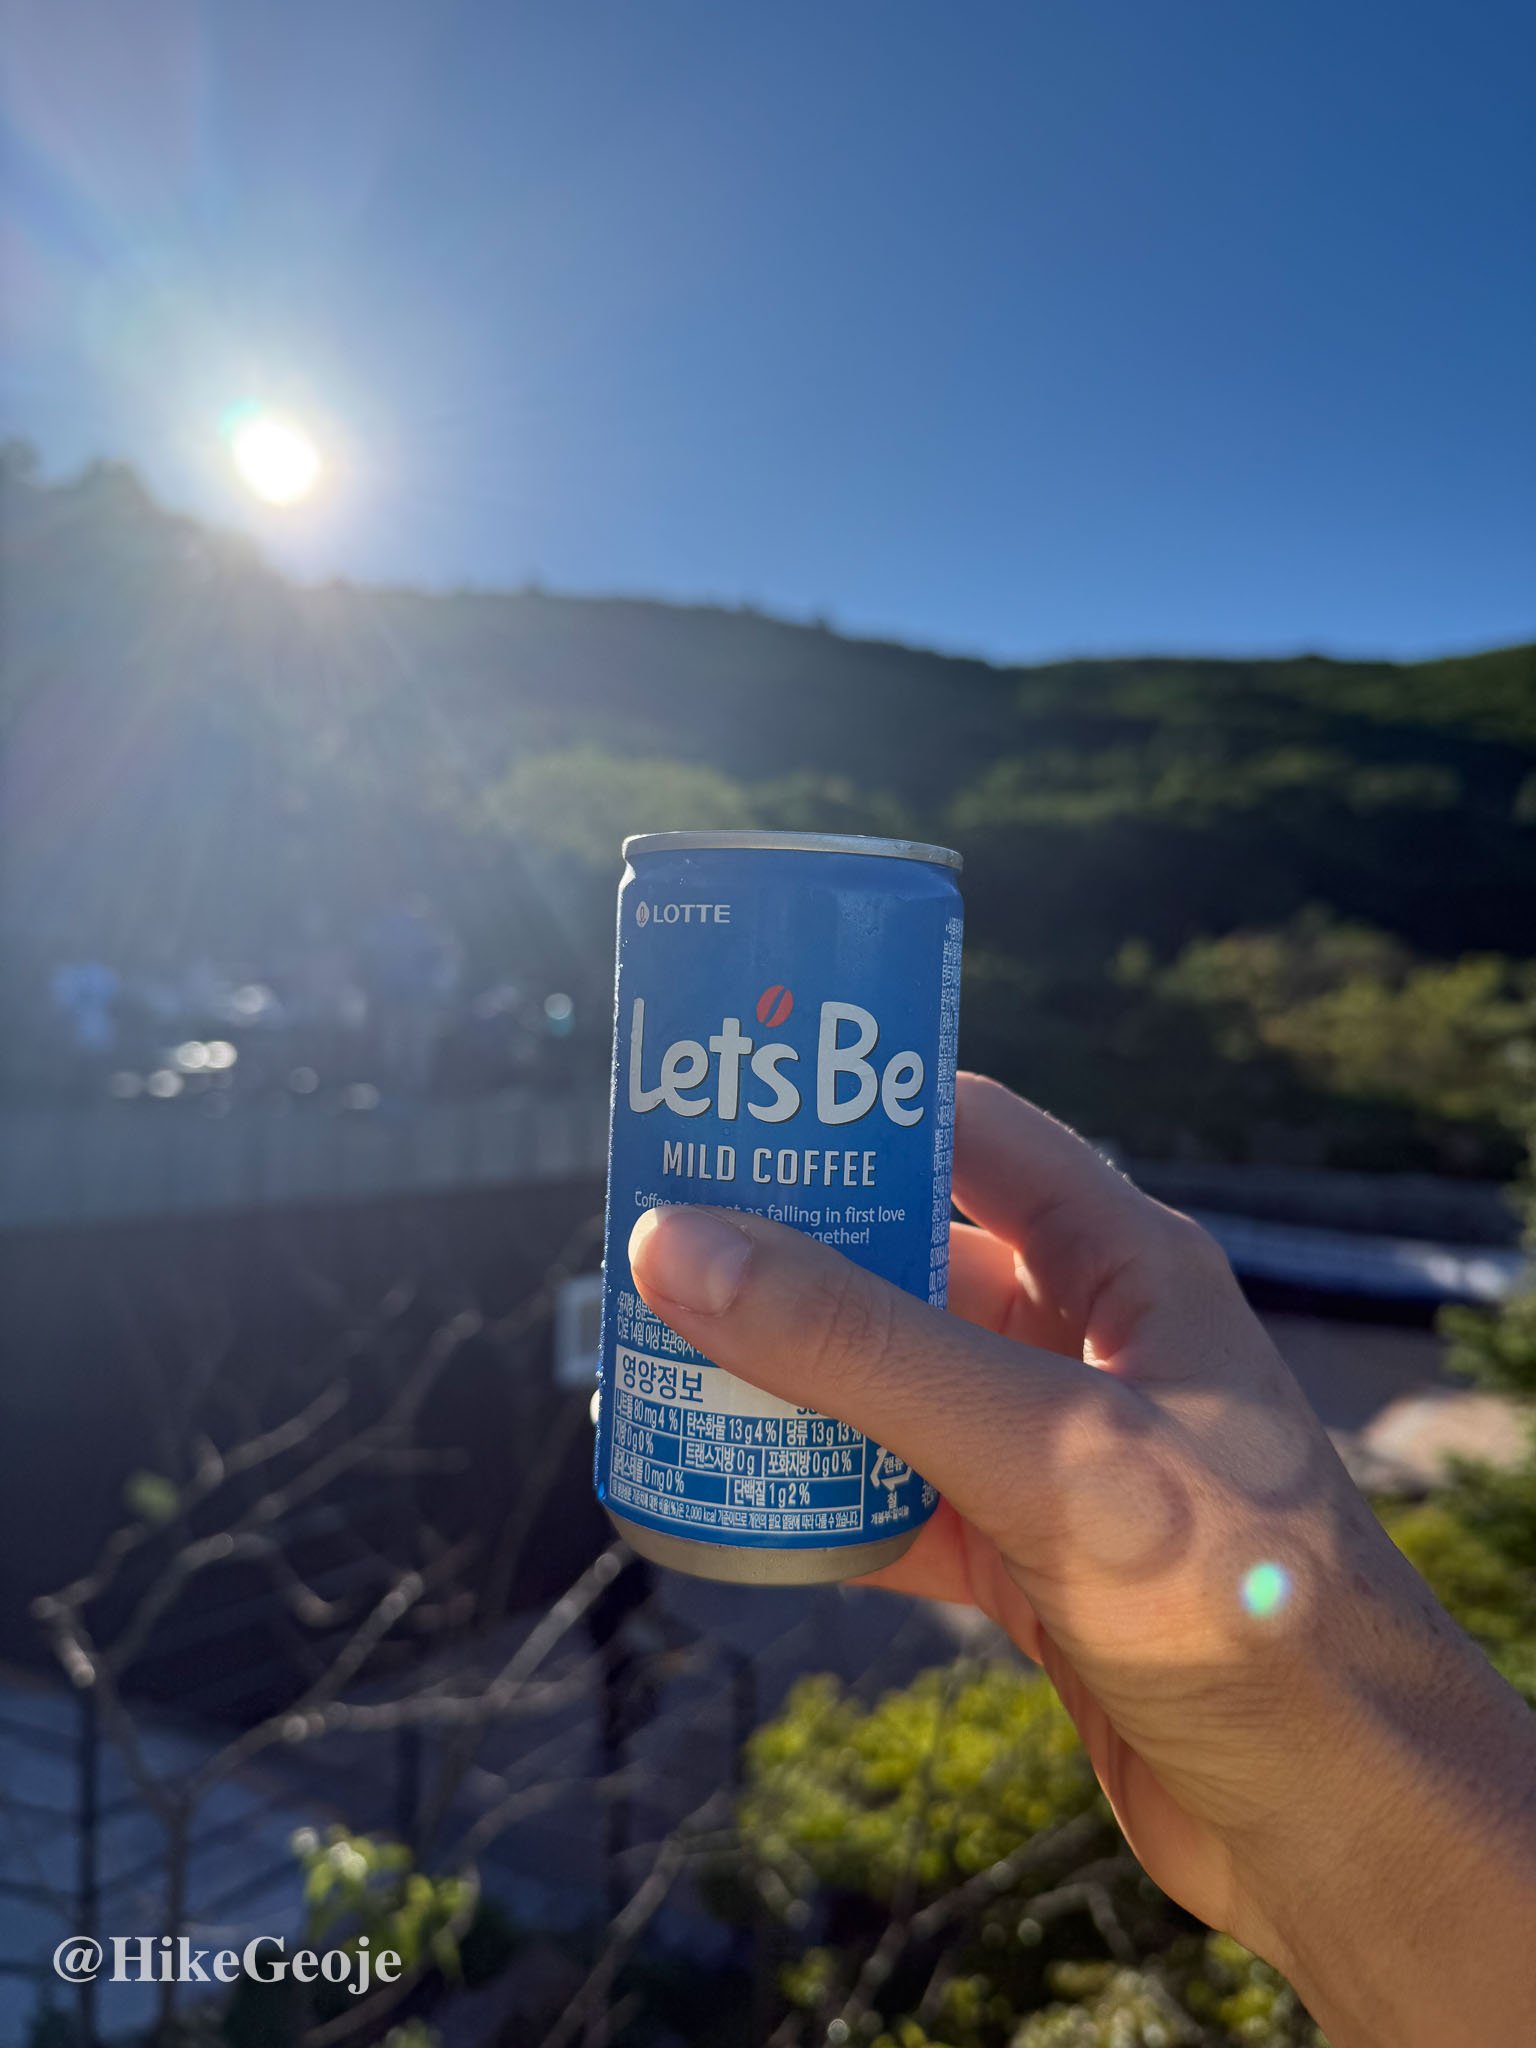
By the time I reached the ridgeline and roadway, I was moving quickly and treated myself to an ice-cold canned coffee at Nogodan Shelter’s vending machine.
Instead of repeating Nogodan Peak, I continued along the ridge. The first 5 km were smooth and deceptively easy…I even thought, I could do this whole ridge in one day! Then came Imgeollyeong (임걸령), where the trail got steeper and more rugged. There’s a water spring here, the last before Yeonhacheon Shelter.
The start of a very easy 5km!
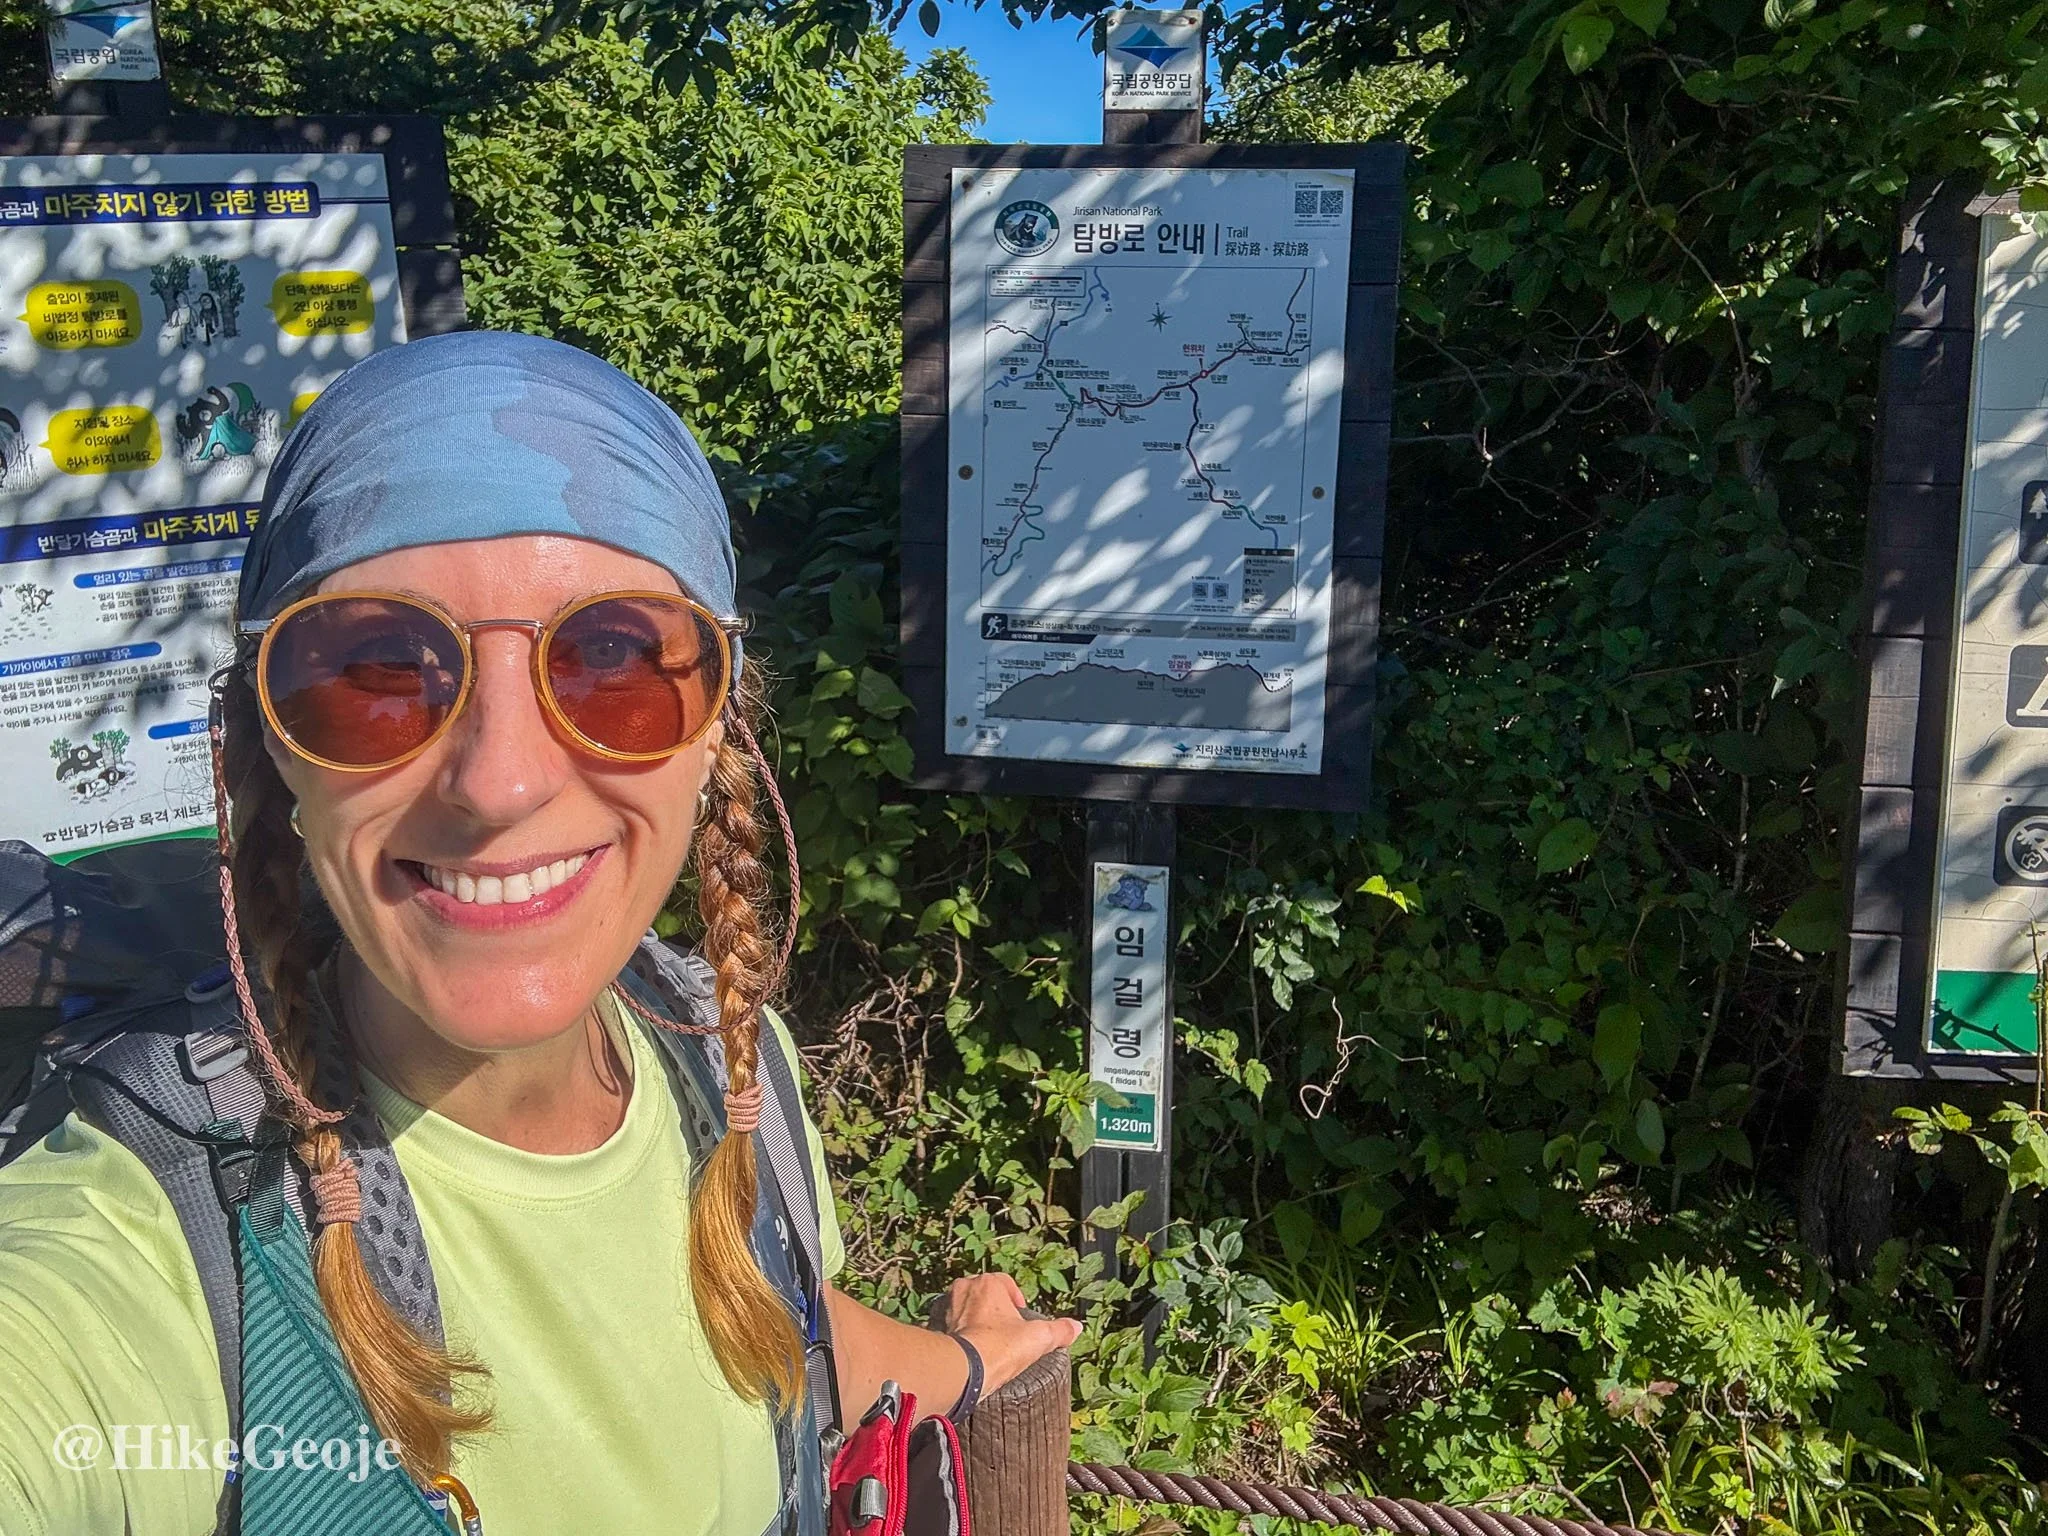
Imgeollyeong.
Imgeollyeong has a fun story: it’s said to be named after a bandit leader, Im Geol (임걸), who used this mountain pass to raid travelers during the Joseon Dynasty. Both feared and respected, he left his name on the land.
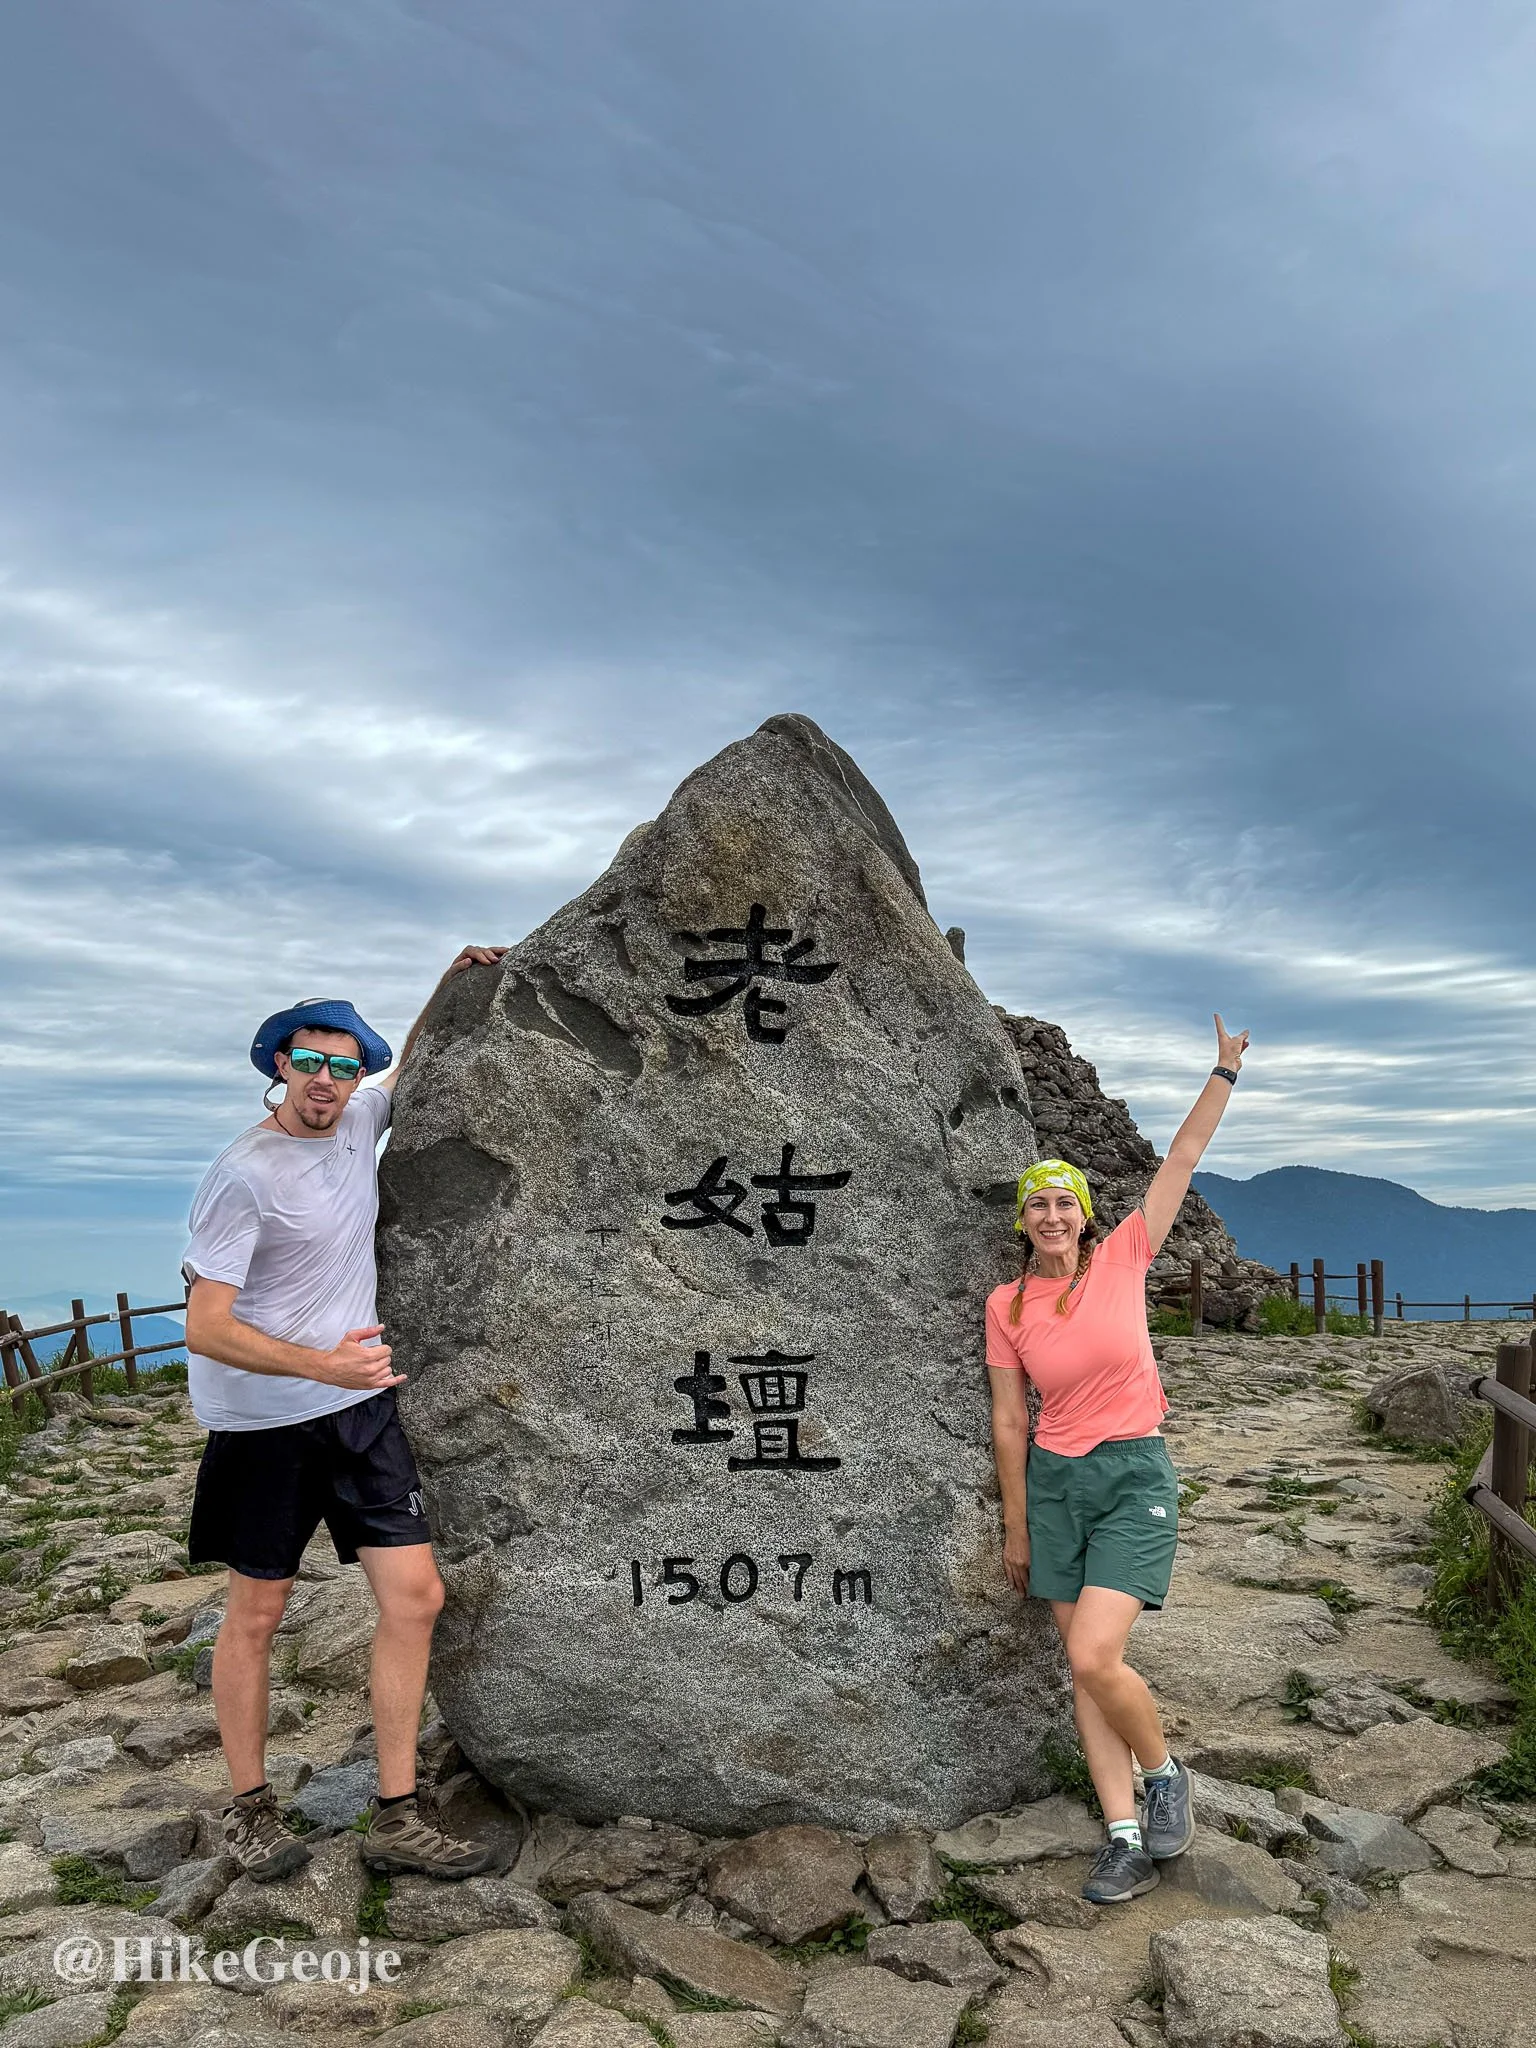
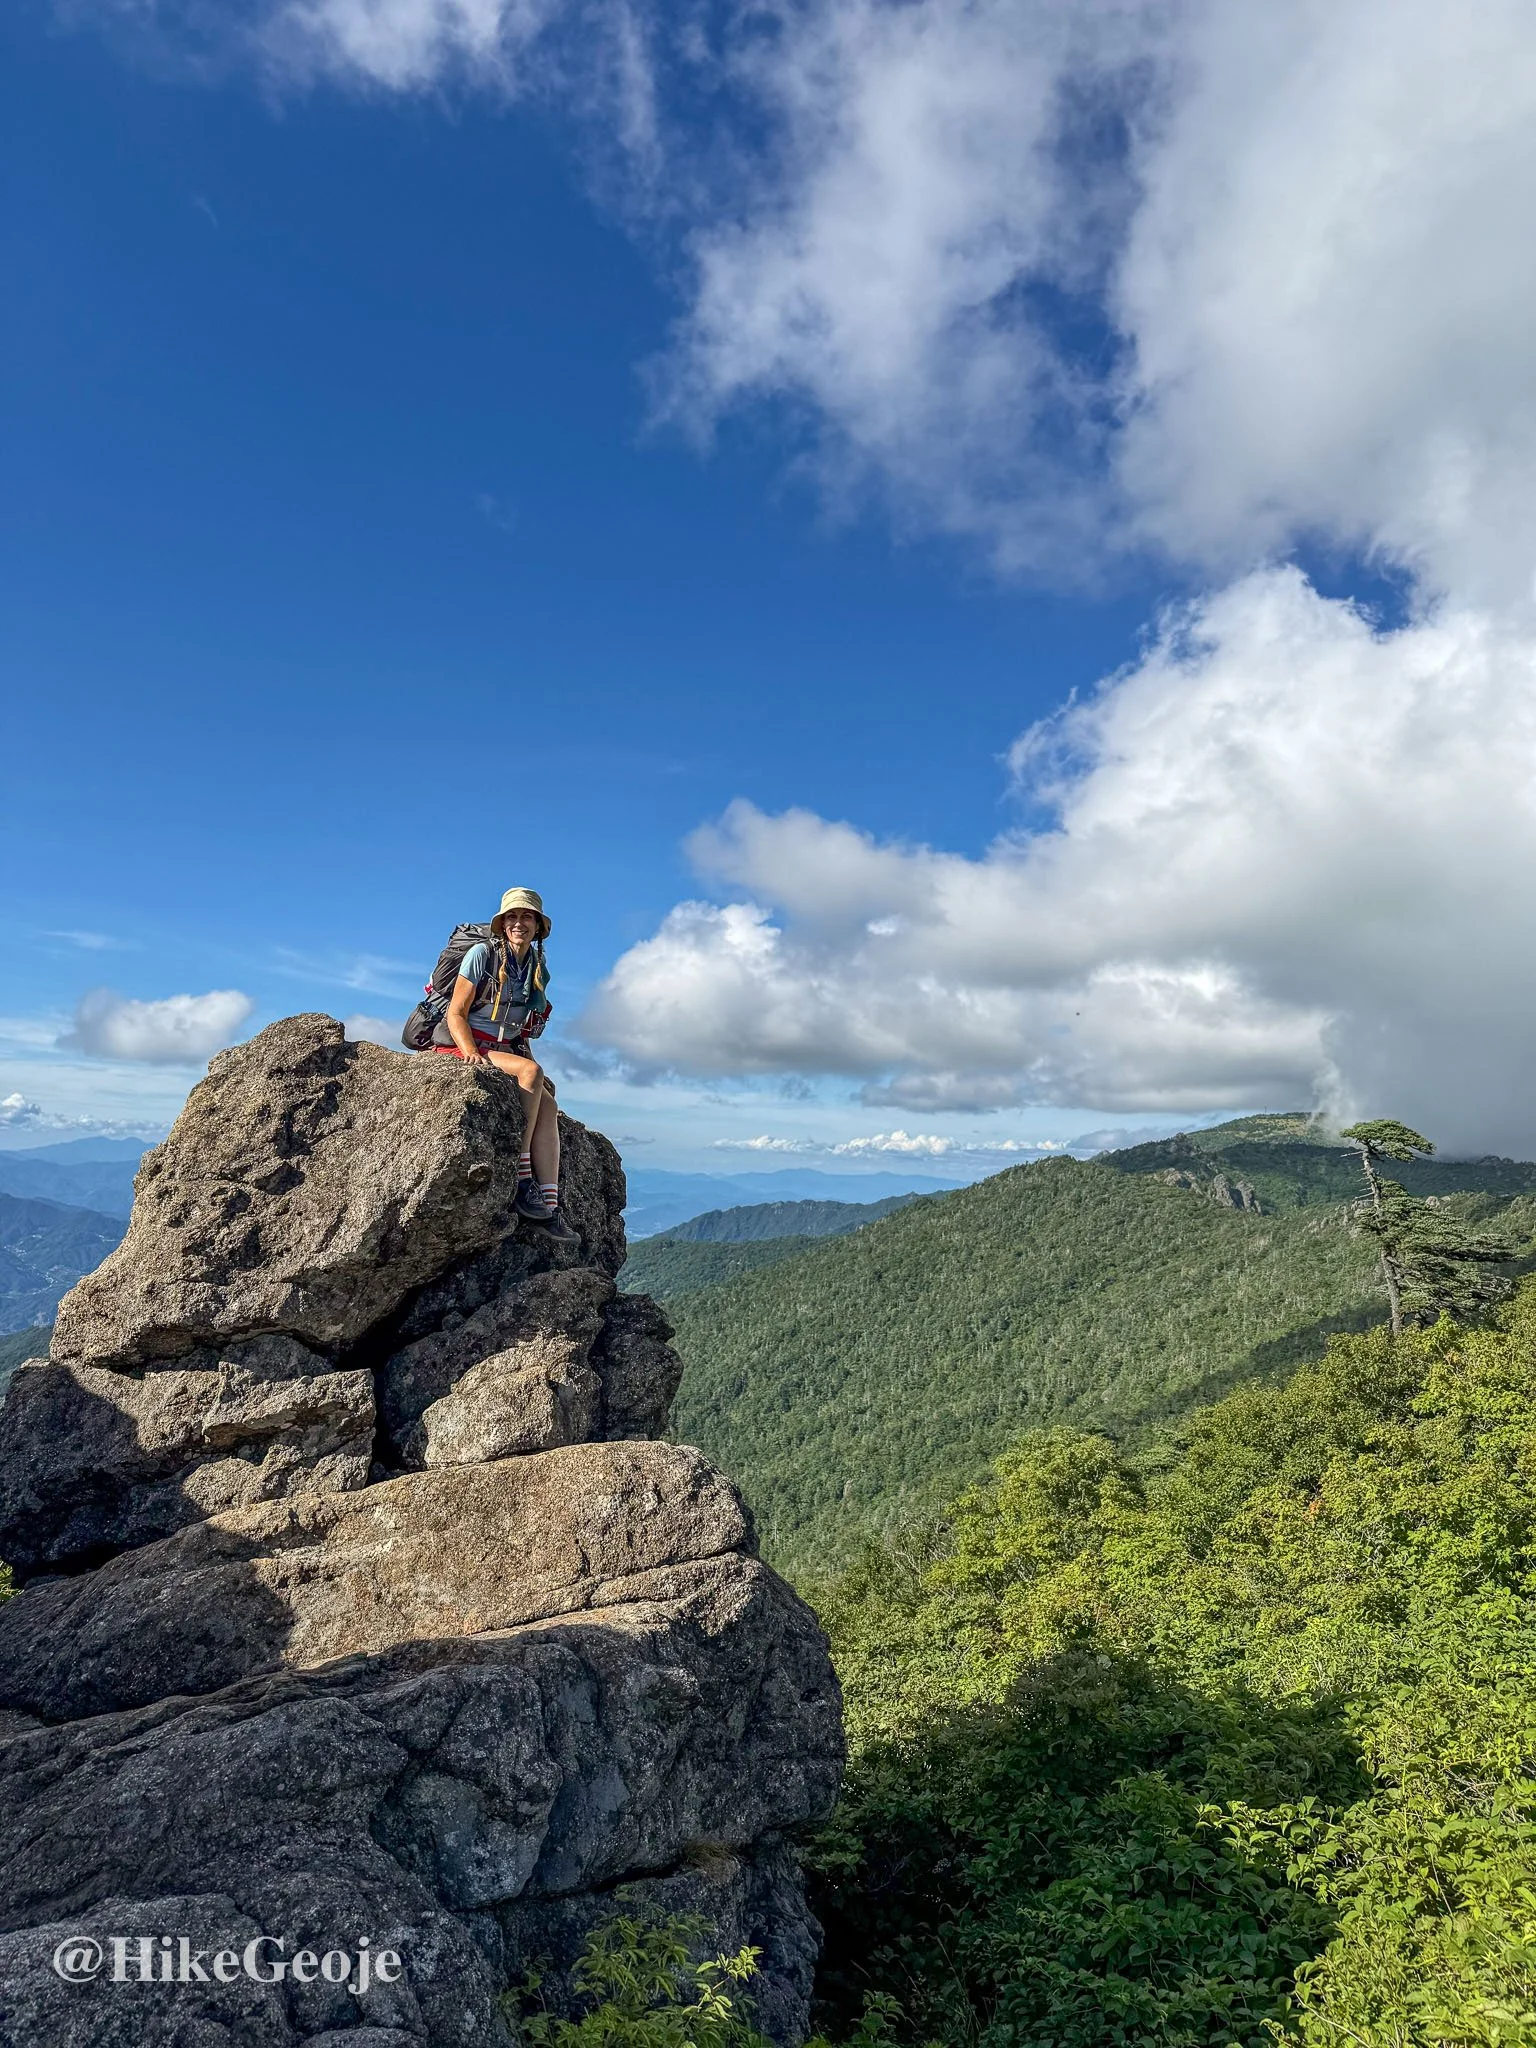
Not far past, I detoured to Banyabong (반야봉) - steep but worth it, and a BAC 100 peak. I left my heavy pack with the pile of other hikers’ bags at the trail junction, grateful for the weight off my back temporarily.

Banyabong
From there it was on to Samdobong (삼도봉), marked by a triangular stone where three provinces meet: Gyeongnam, Jeollanam, and Jeollabuk.
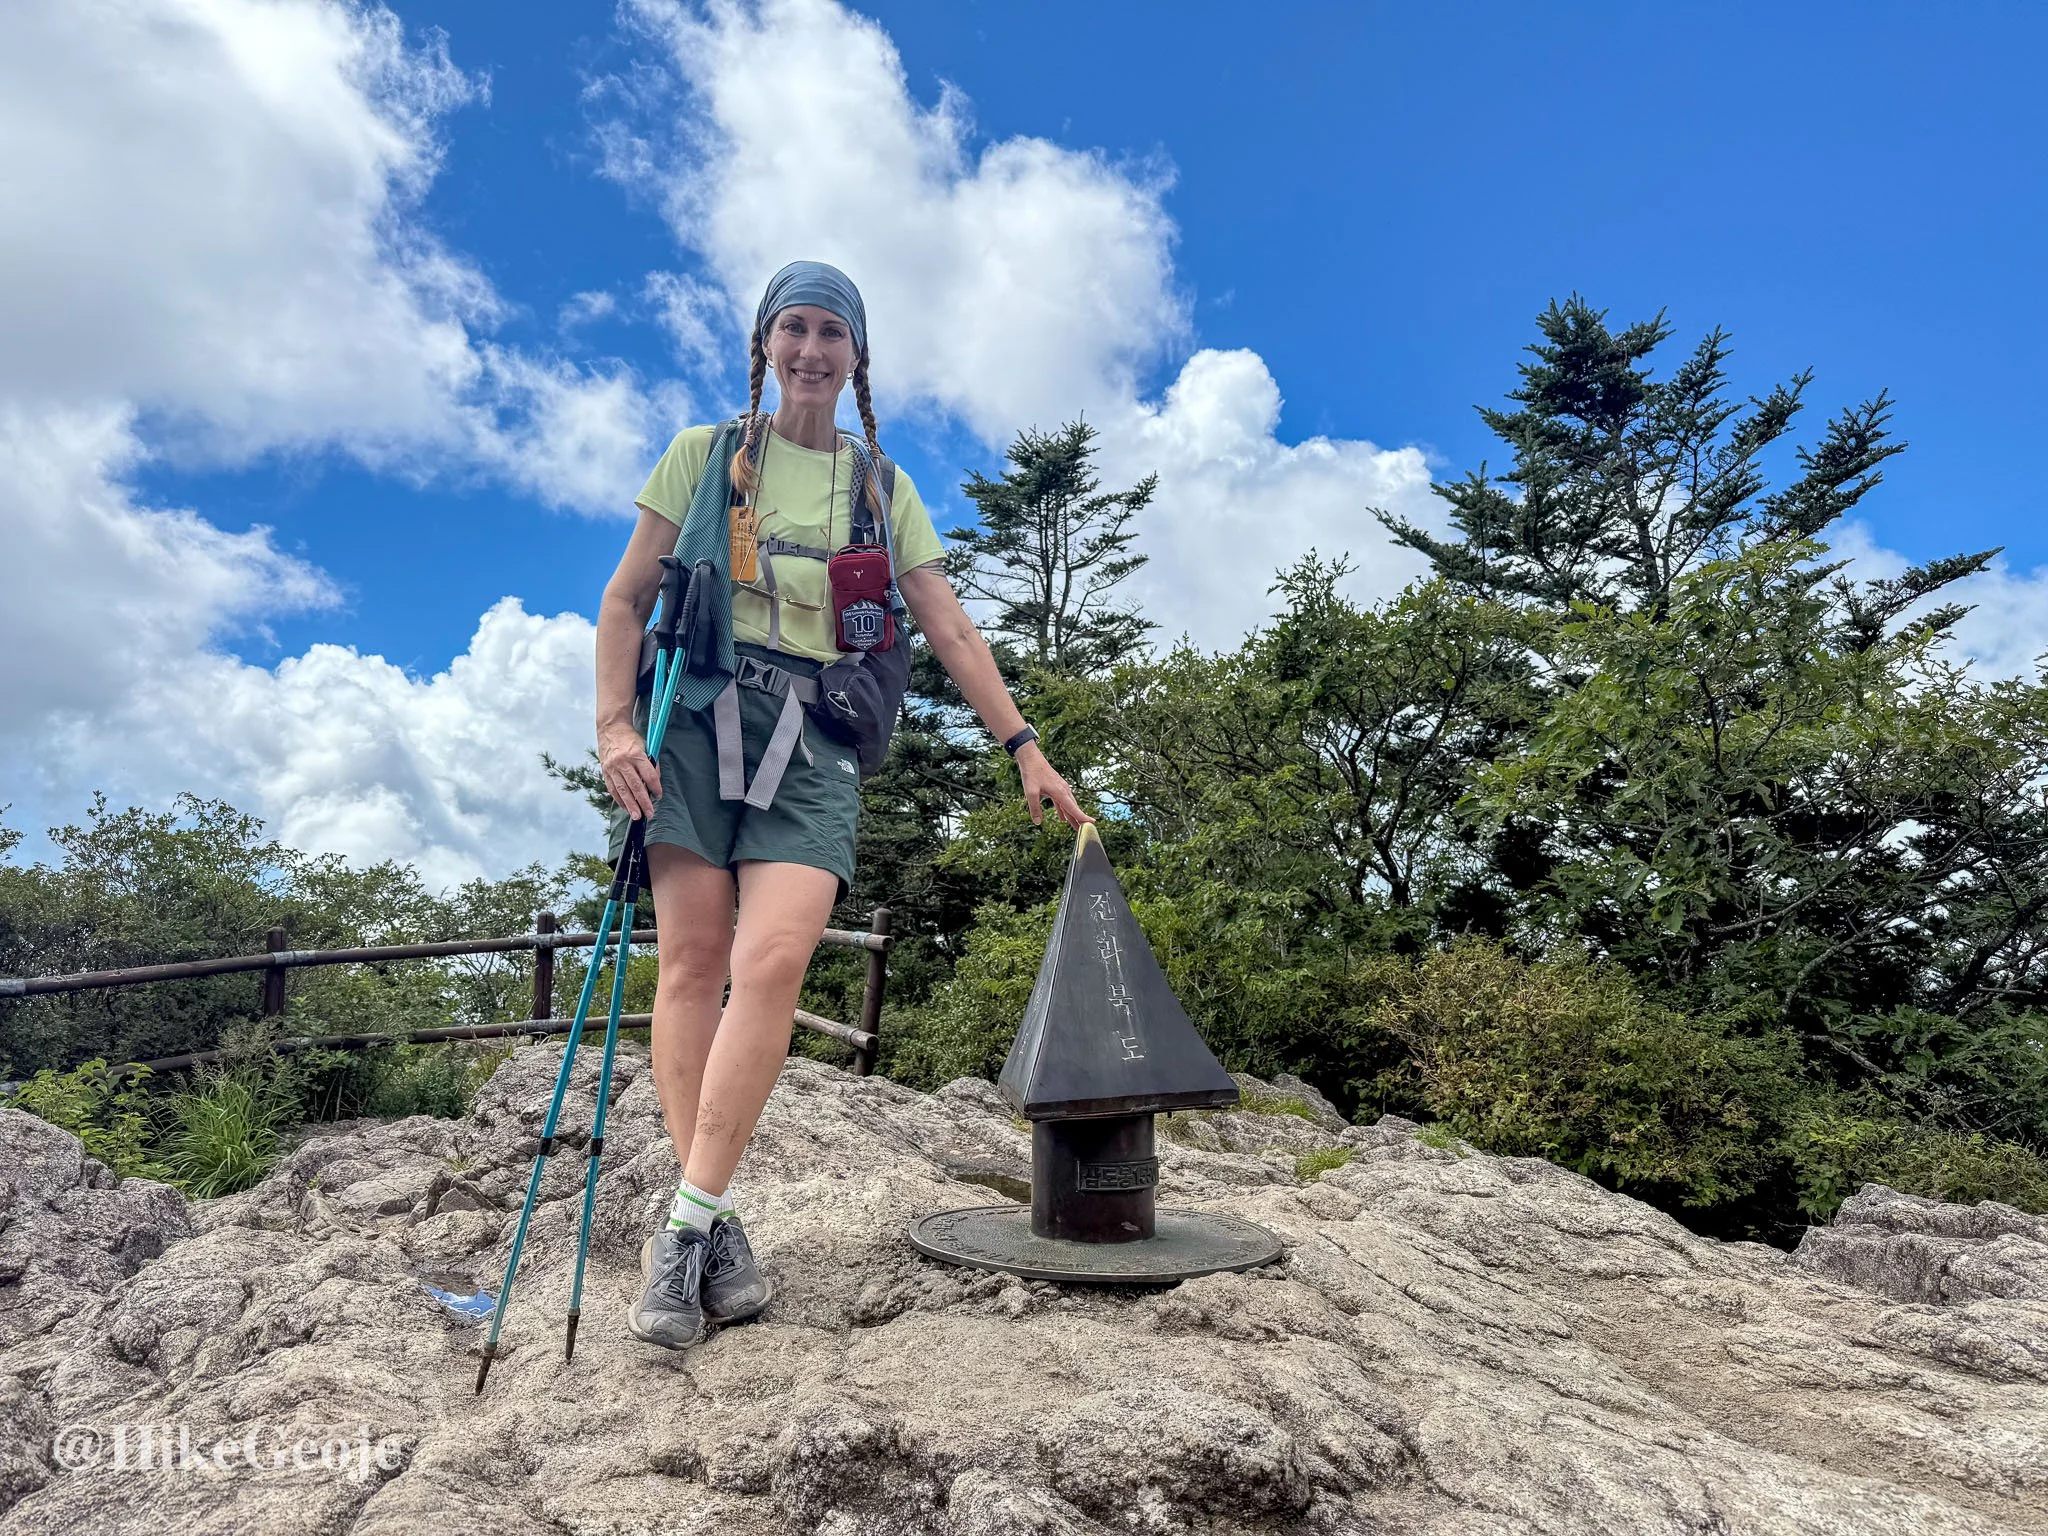
Samdobong
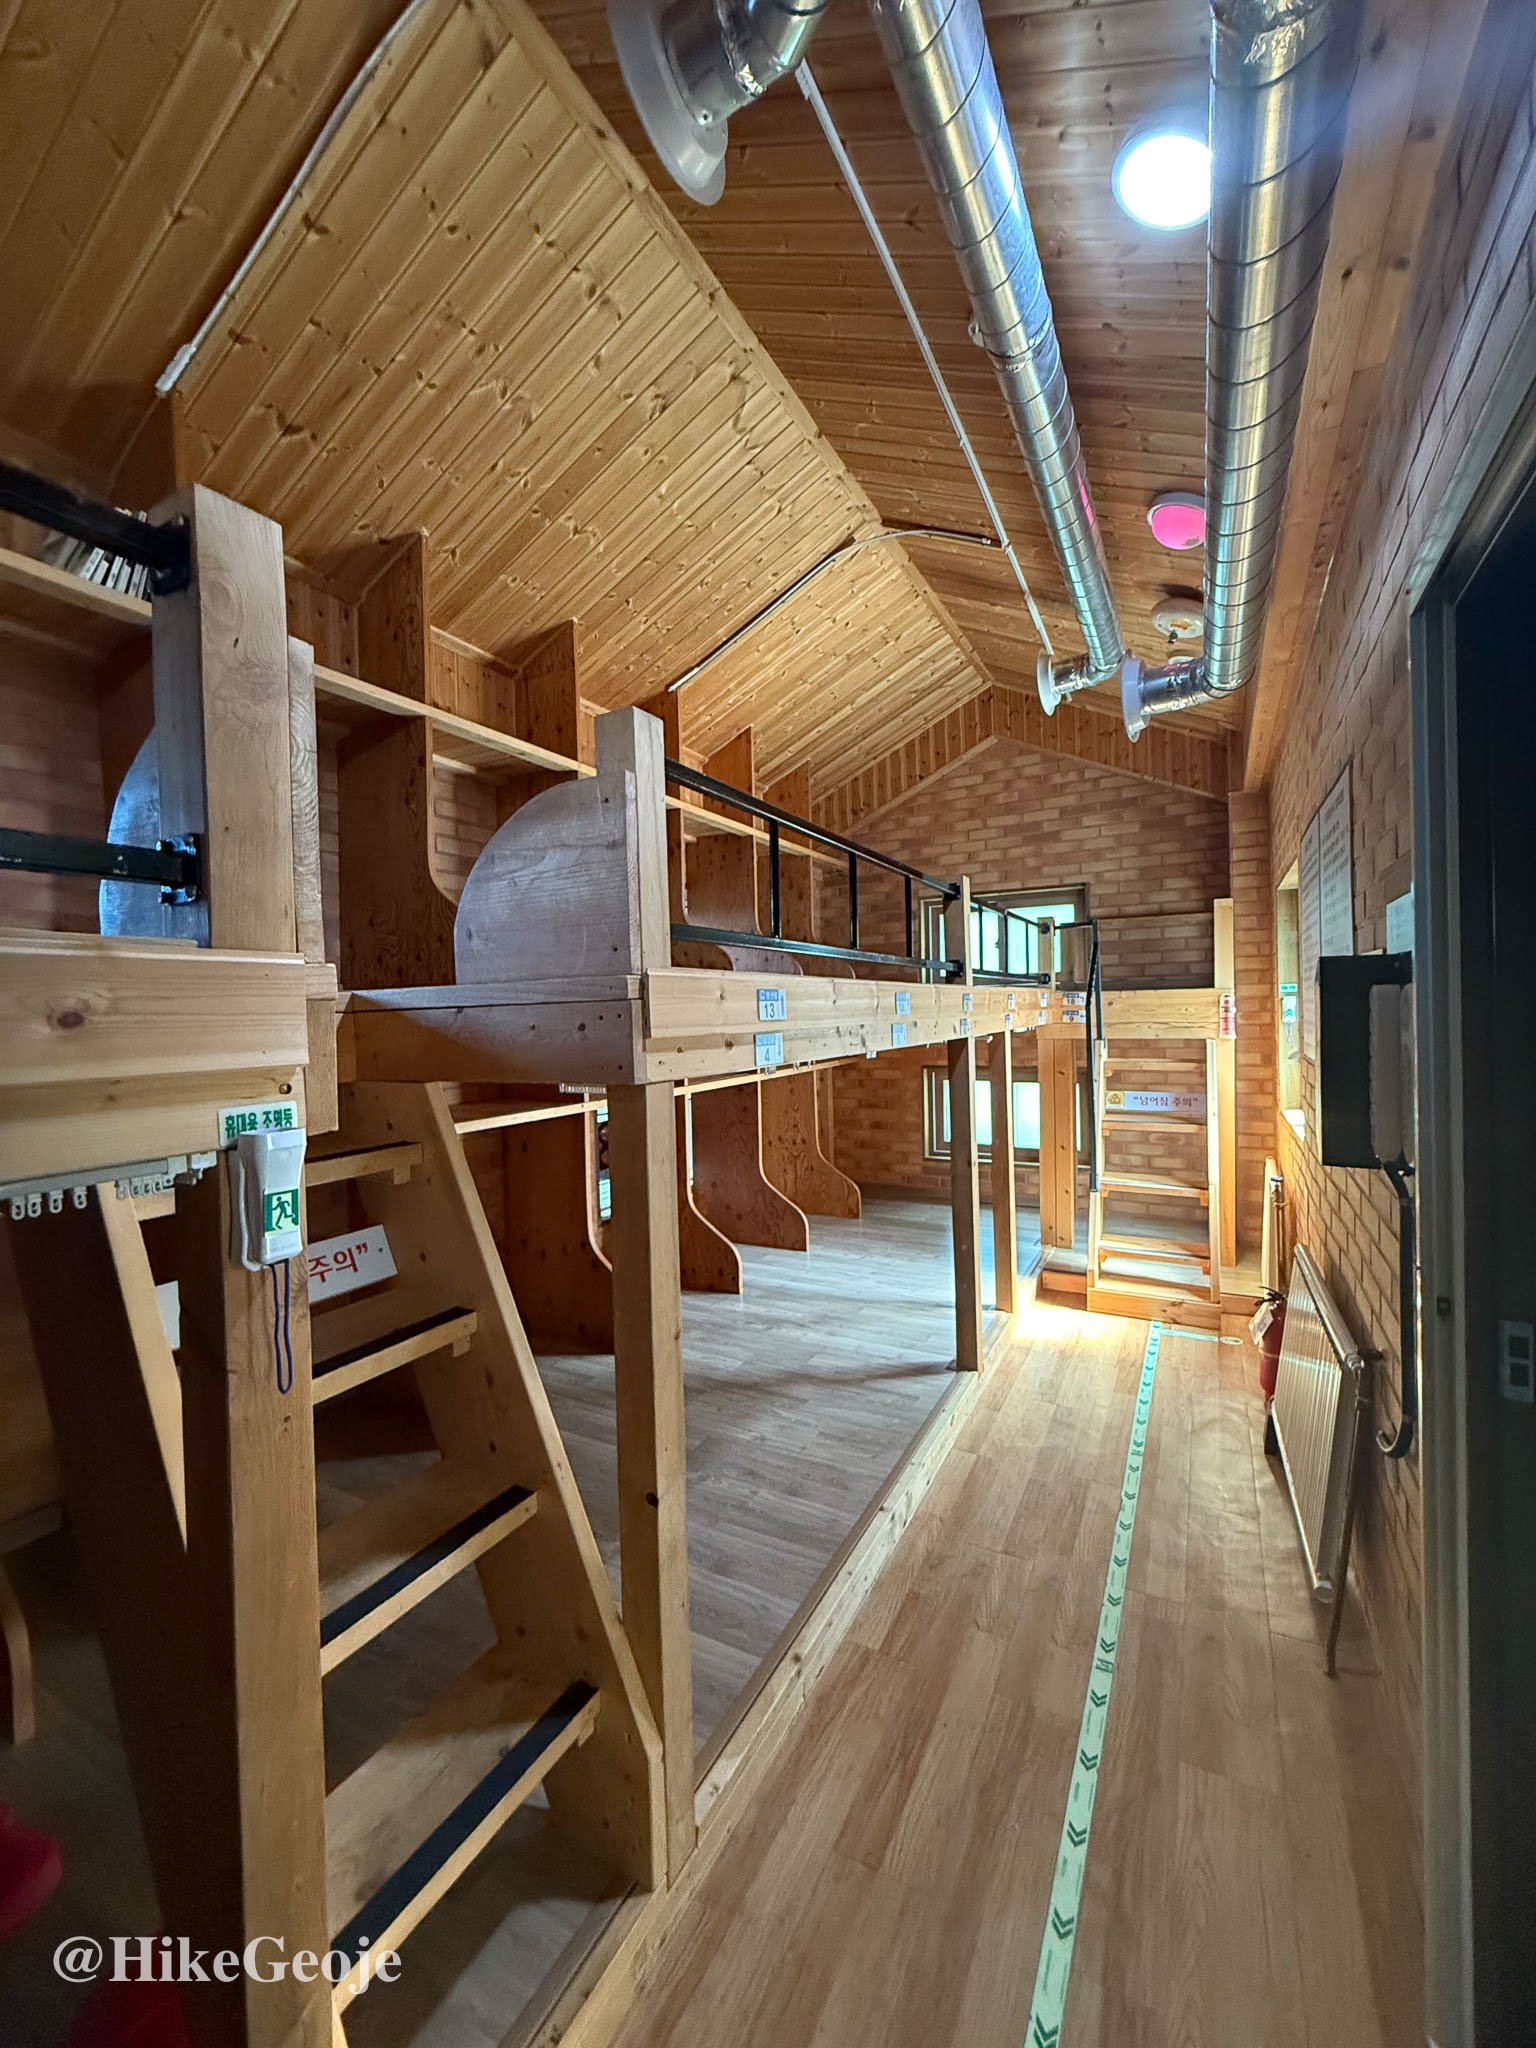
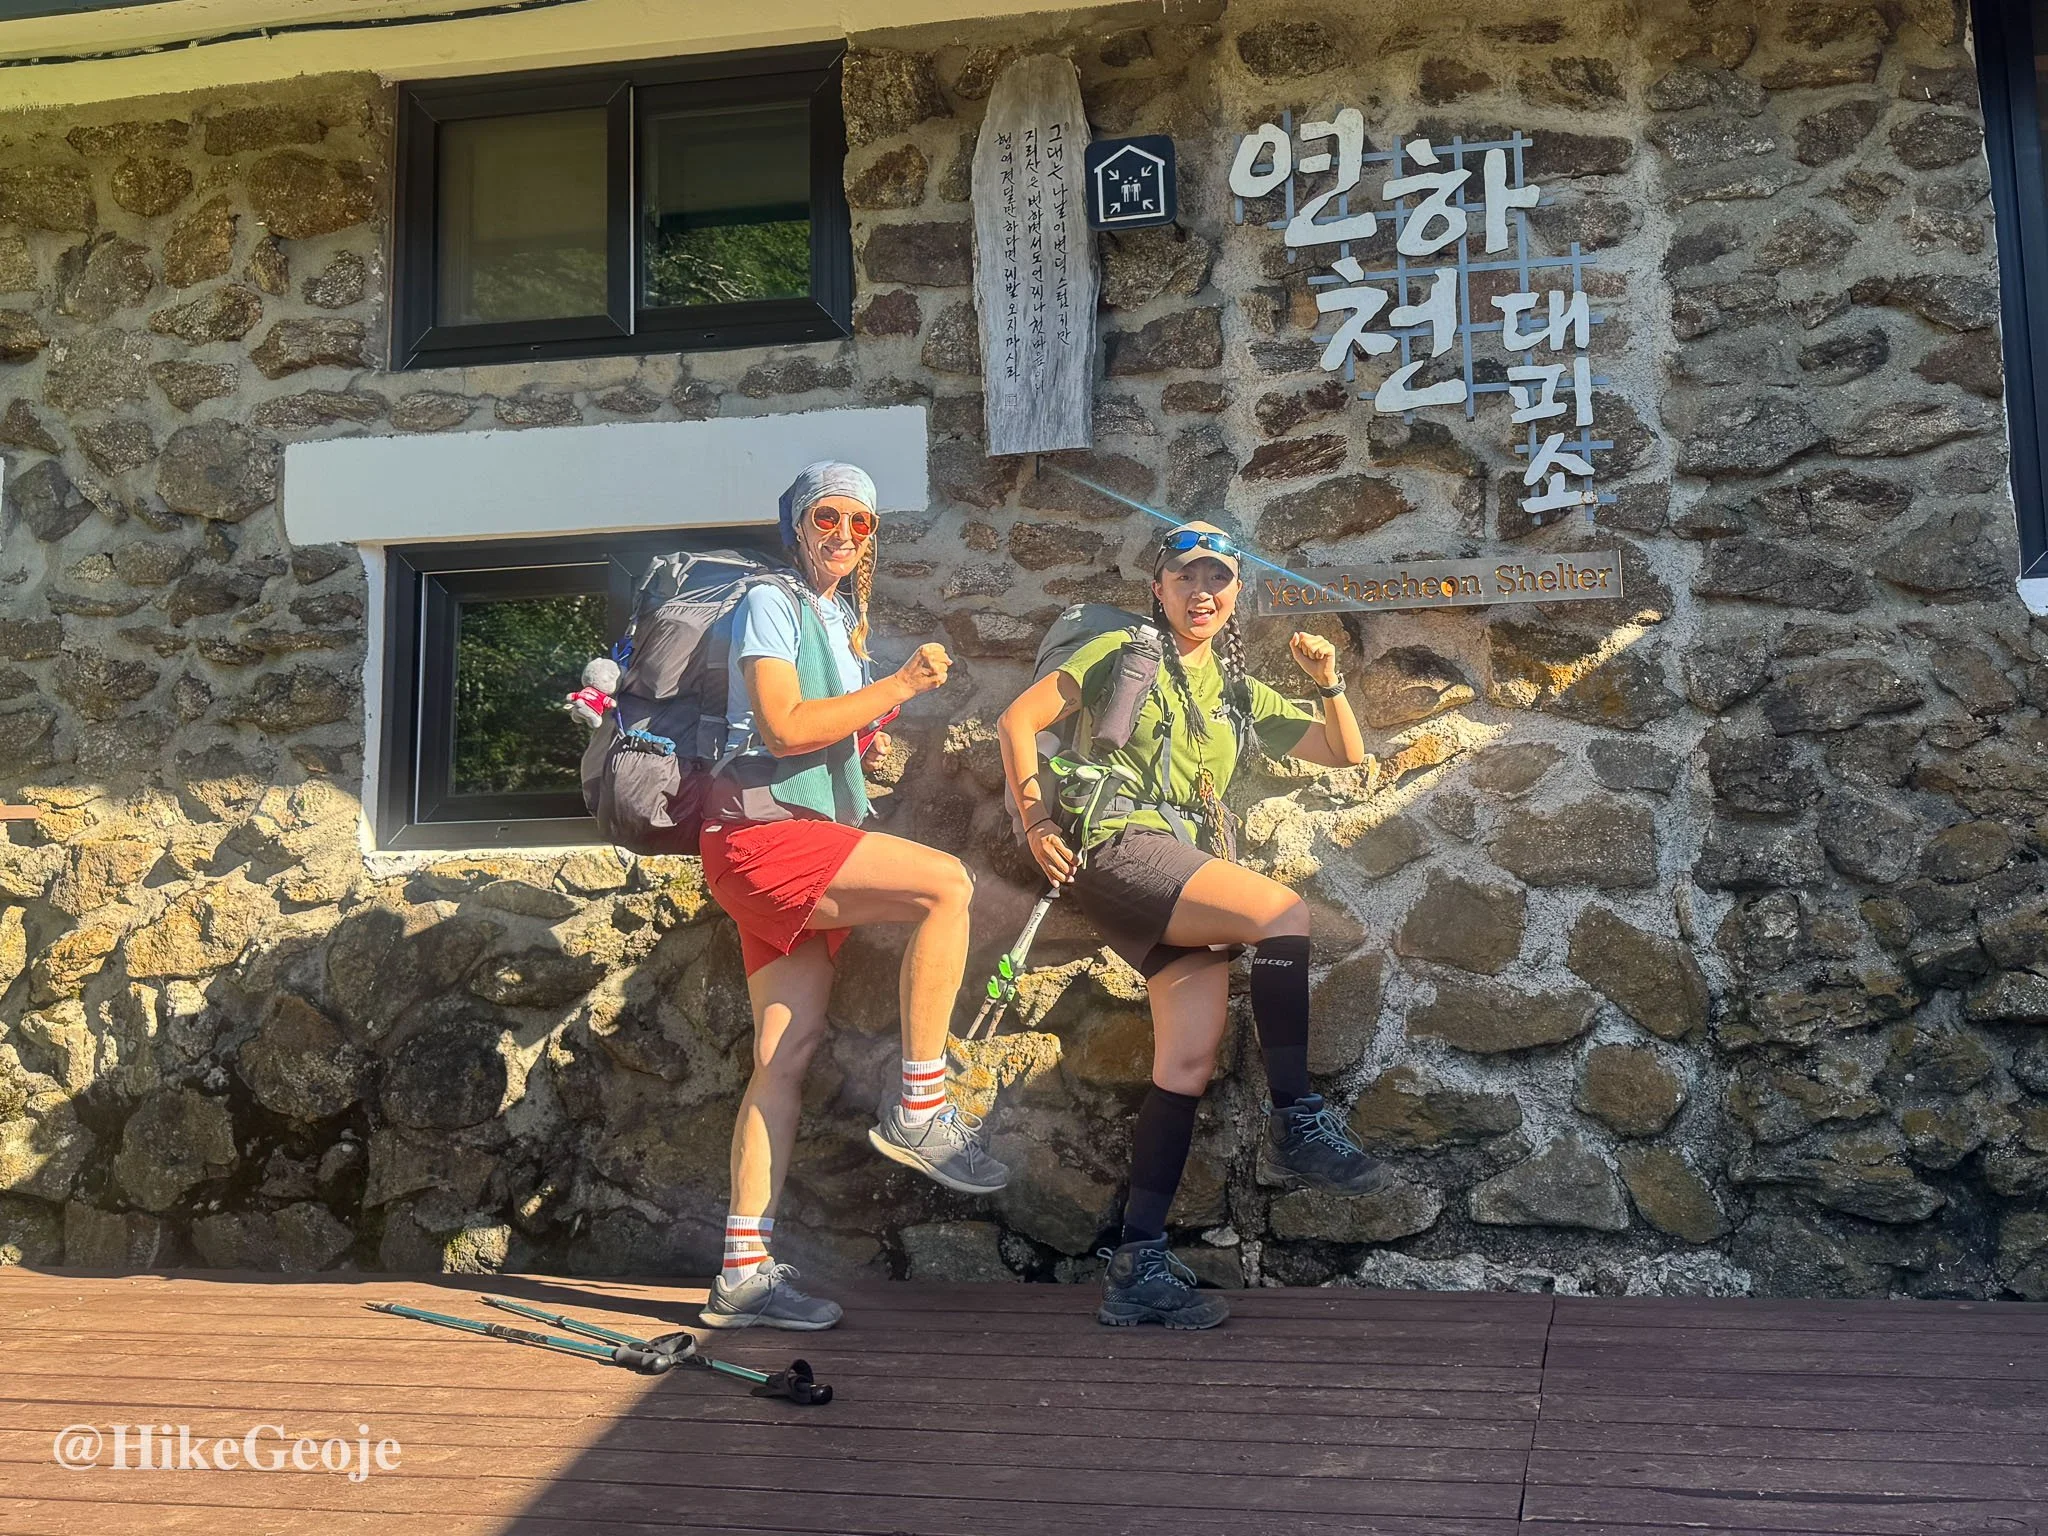
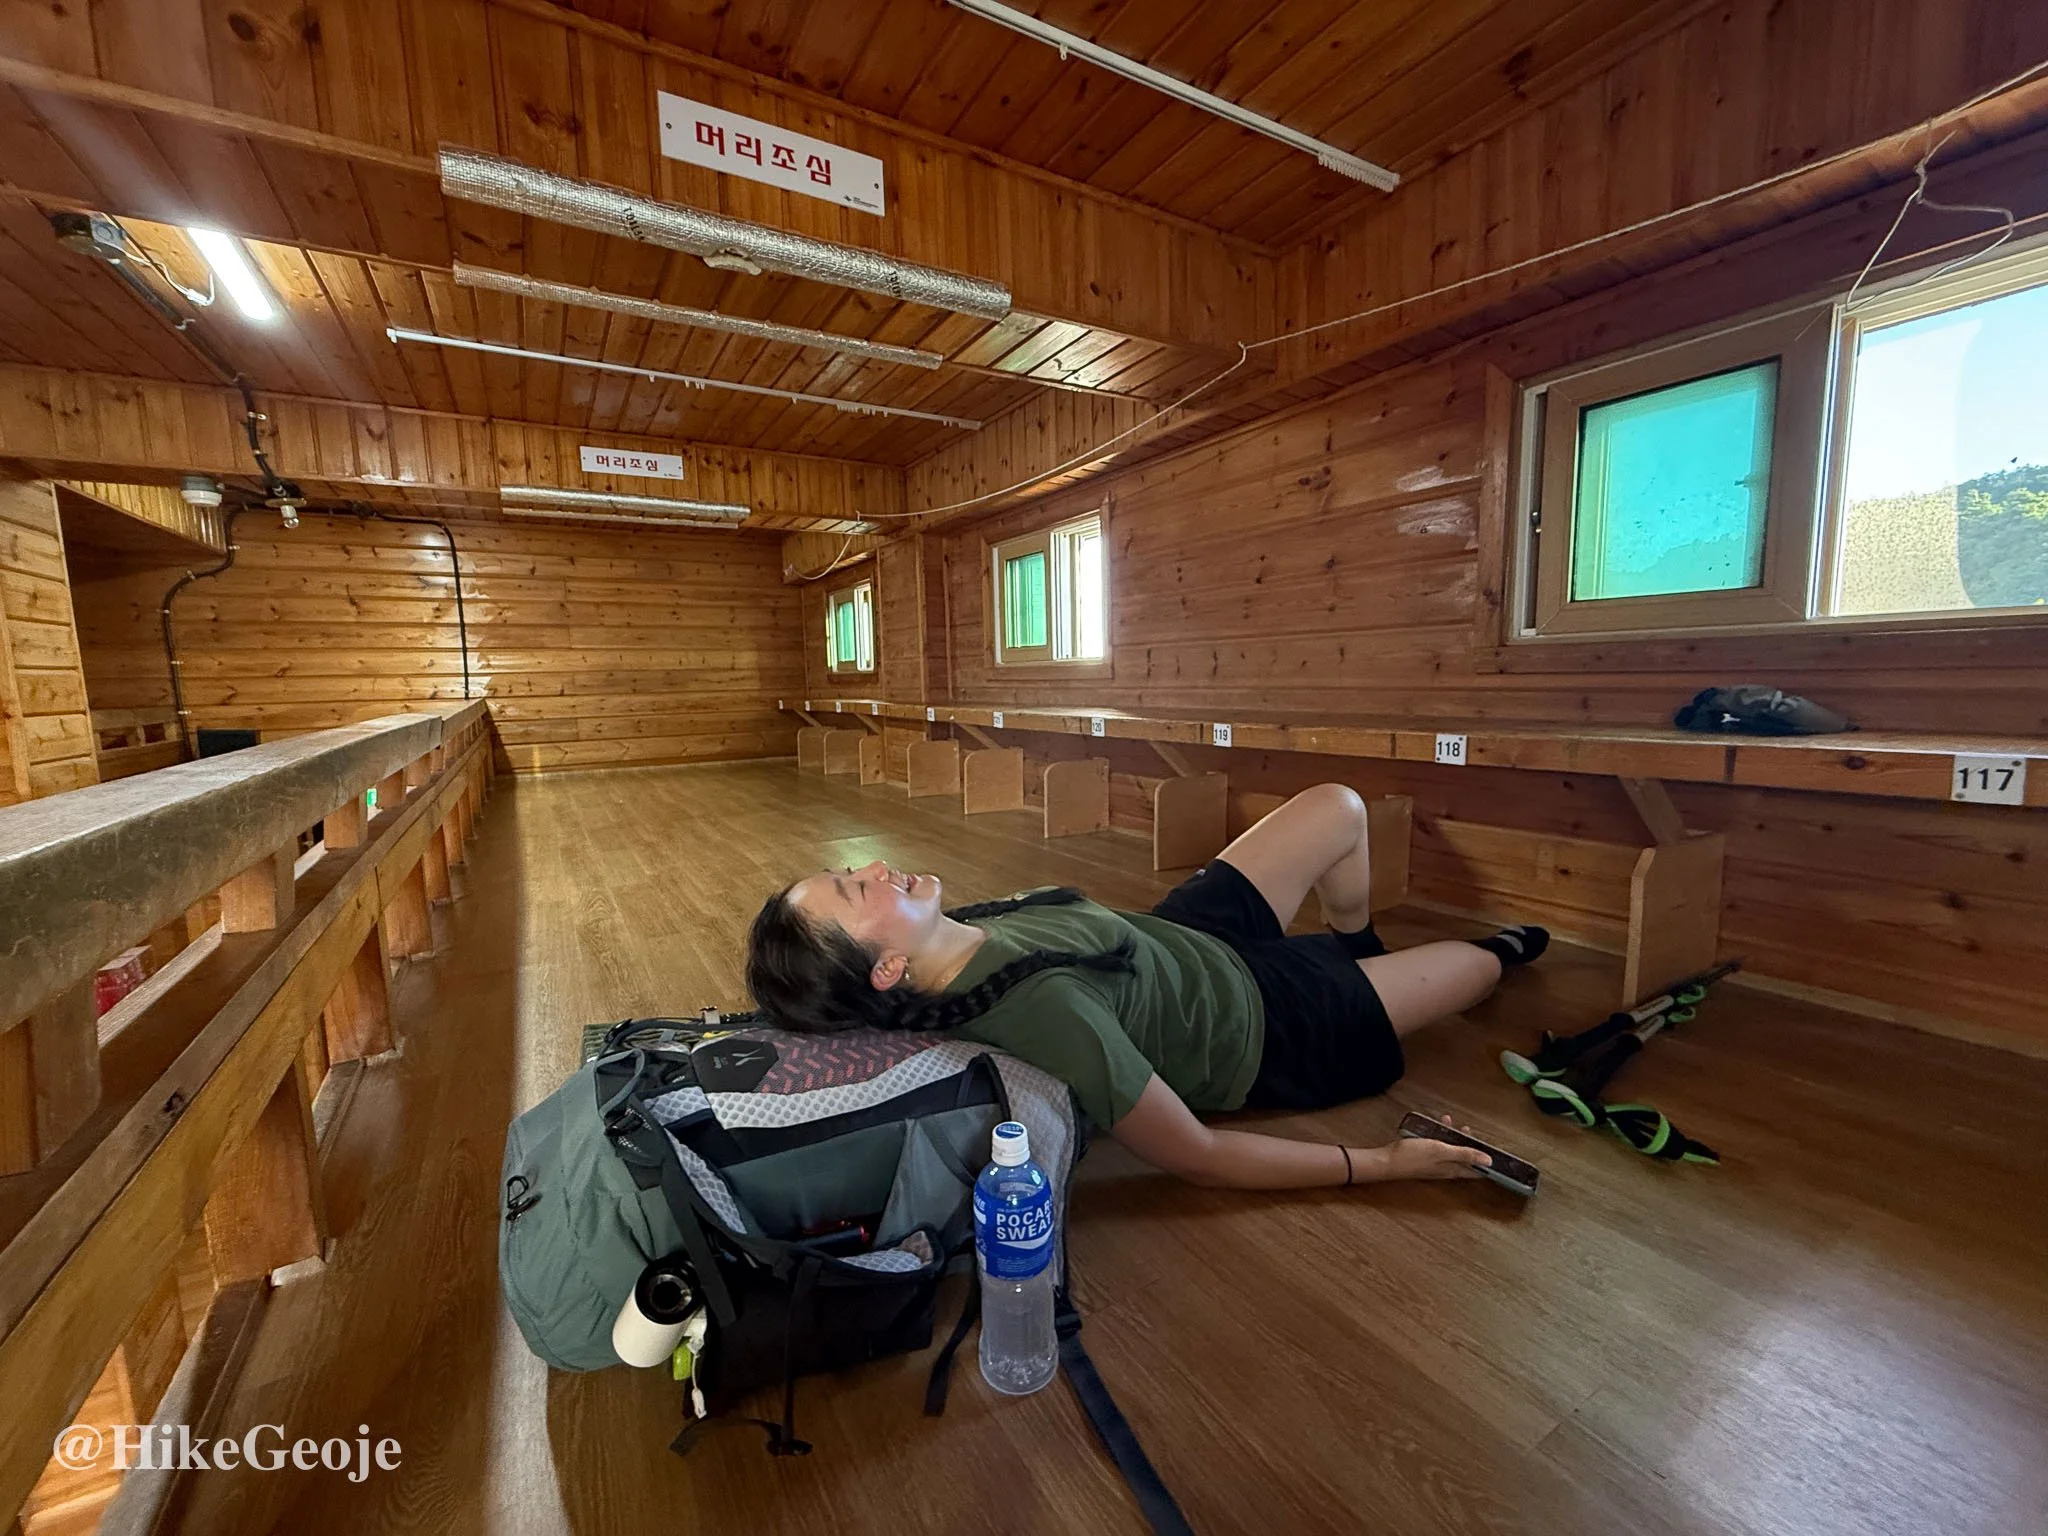
By early afternoon, I reached Yeonhacheon Shelter. It was nothing fancy (no views, outhouse bathrooms) but the rangers were friendly and handed out salt tablets and vitamin C at check-in.
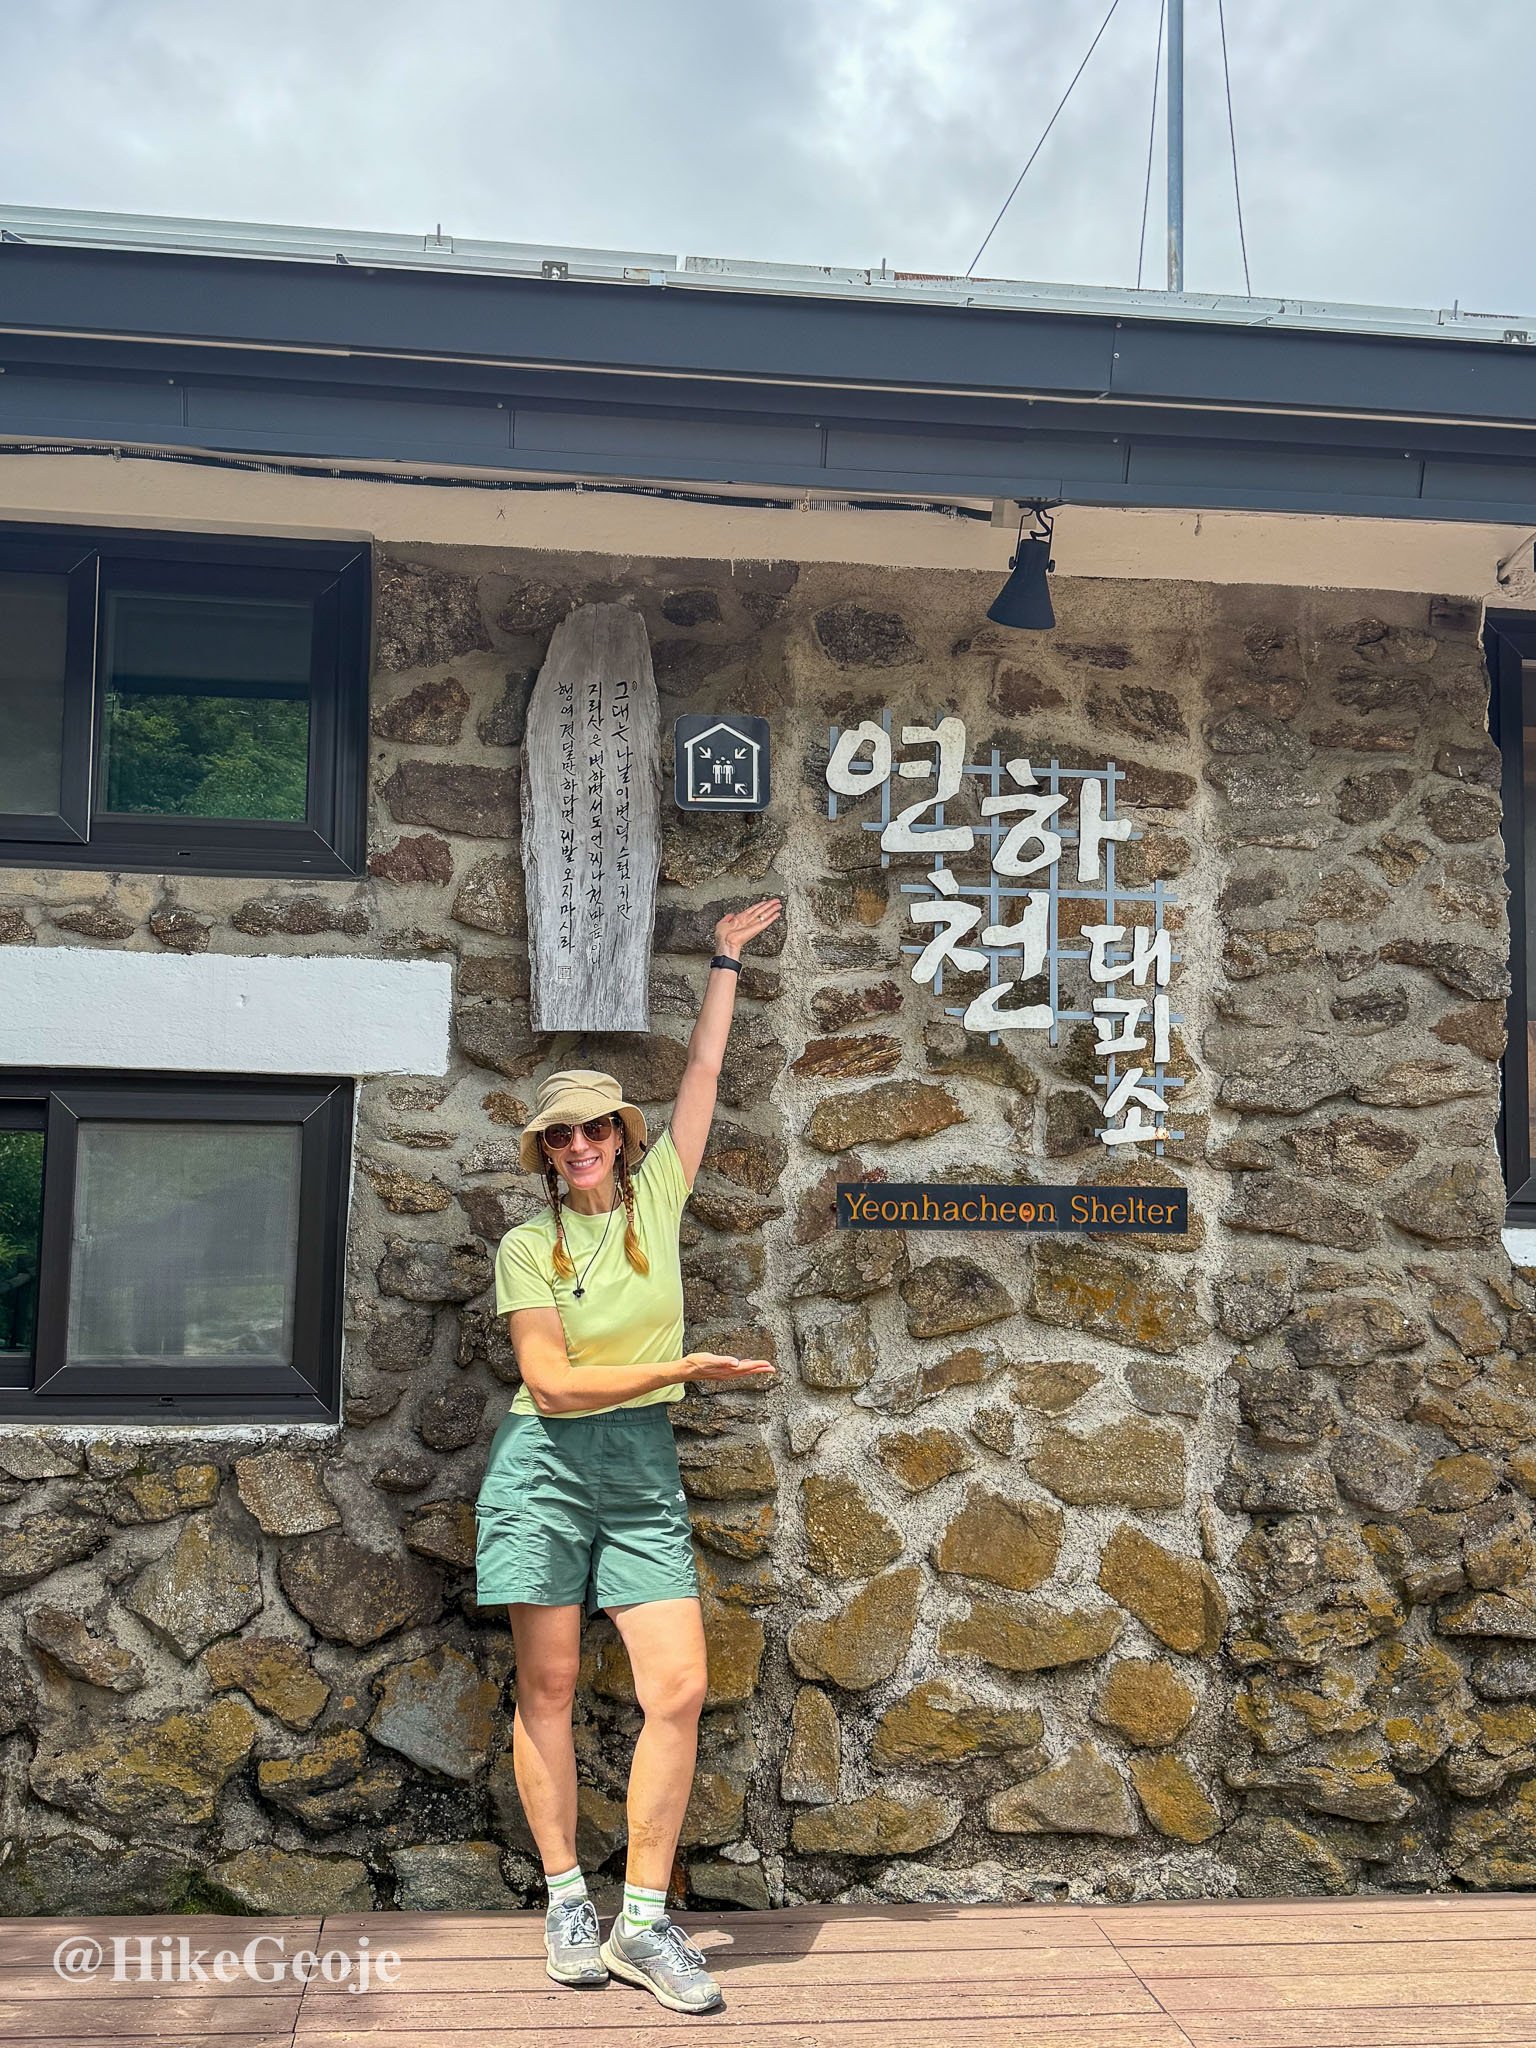
Yeonhacheon Shelter
Yeonhacheon Shelter
More importantly, I met Yejin, another solo hiker. We clicked instantly, swapping hiking stories over coffee and later sharing dinner and being bunk mates. It turned out she’d be my hiking buddy for much of the rest of the trail.
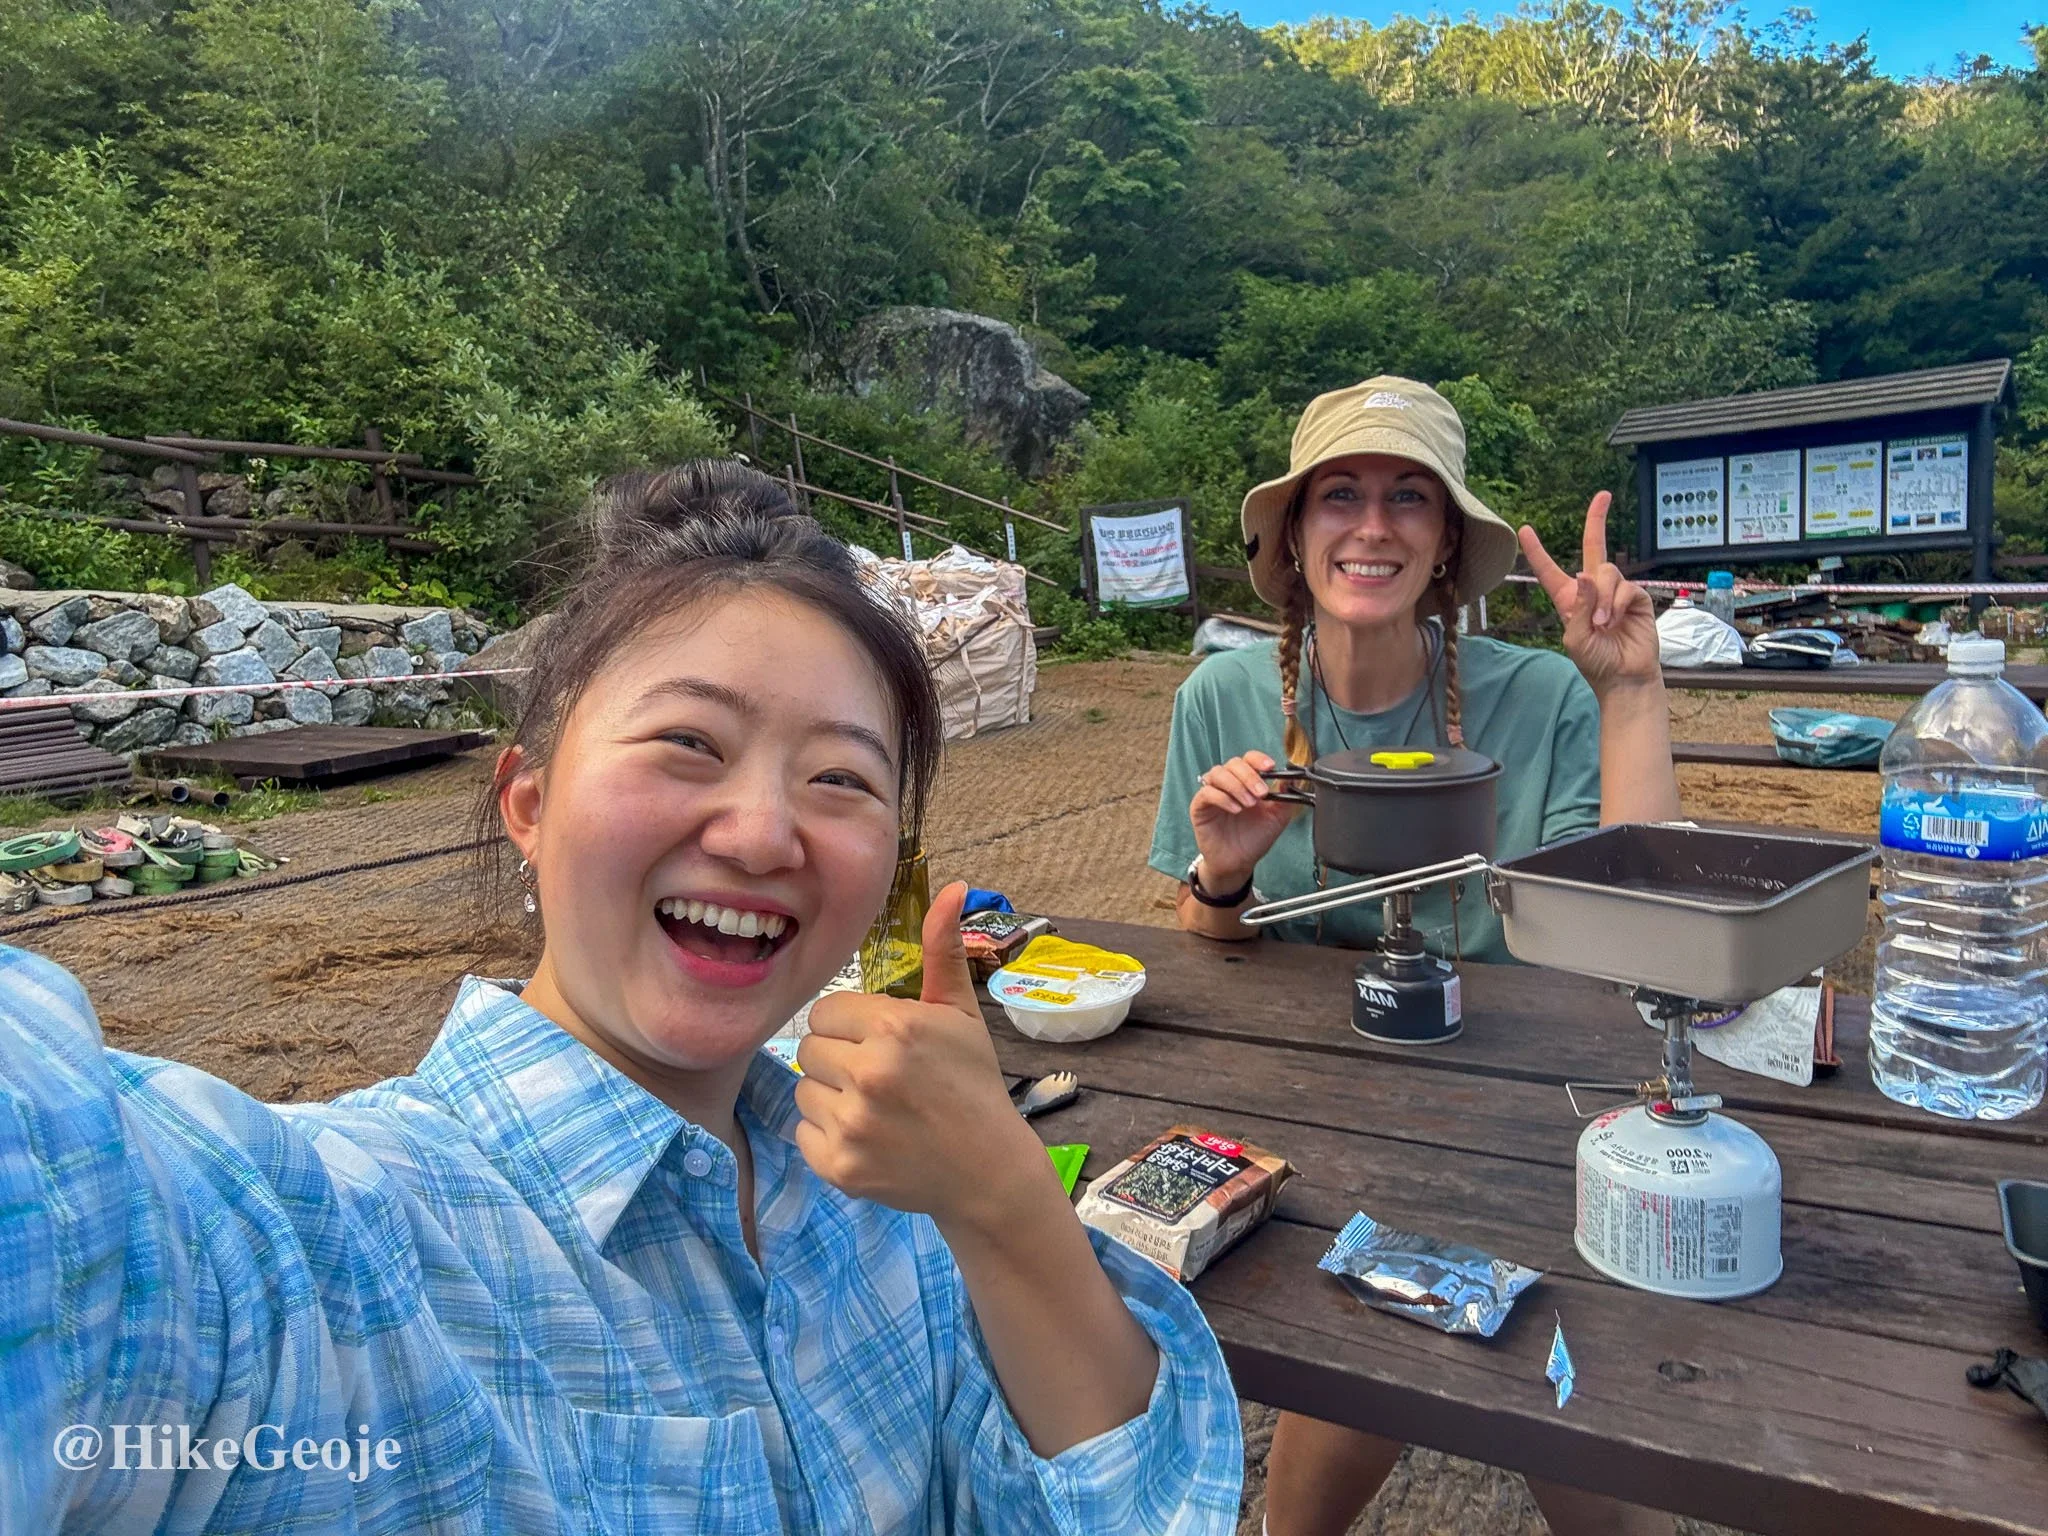
Yejin and I having our dinner.
Day 2 – Yeonhacheon → jangteomok
We decided to sleep in and start late since our distance was shorter. It was the most beautiful day of the hike. Clear skies stretched forever, and from the ridge we could see all the way to Yeosu and the sea.
…and we’re off!
Along the way we passed Byeoksoryong Shelter (better views than Yeonhacheon, flush toilets too) and stopped for lunch at Seseok Shelter. By then it was blazing hot, so standing in the shade to eat was the only option.
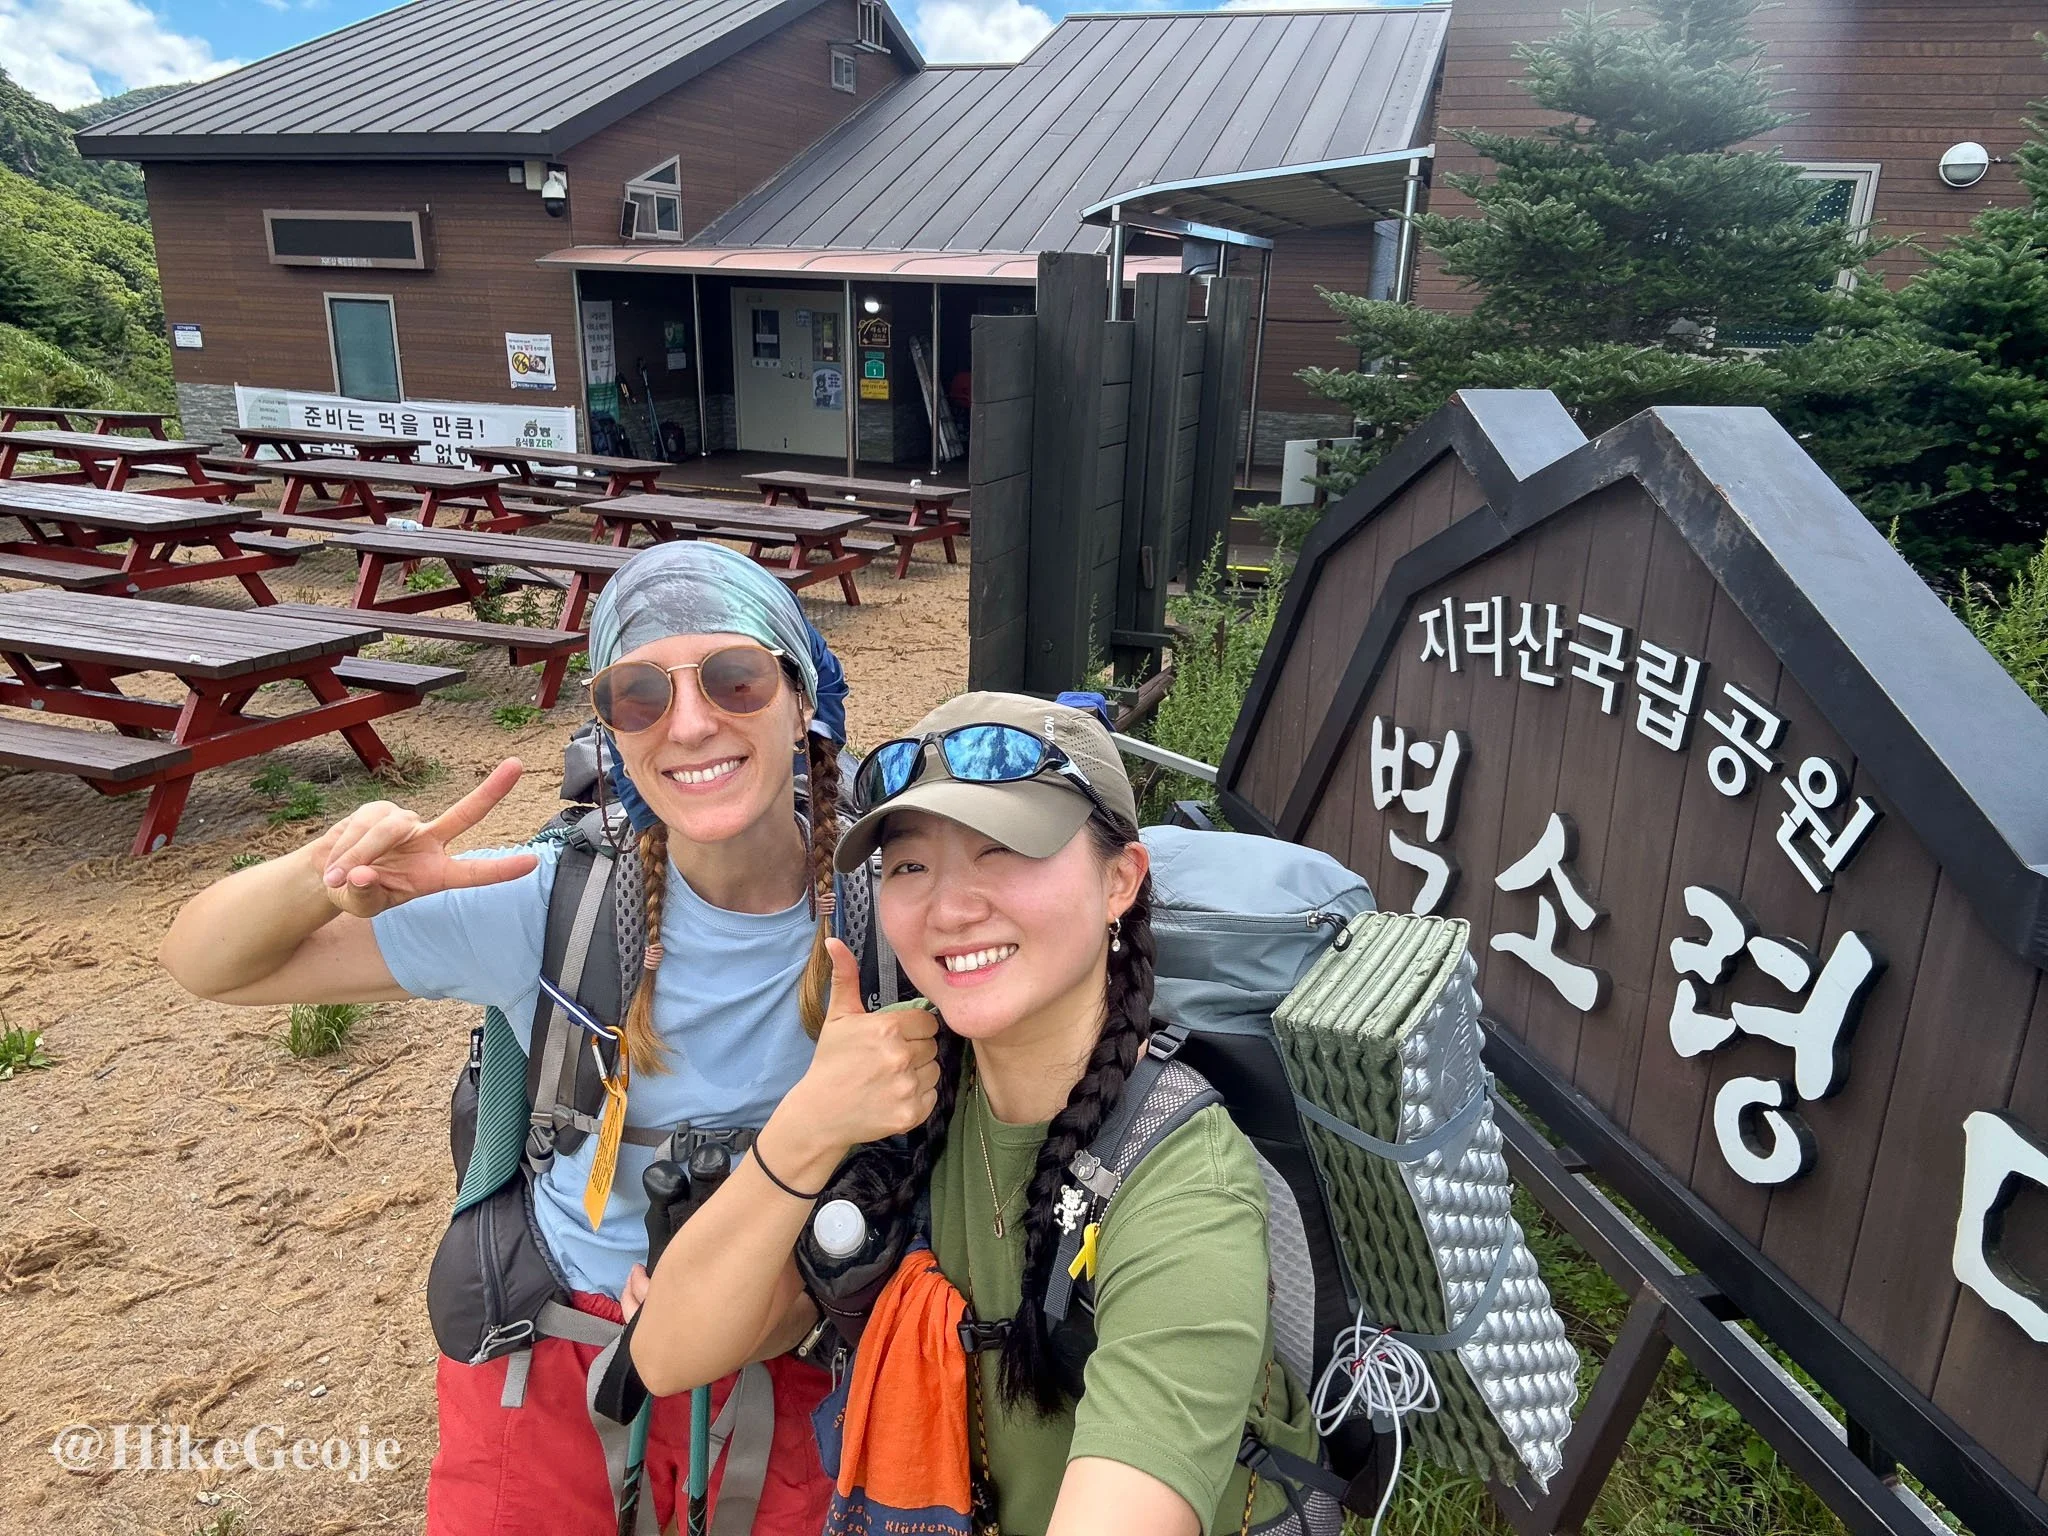
Byeoksoryeong Shelter
Moving on from Byeoksoryeong Shelter
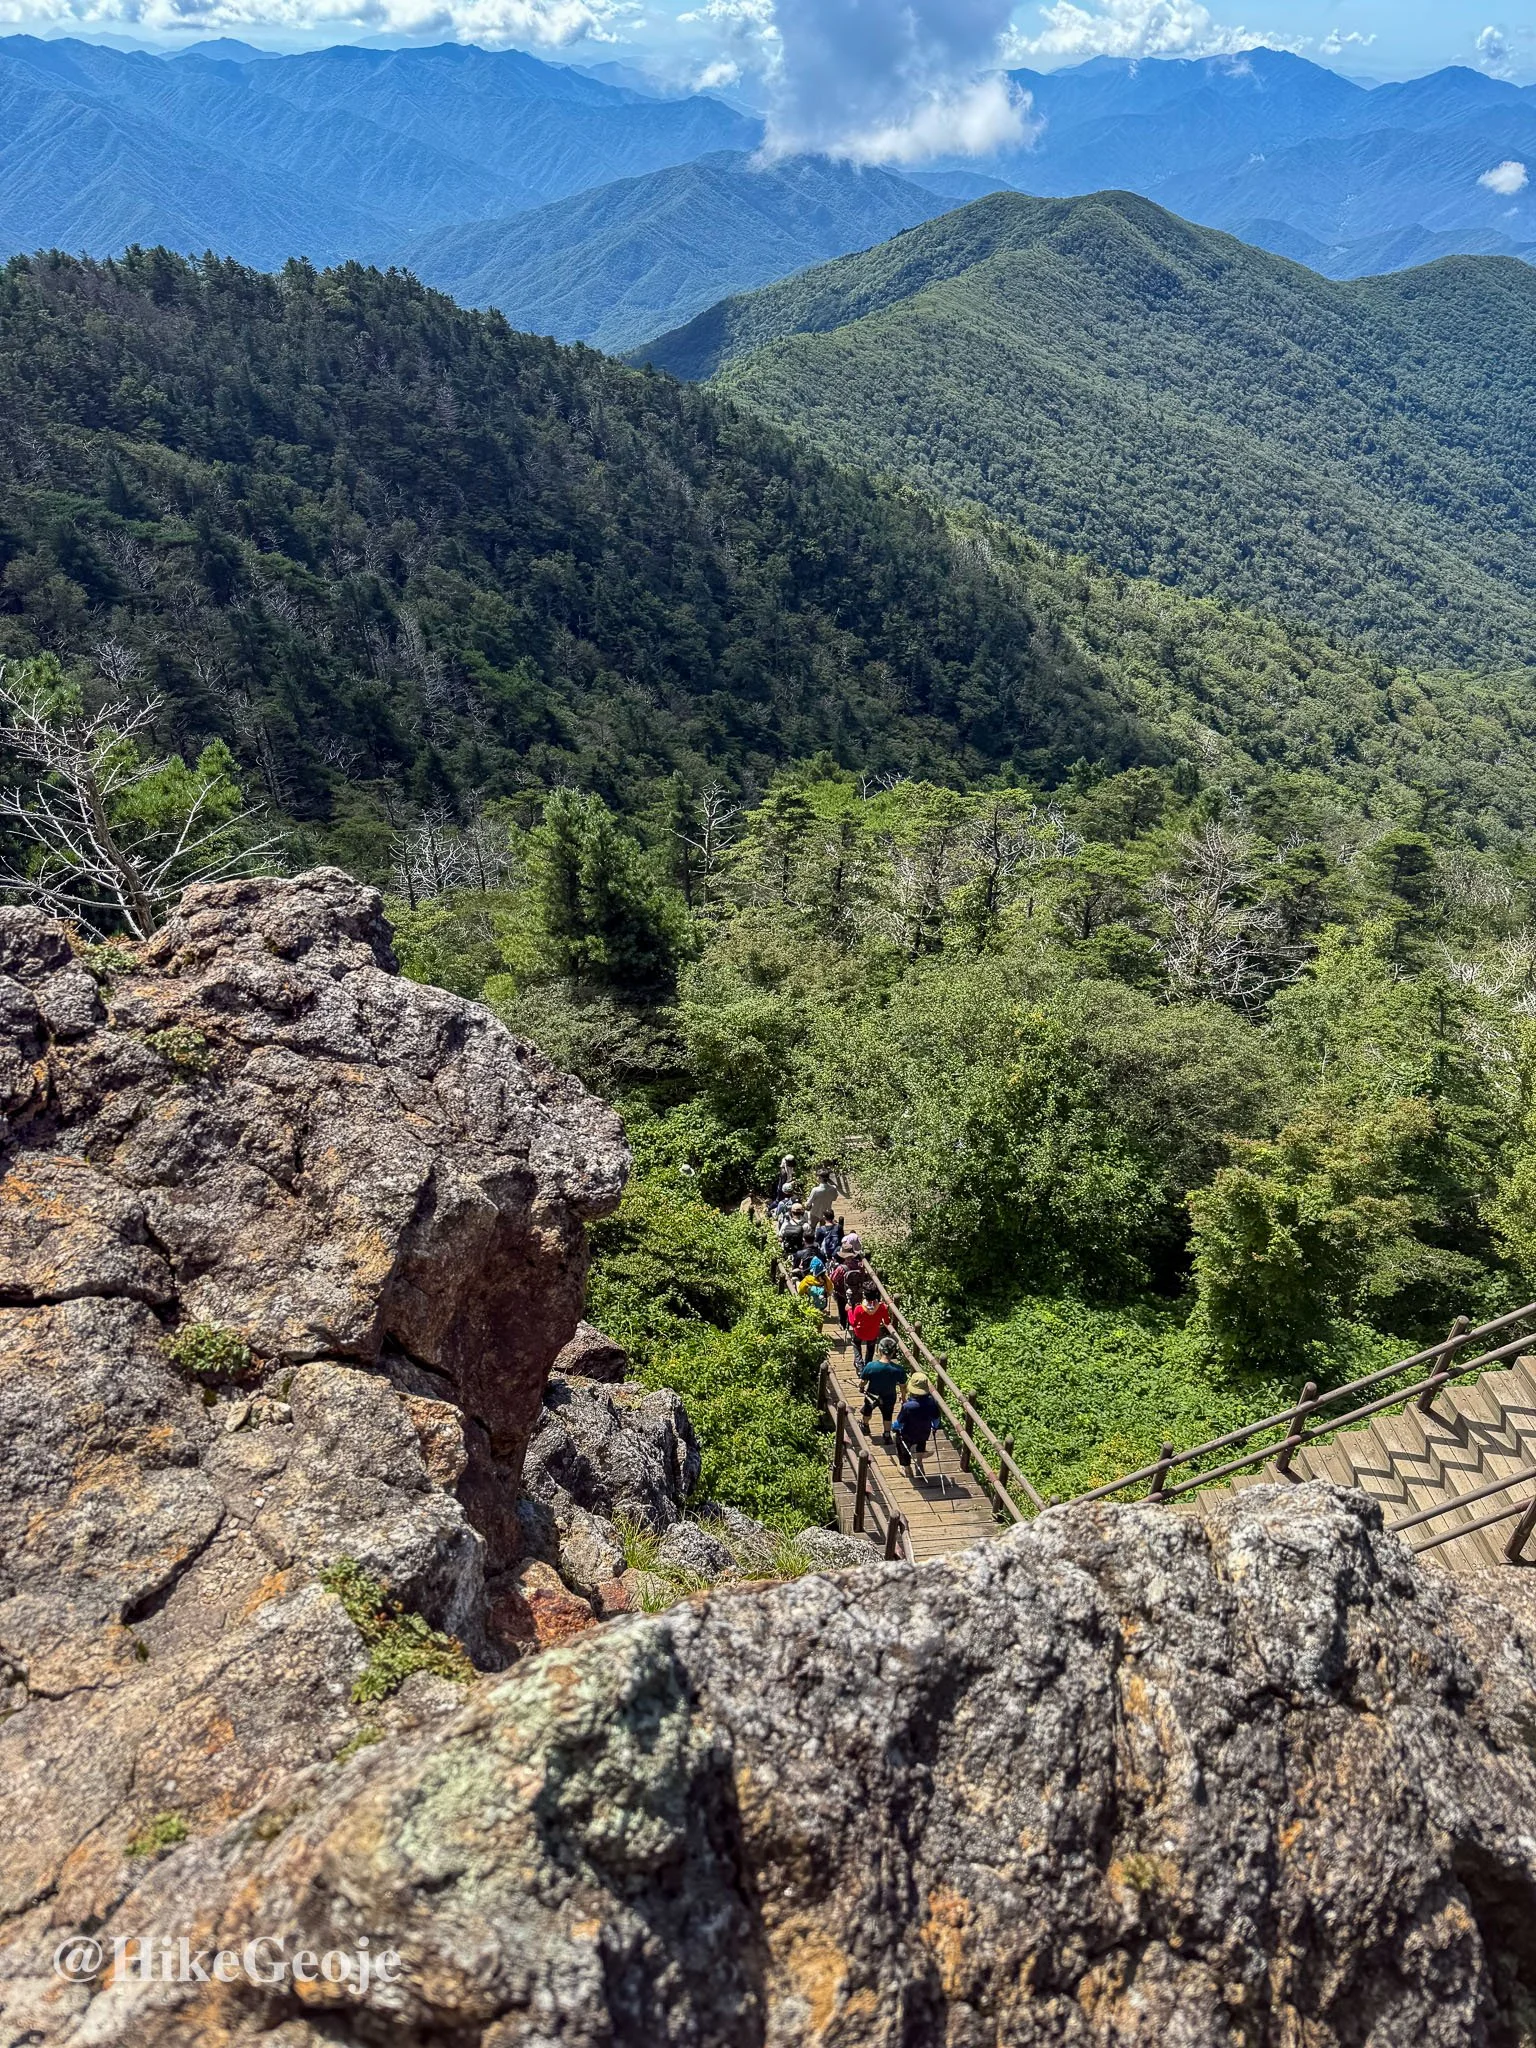
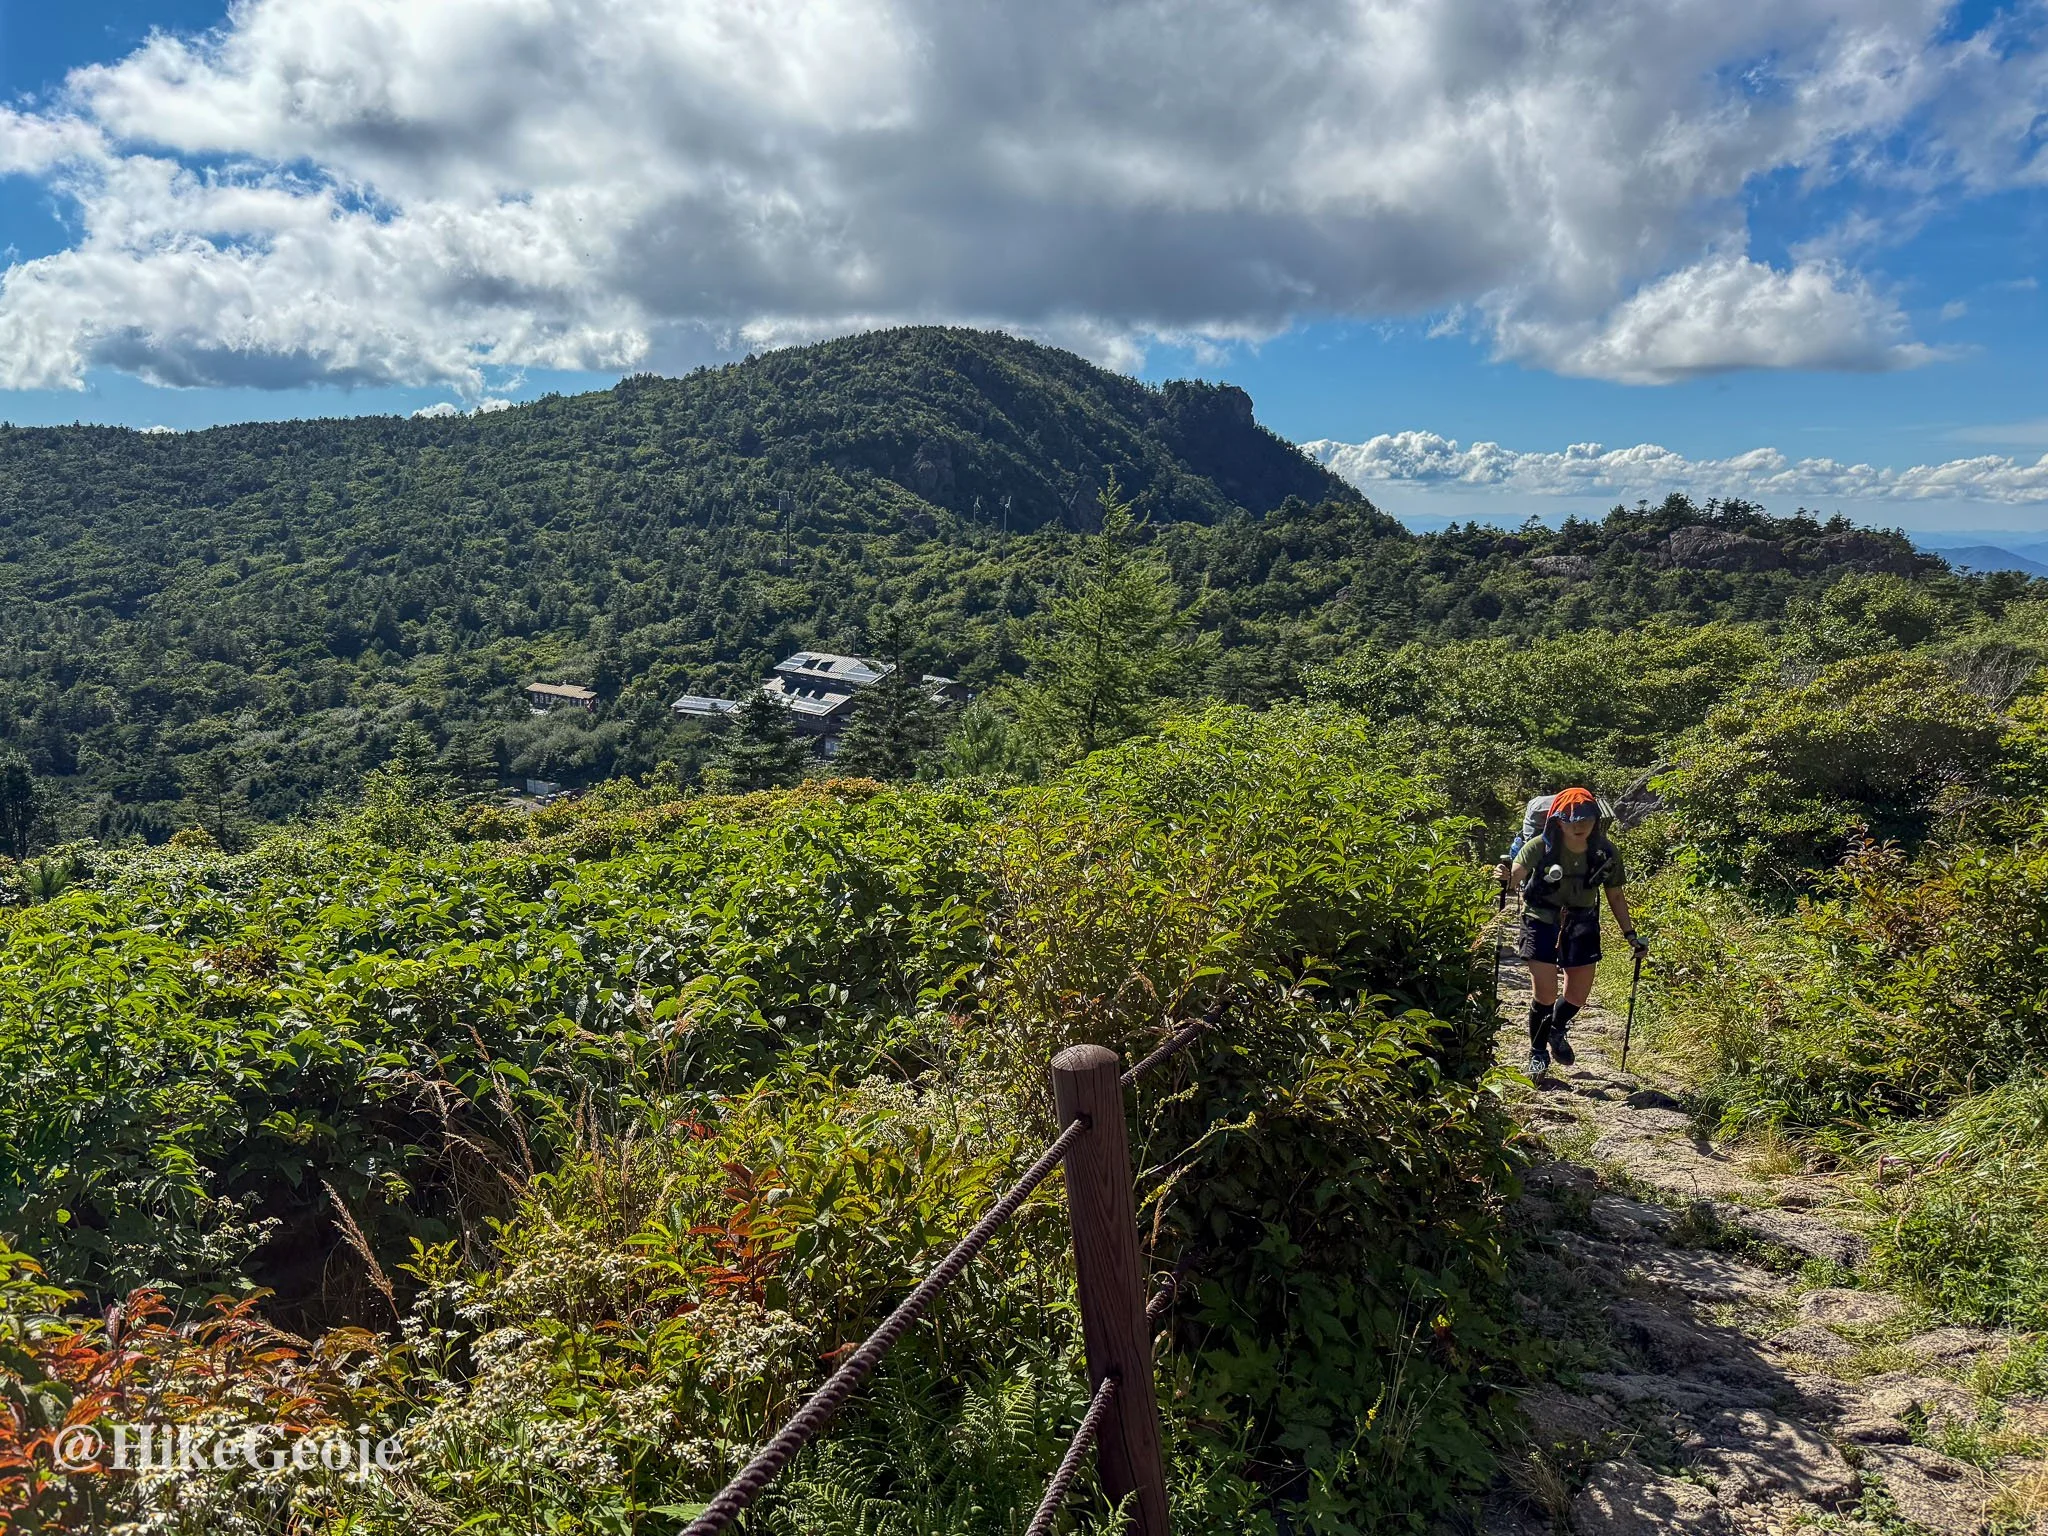
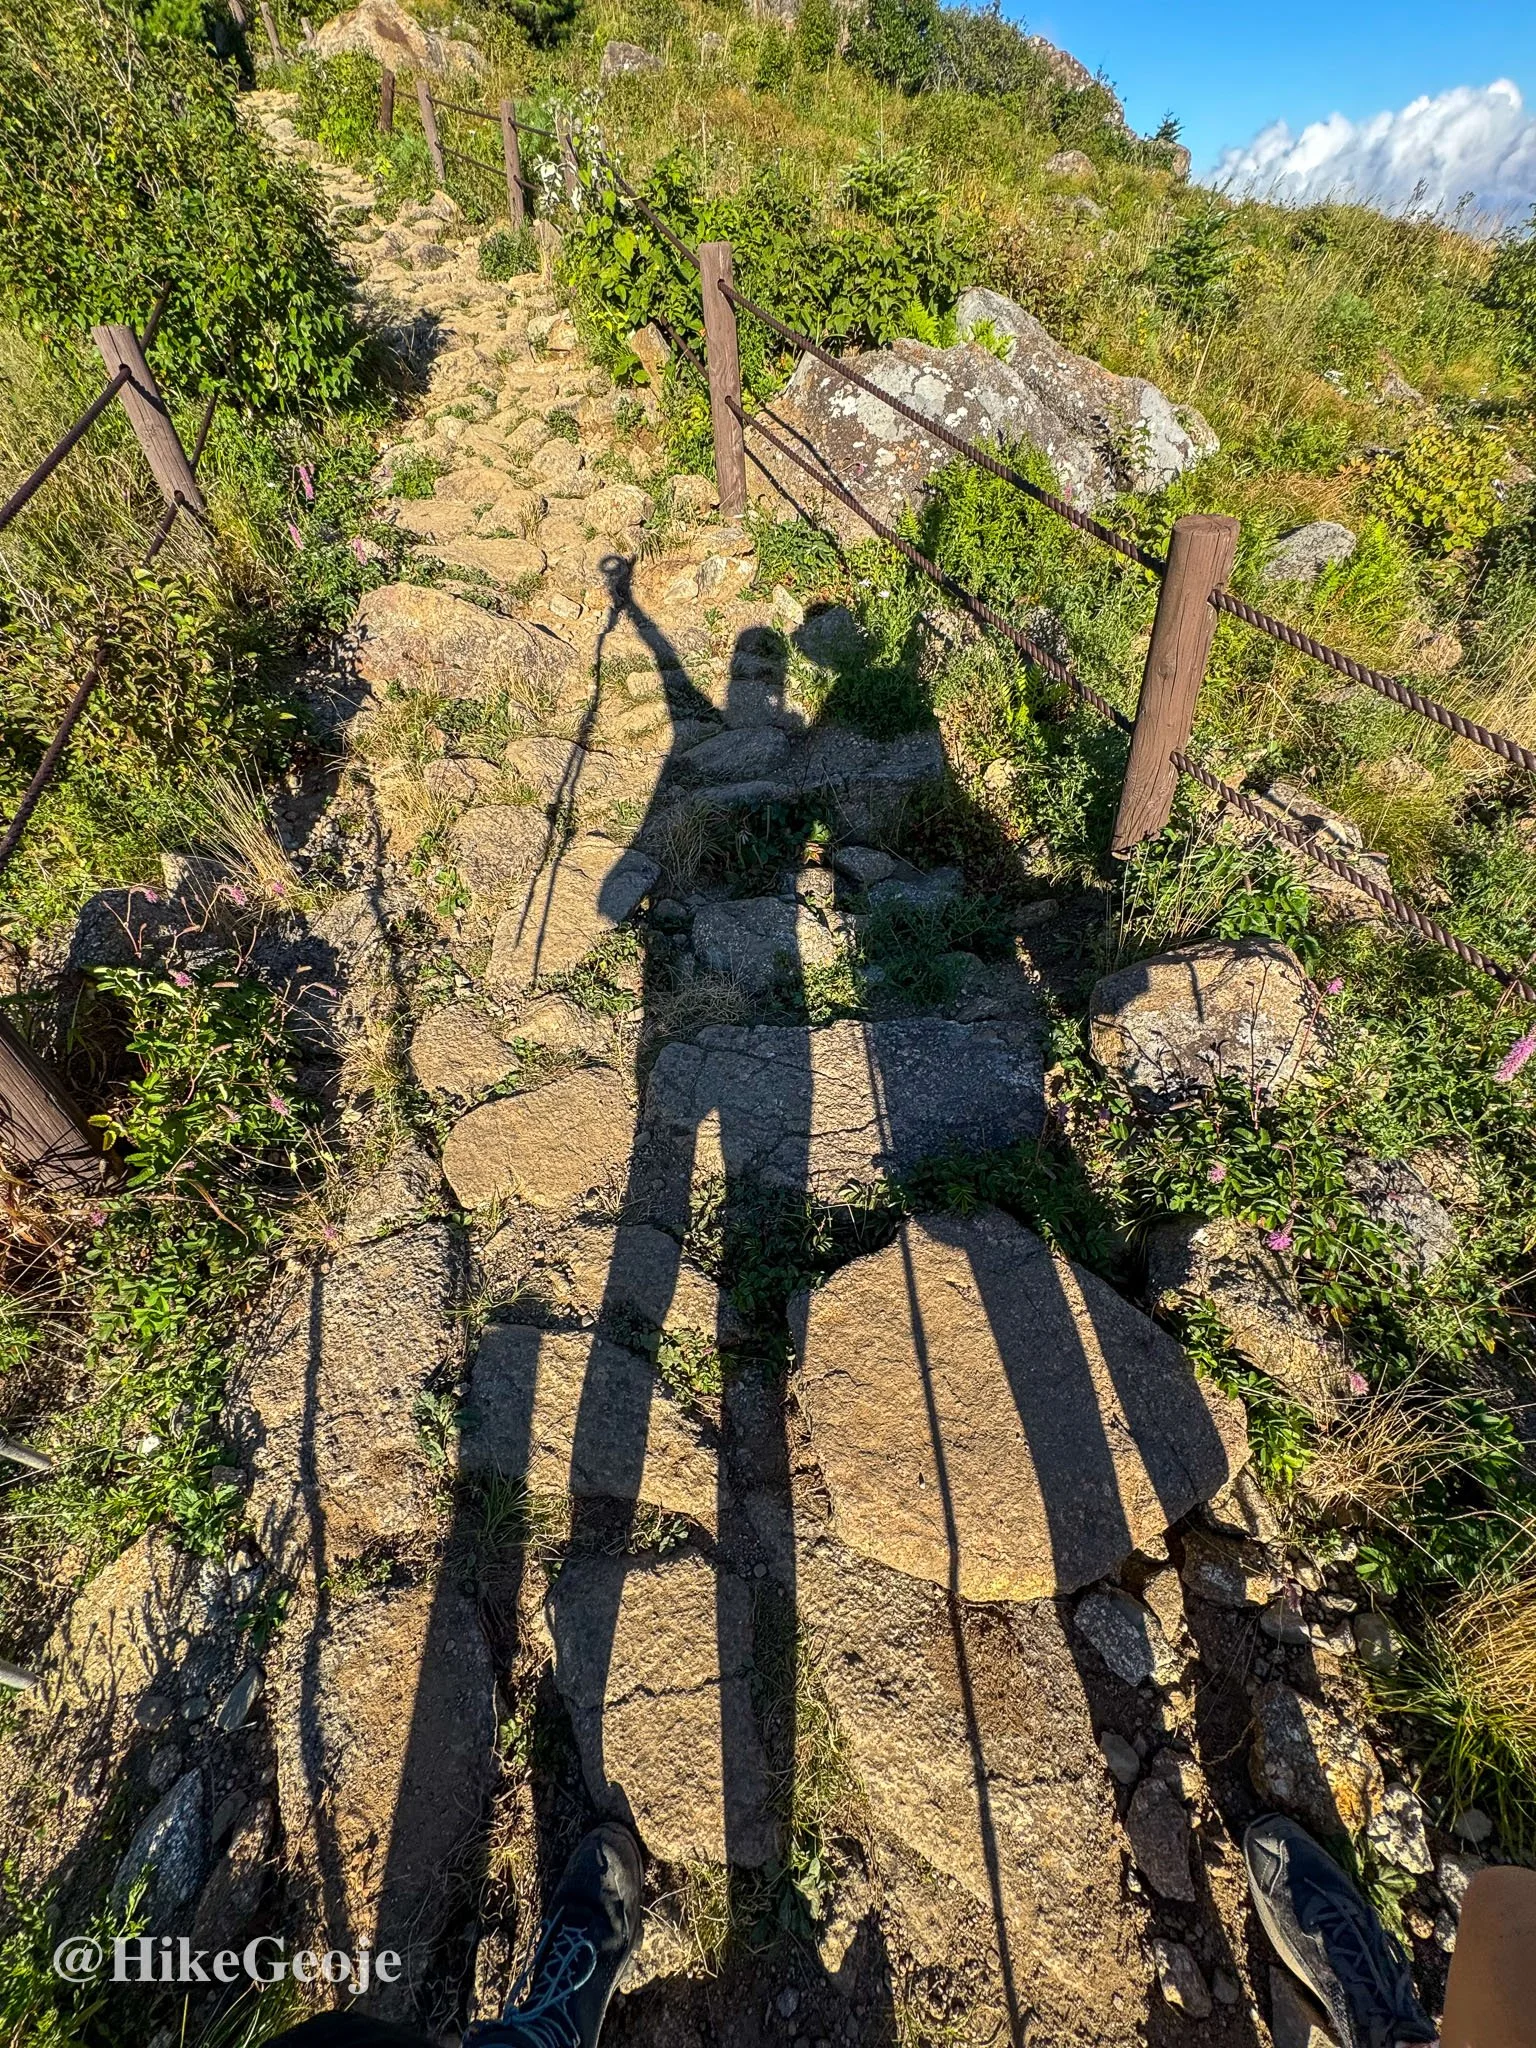
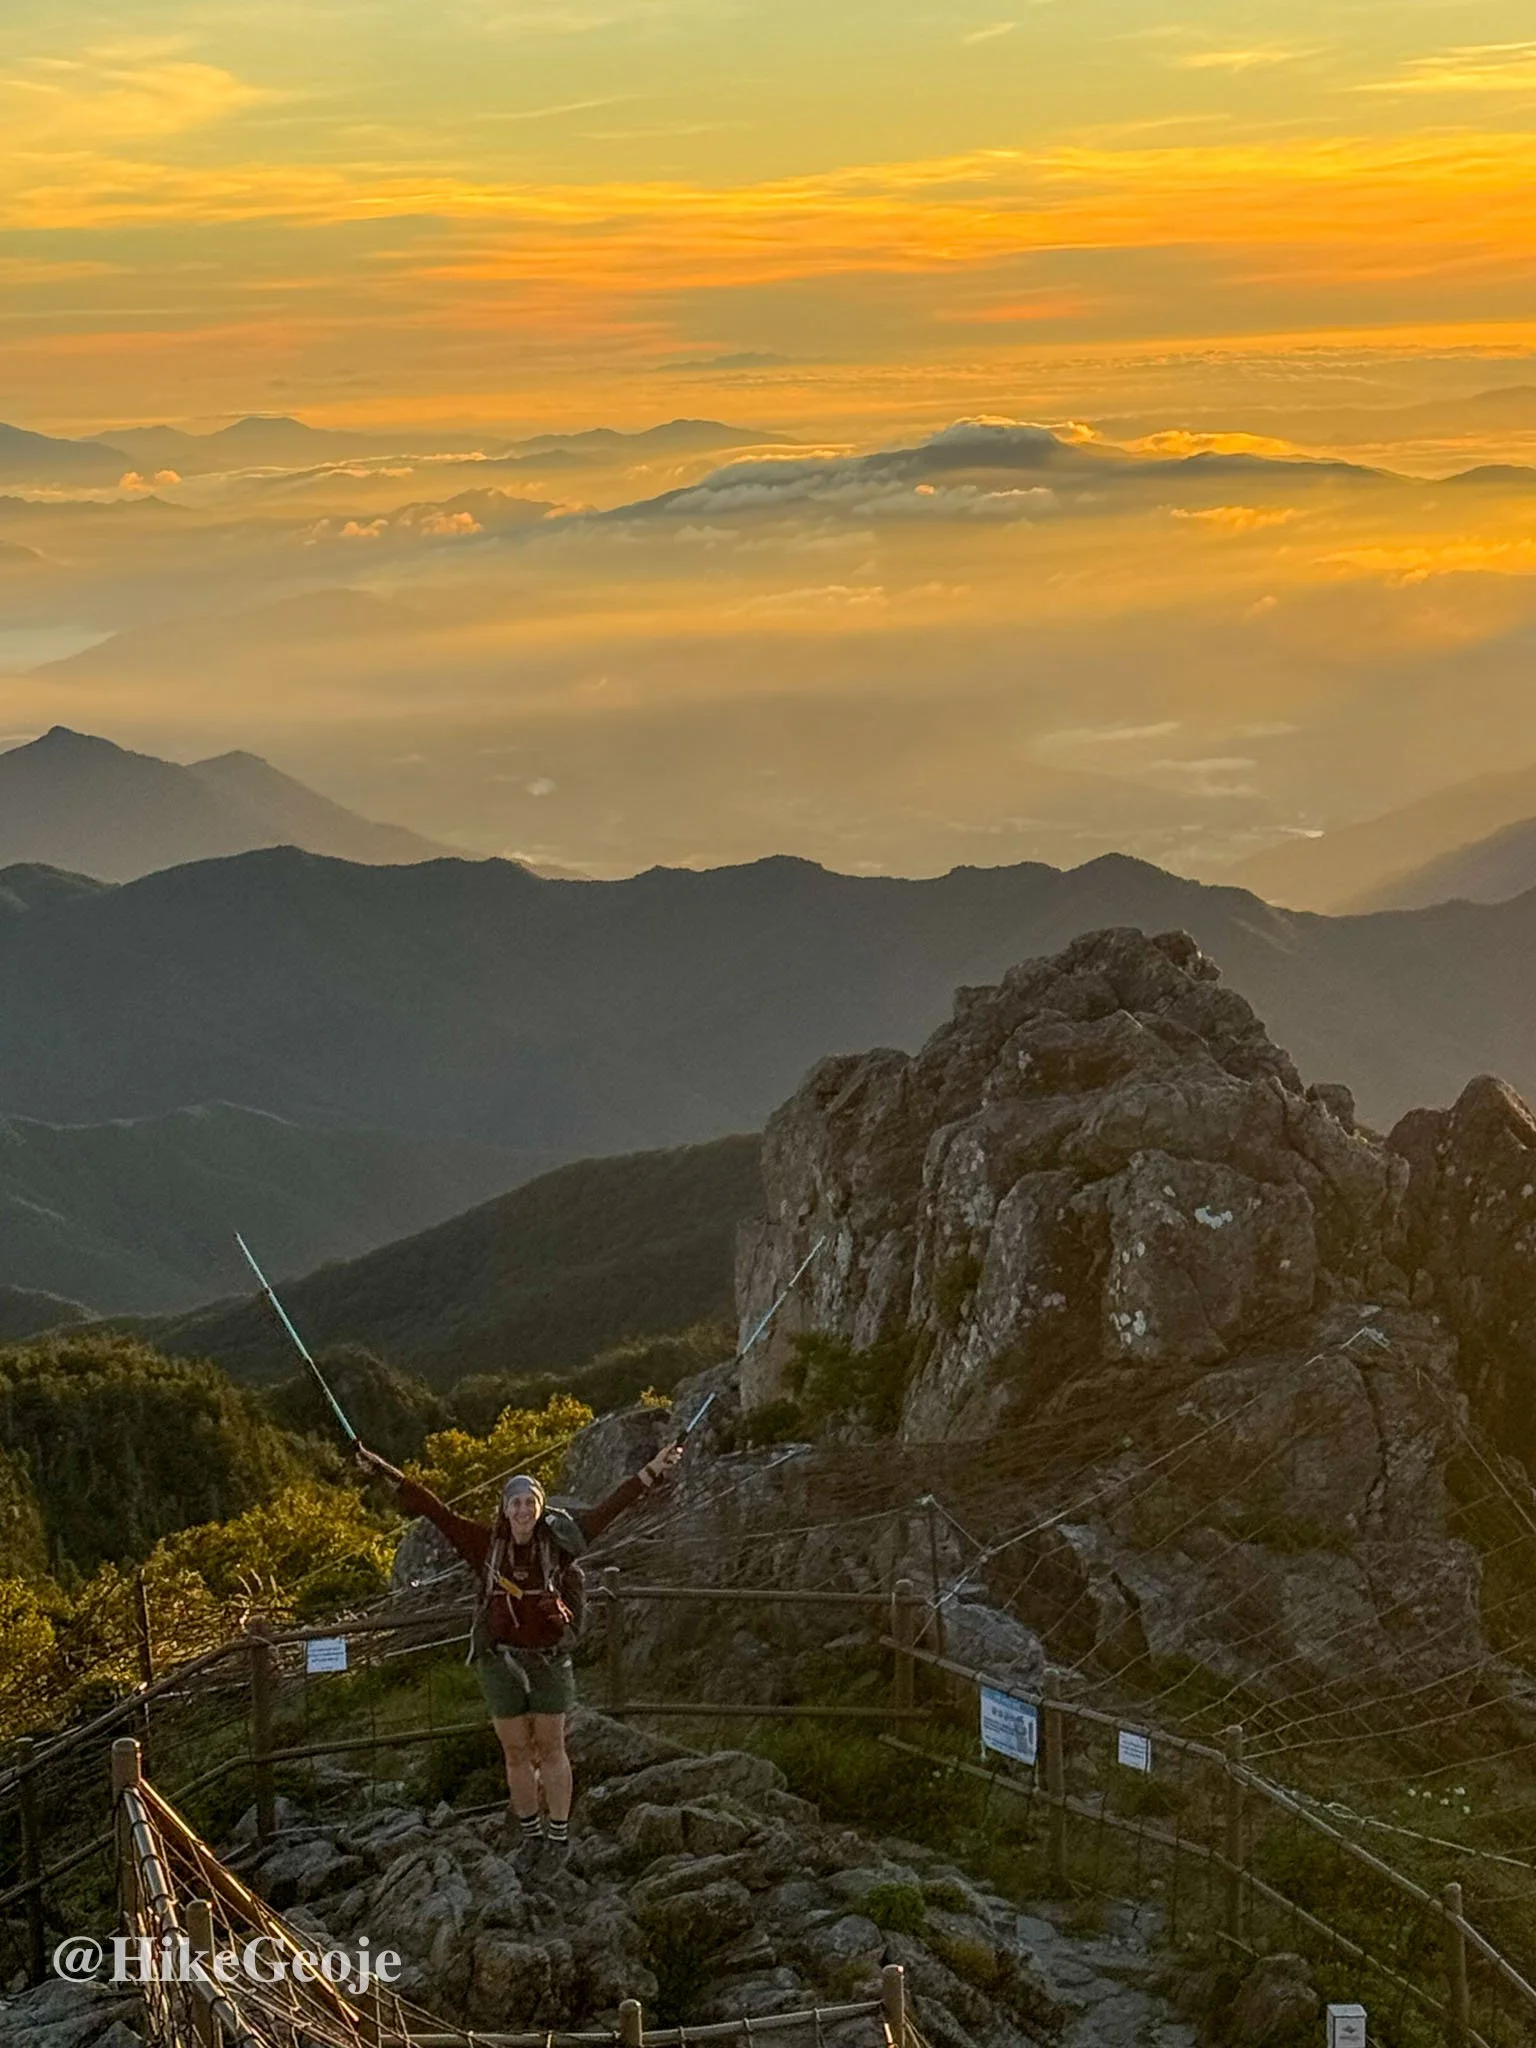
The highlight came shortly after: Chotdaebong (촛대봉). Giant rocks jutted from the ridge, perfect for scrambling and taking in the views. We lingered there, snapping endless photos and soaking it in. I think this may have been my favorite section of the entire ridge.
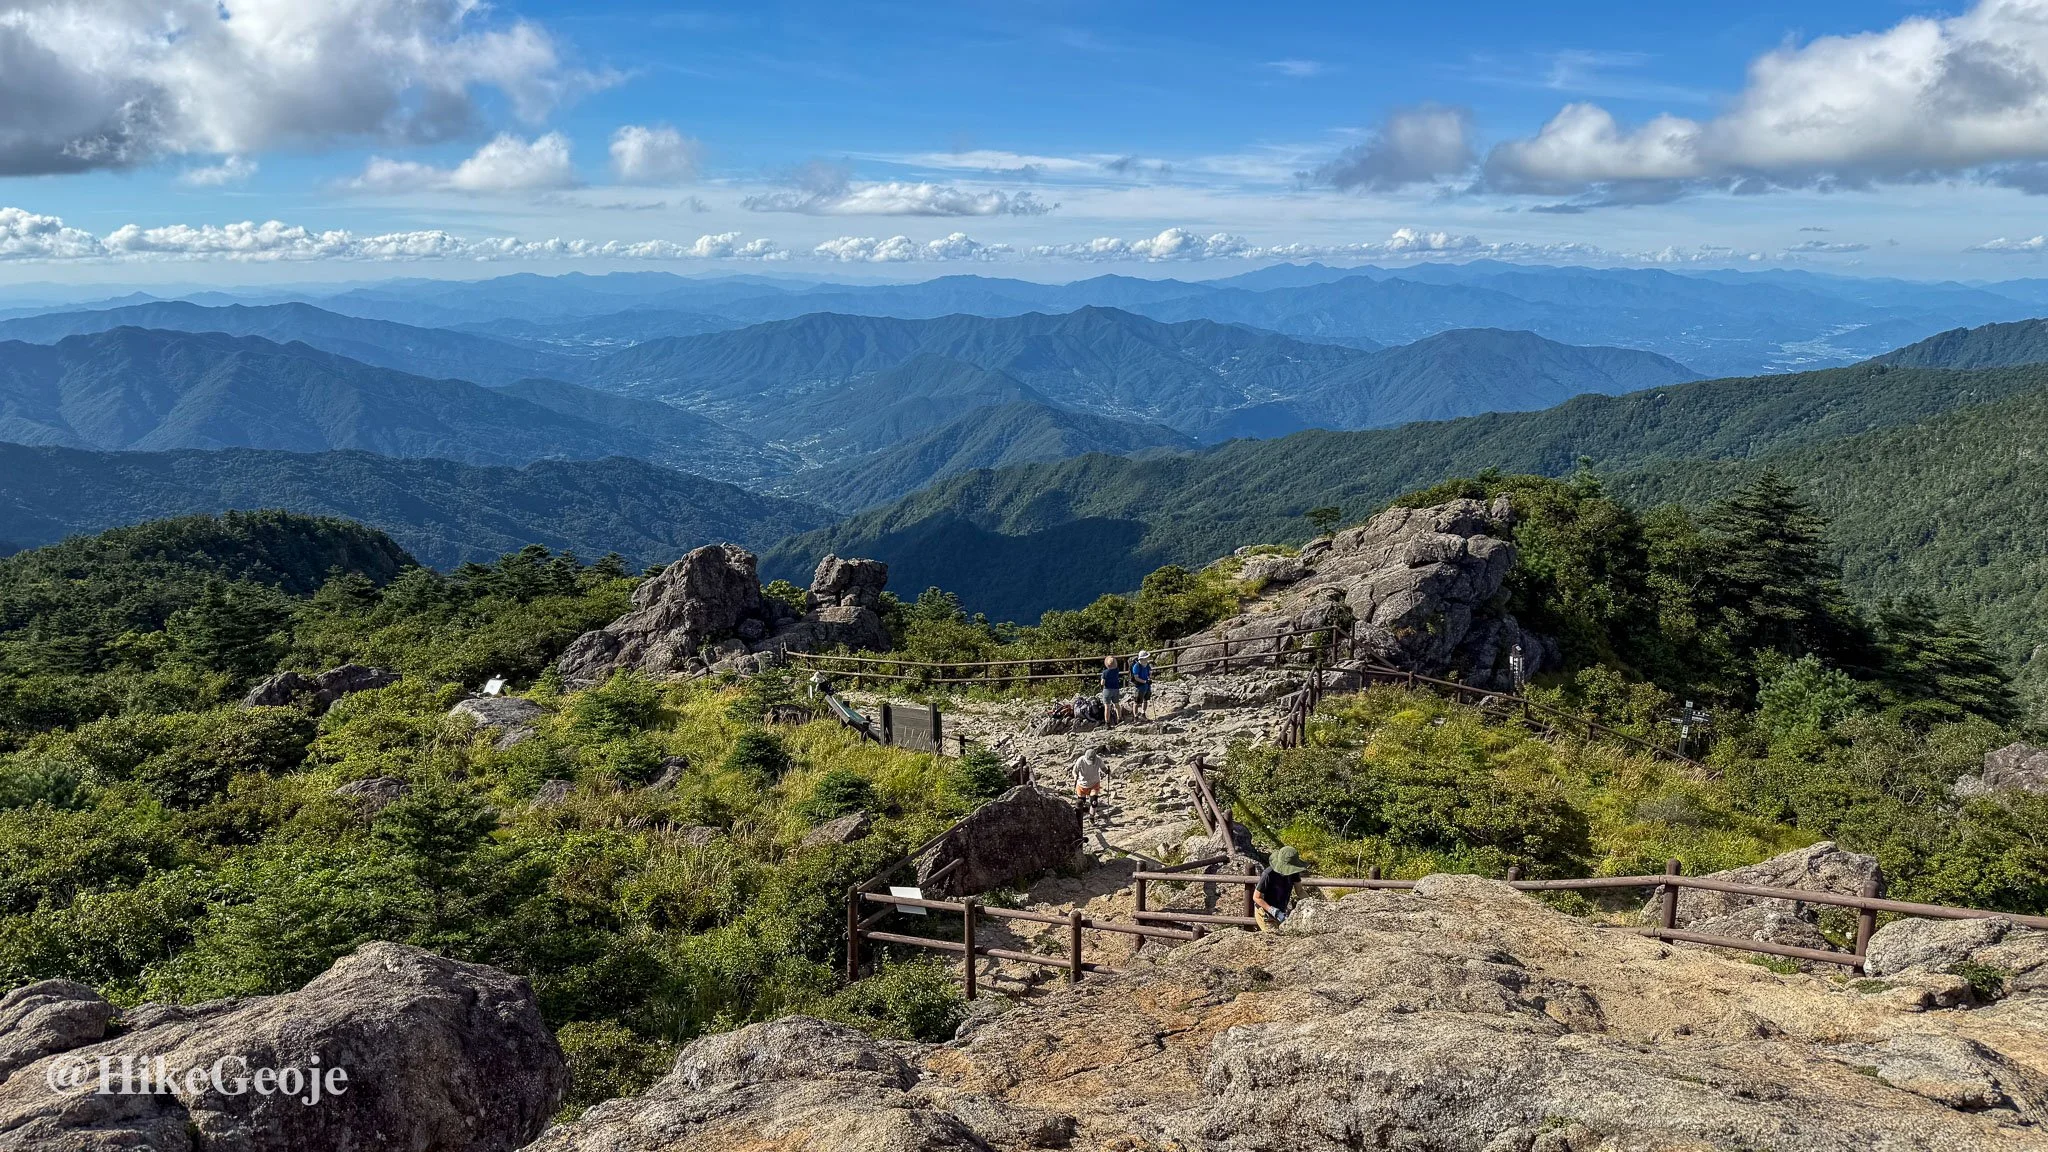
Because of the weather and the constant photo stops, progress was slow. But it didn’t matter. Hiking with Yejin turned the day into a mix of laughter, rest breaks, and even a bit of language exchange — I taught her some English nature words, and she taught me the Korean equivalent.
By evening we reached Jangteomok Shelter, notorious for its narrow sleeping slots and smelly outhouses. But it also has the best sunset views on the ridge, and that night’s was magical - golden light spilling over peaks in both directions. We couldn’t have asked for a better ending to Day 2.
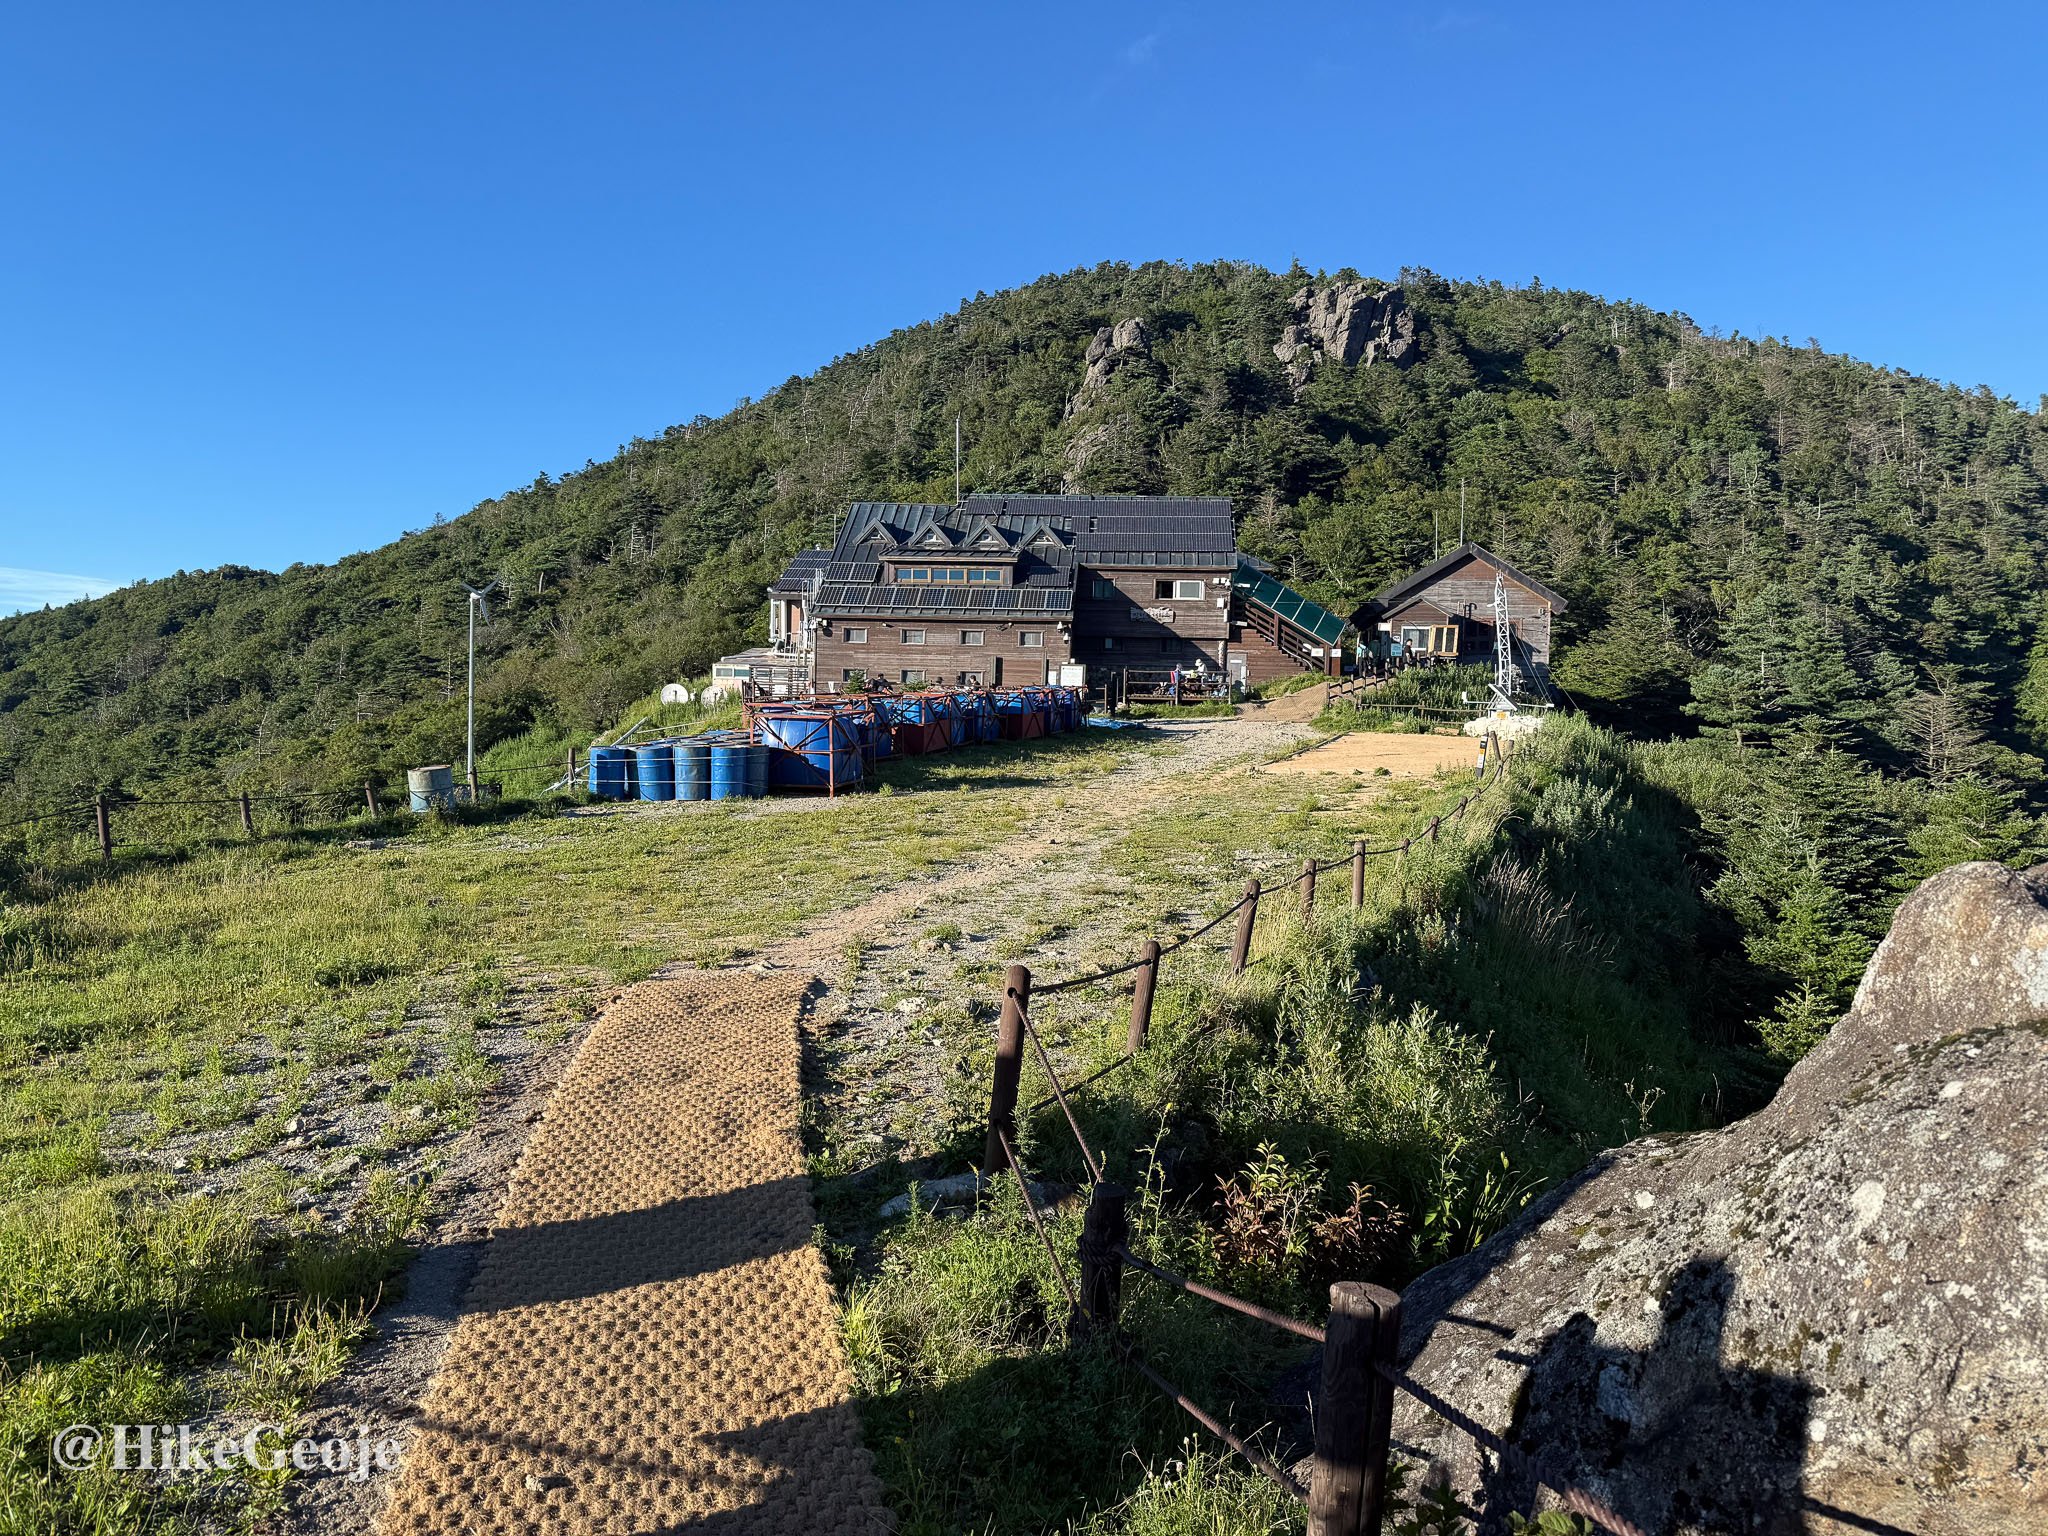
Jangteomok Shelter
Jangteomok Shelter
Day 3 – Jangteomok → Daewonsa
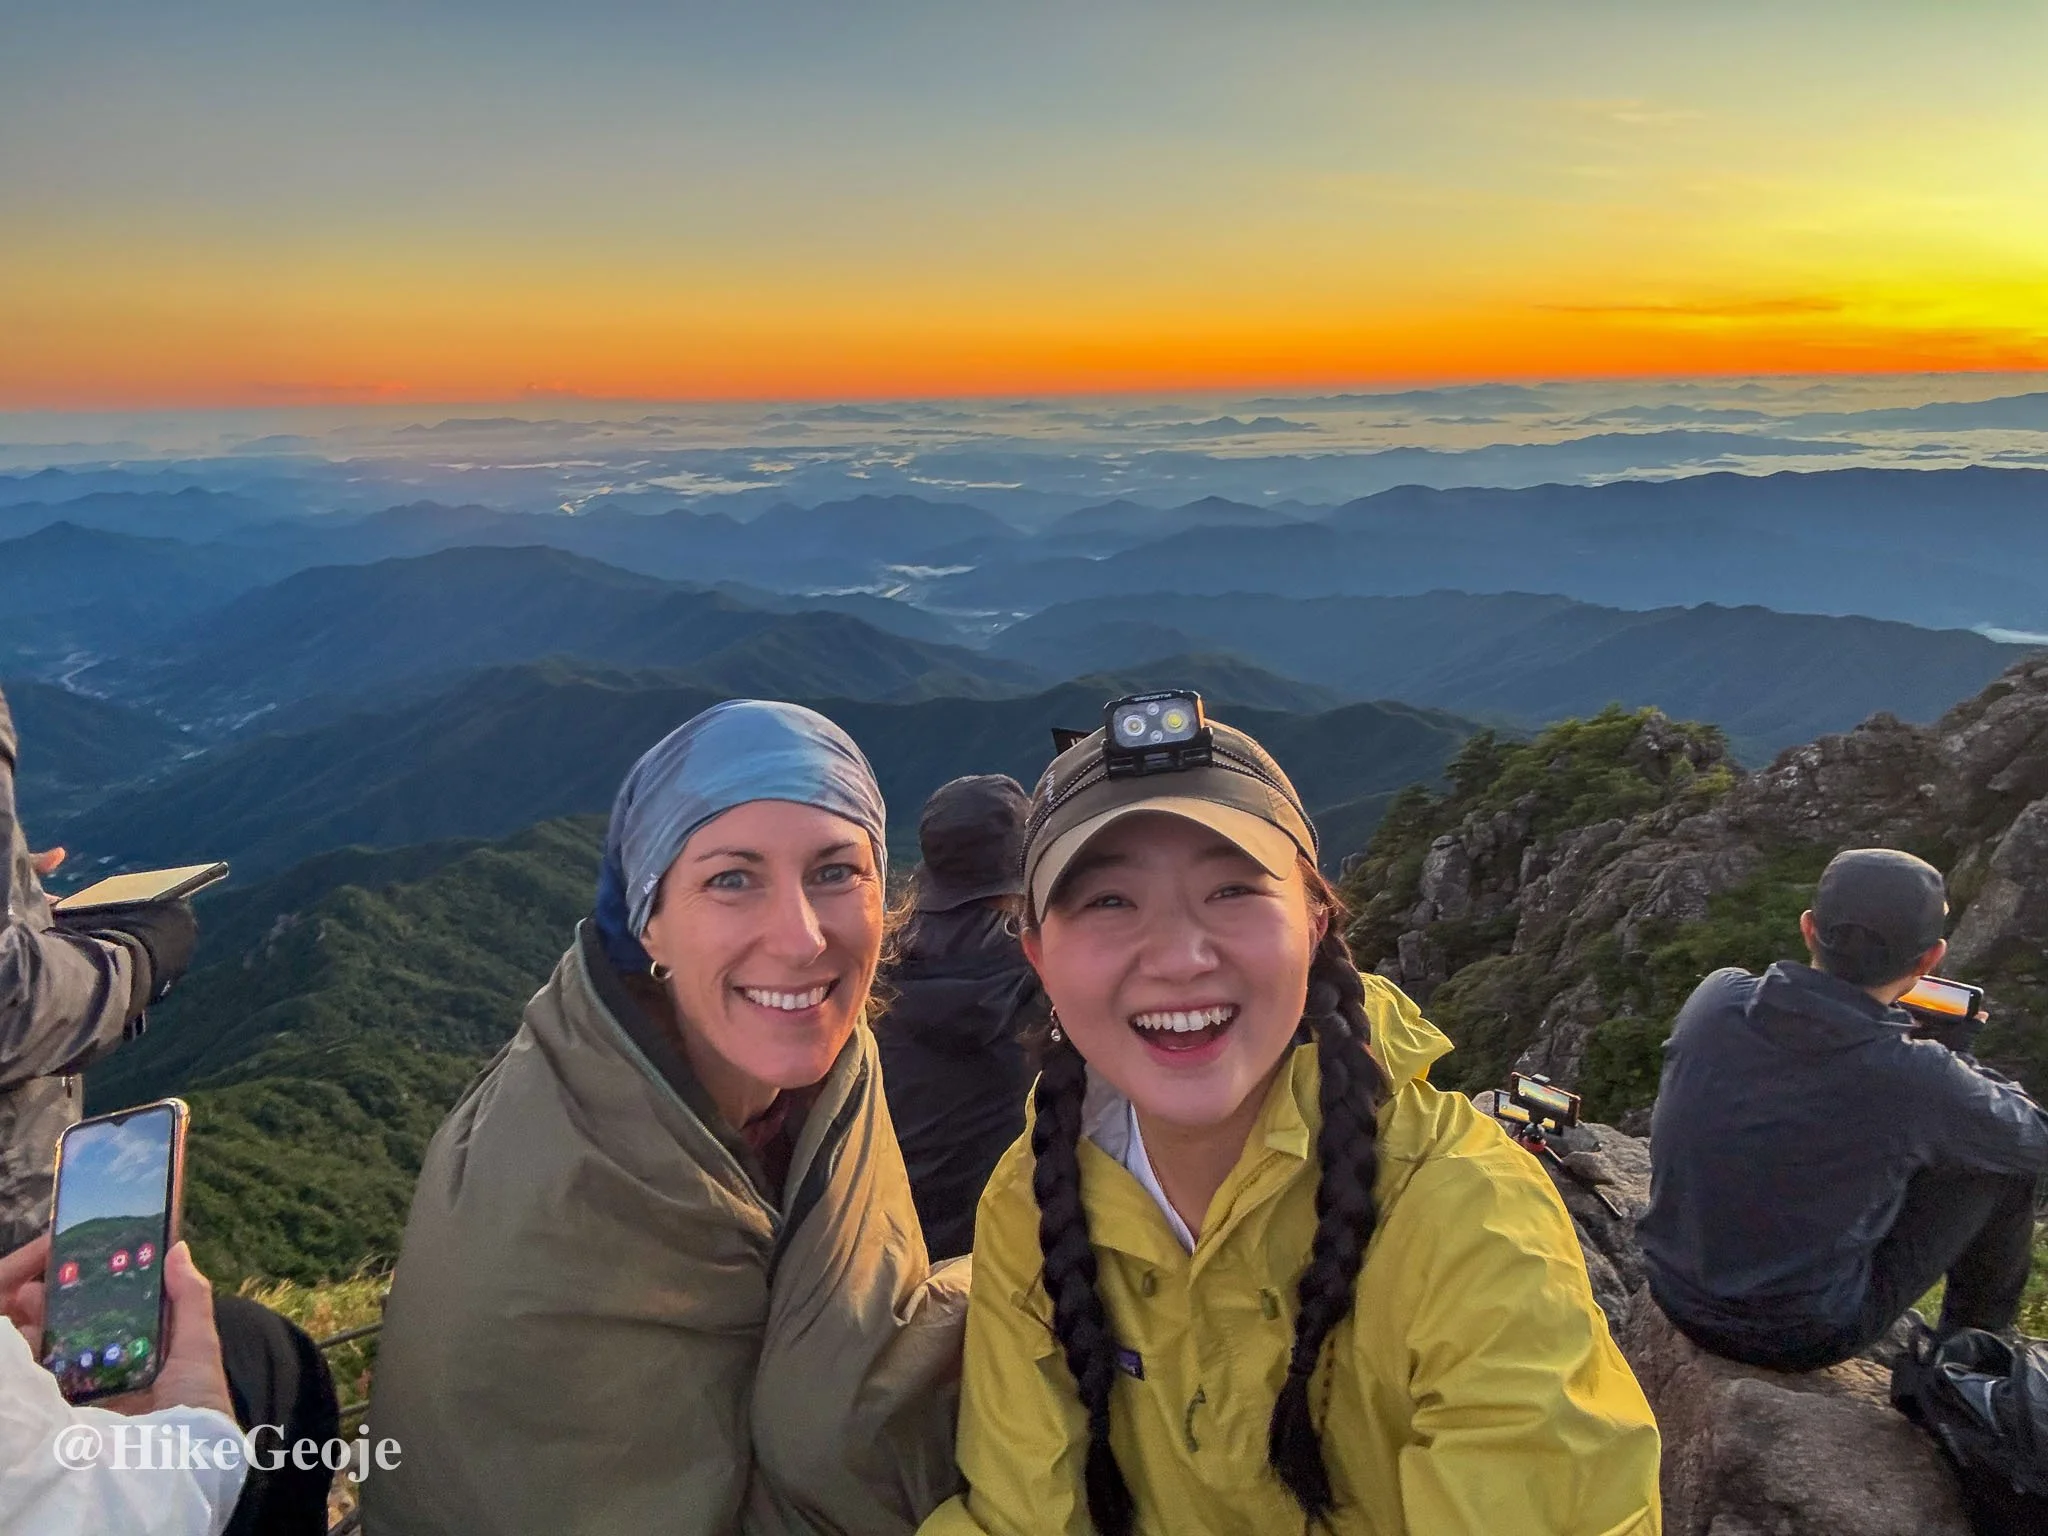
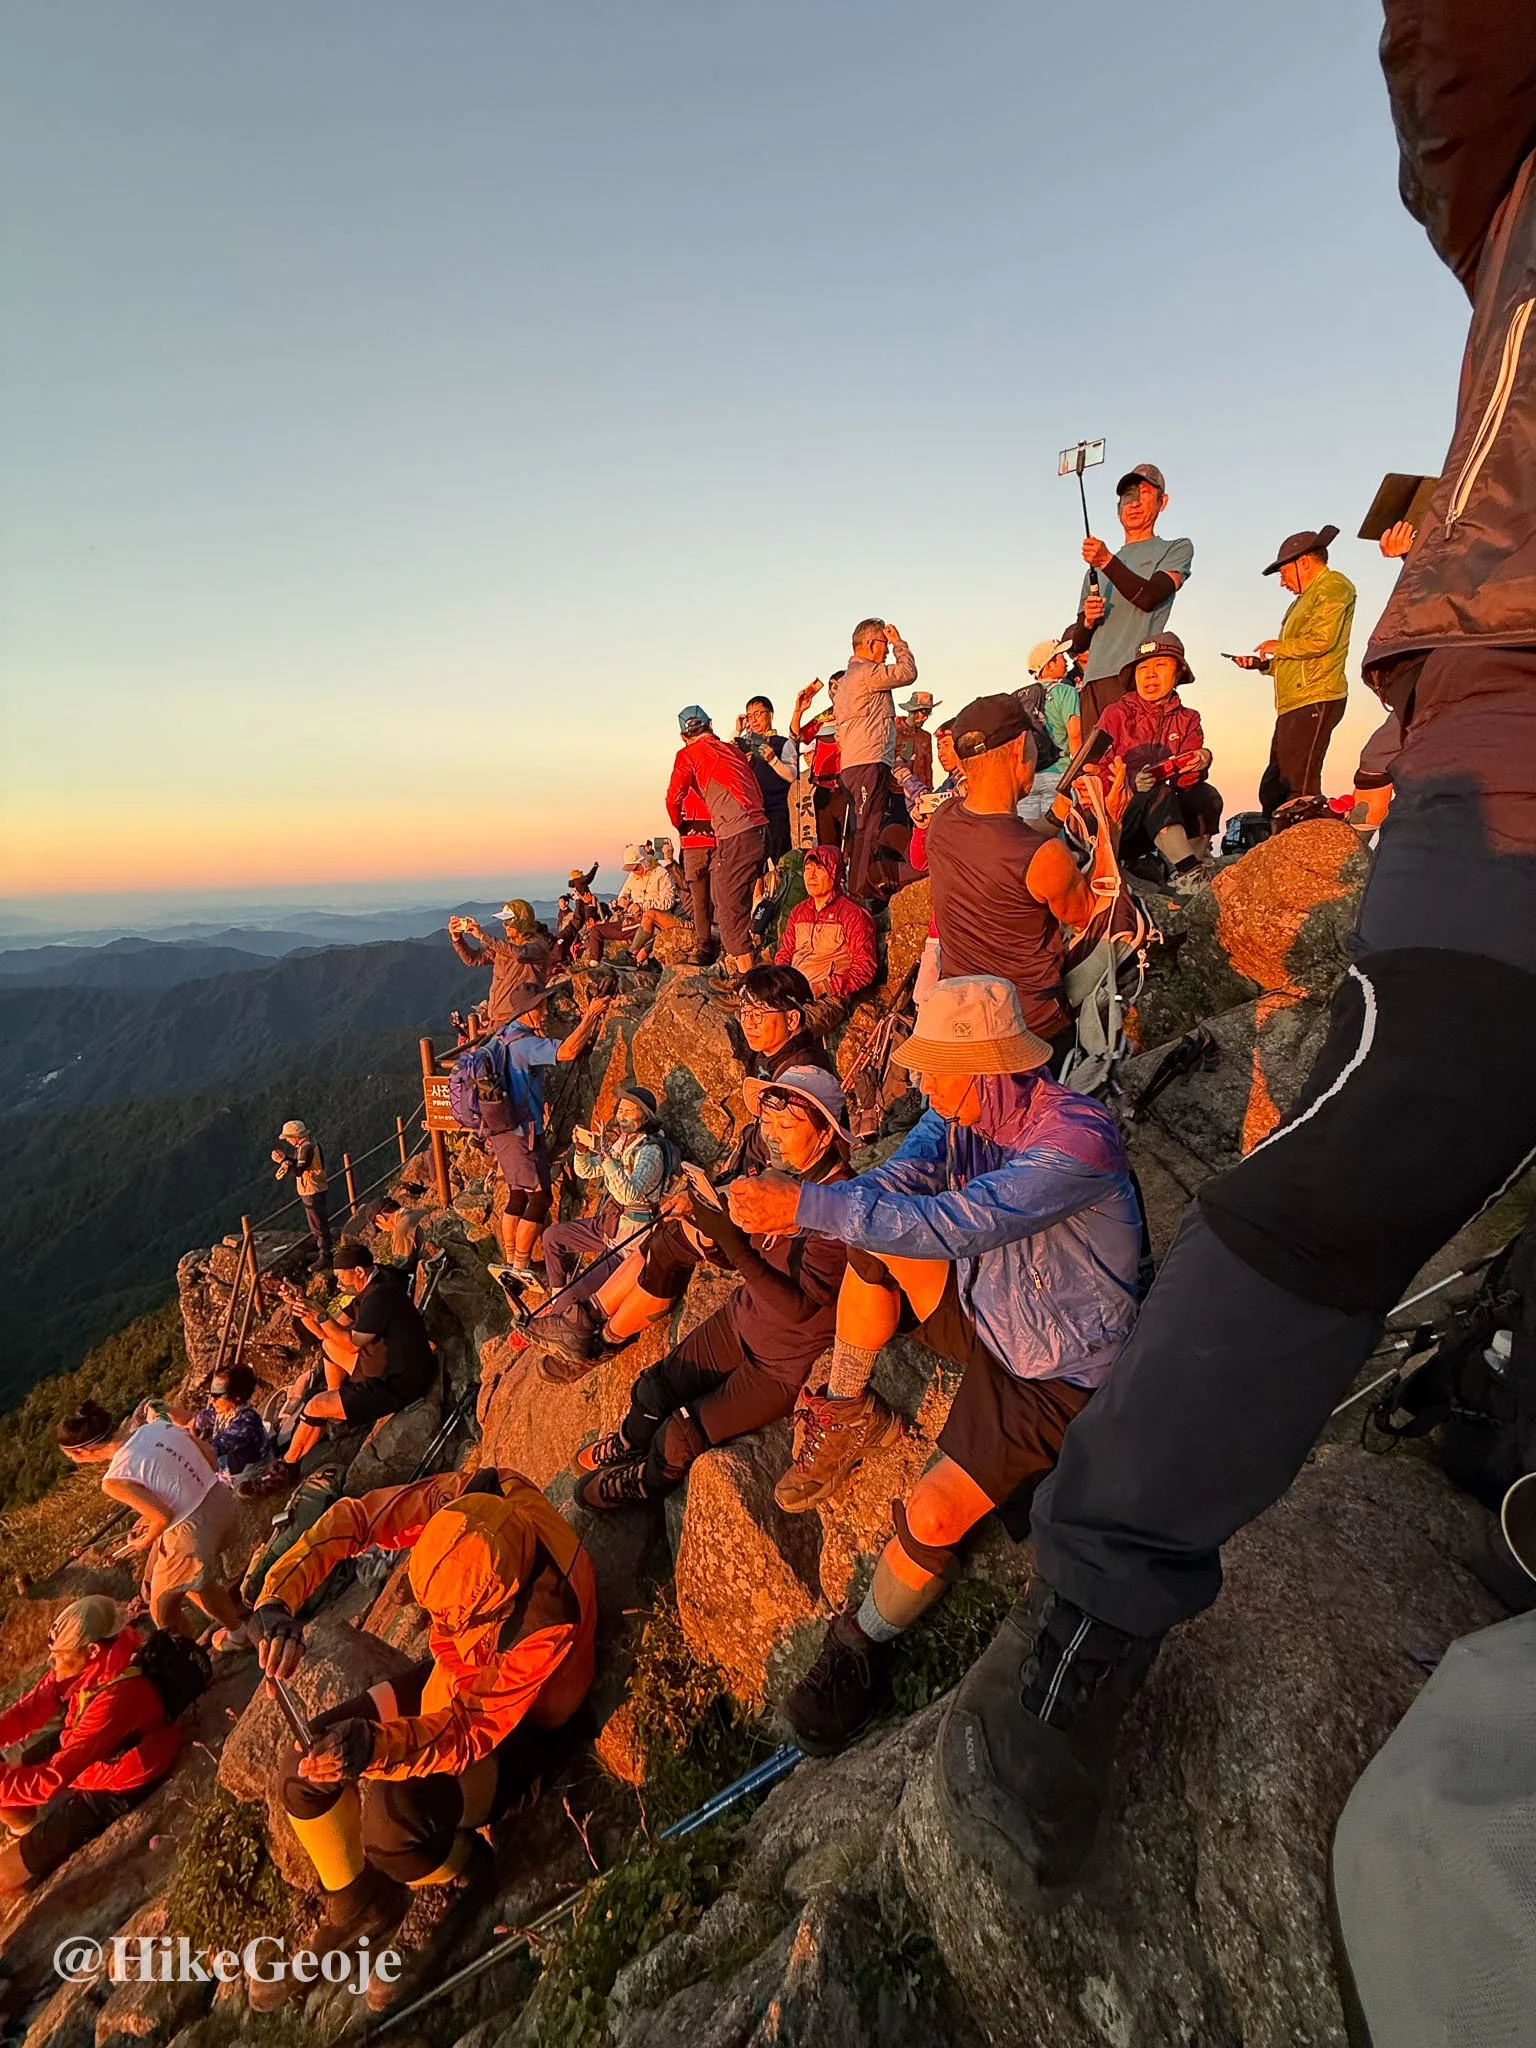
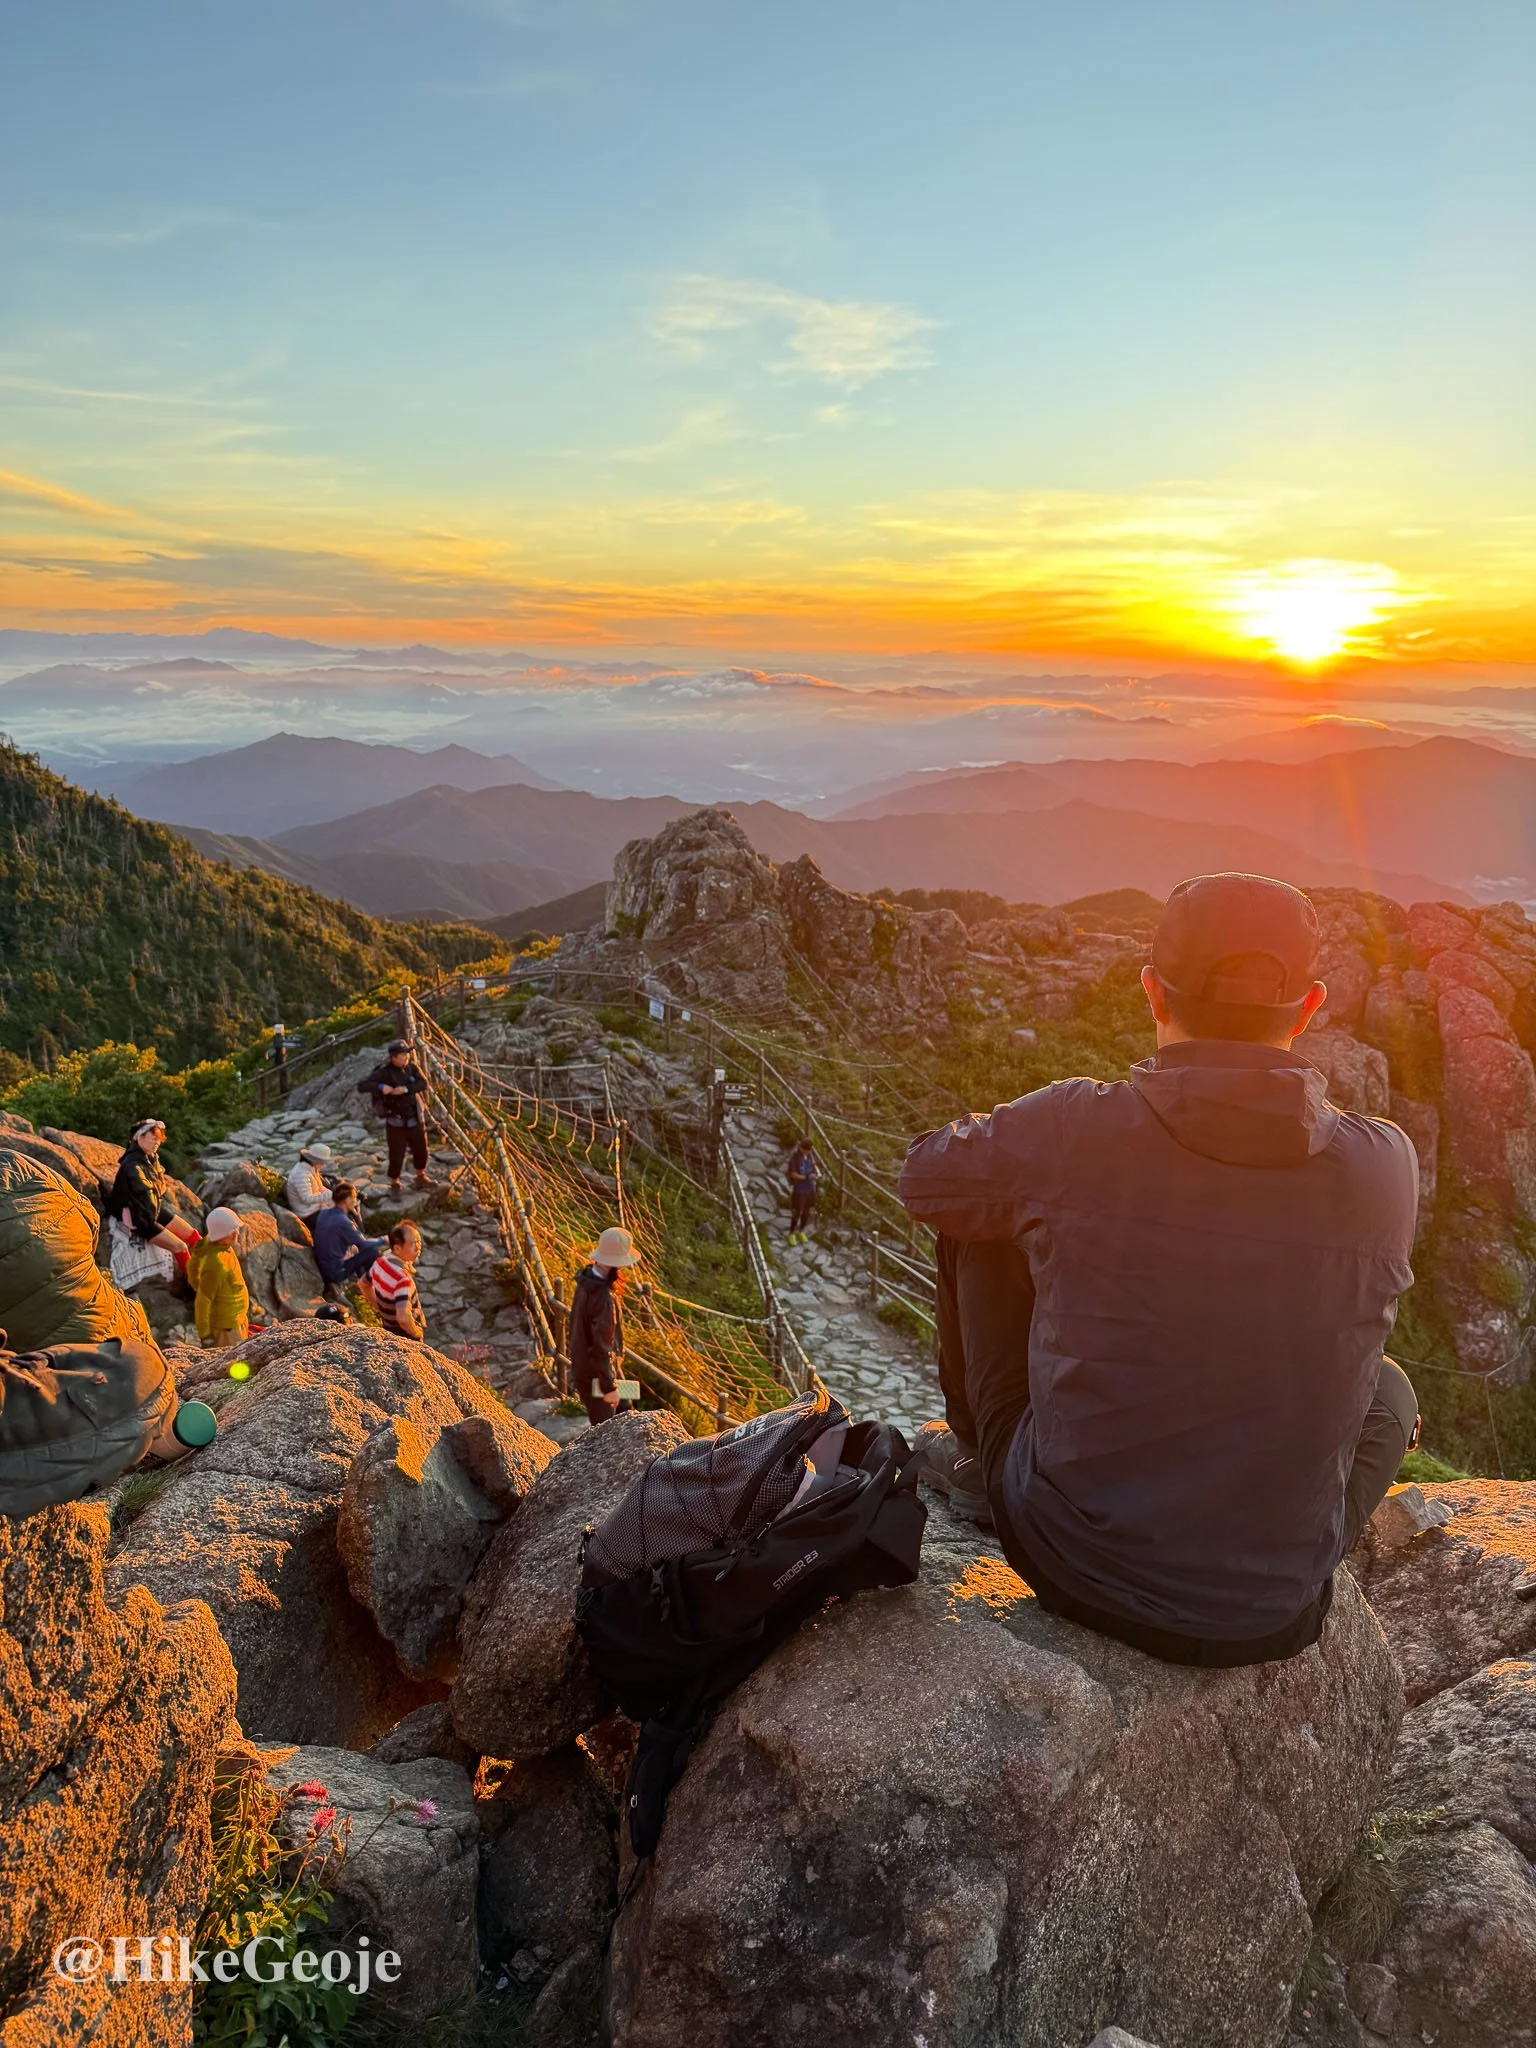
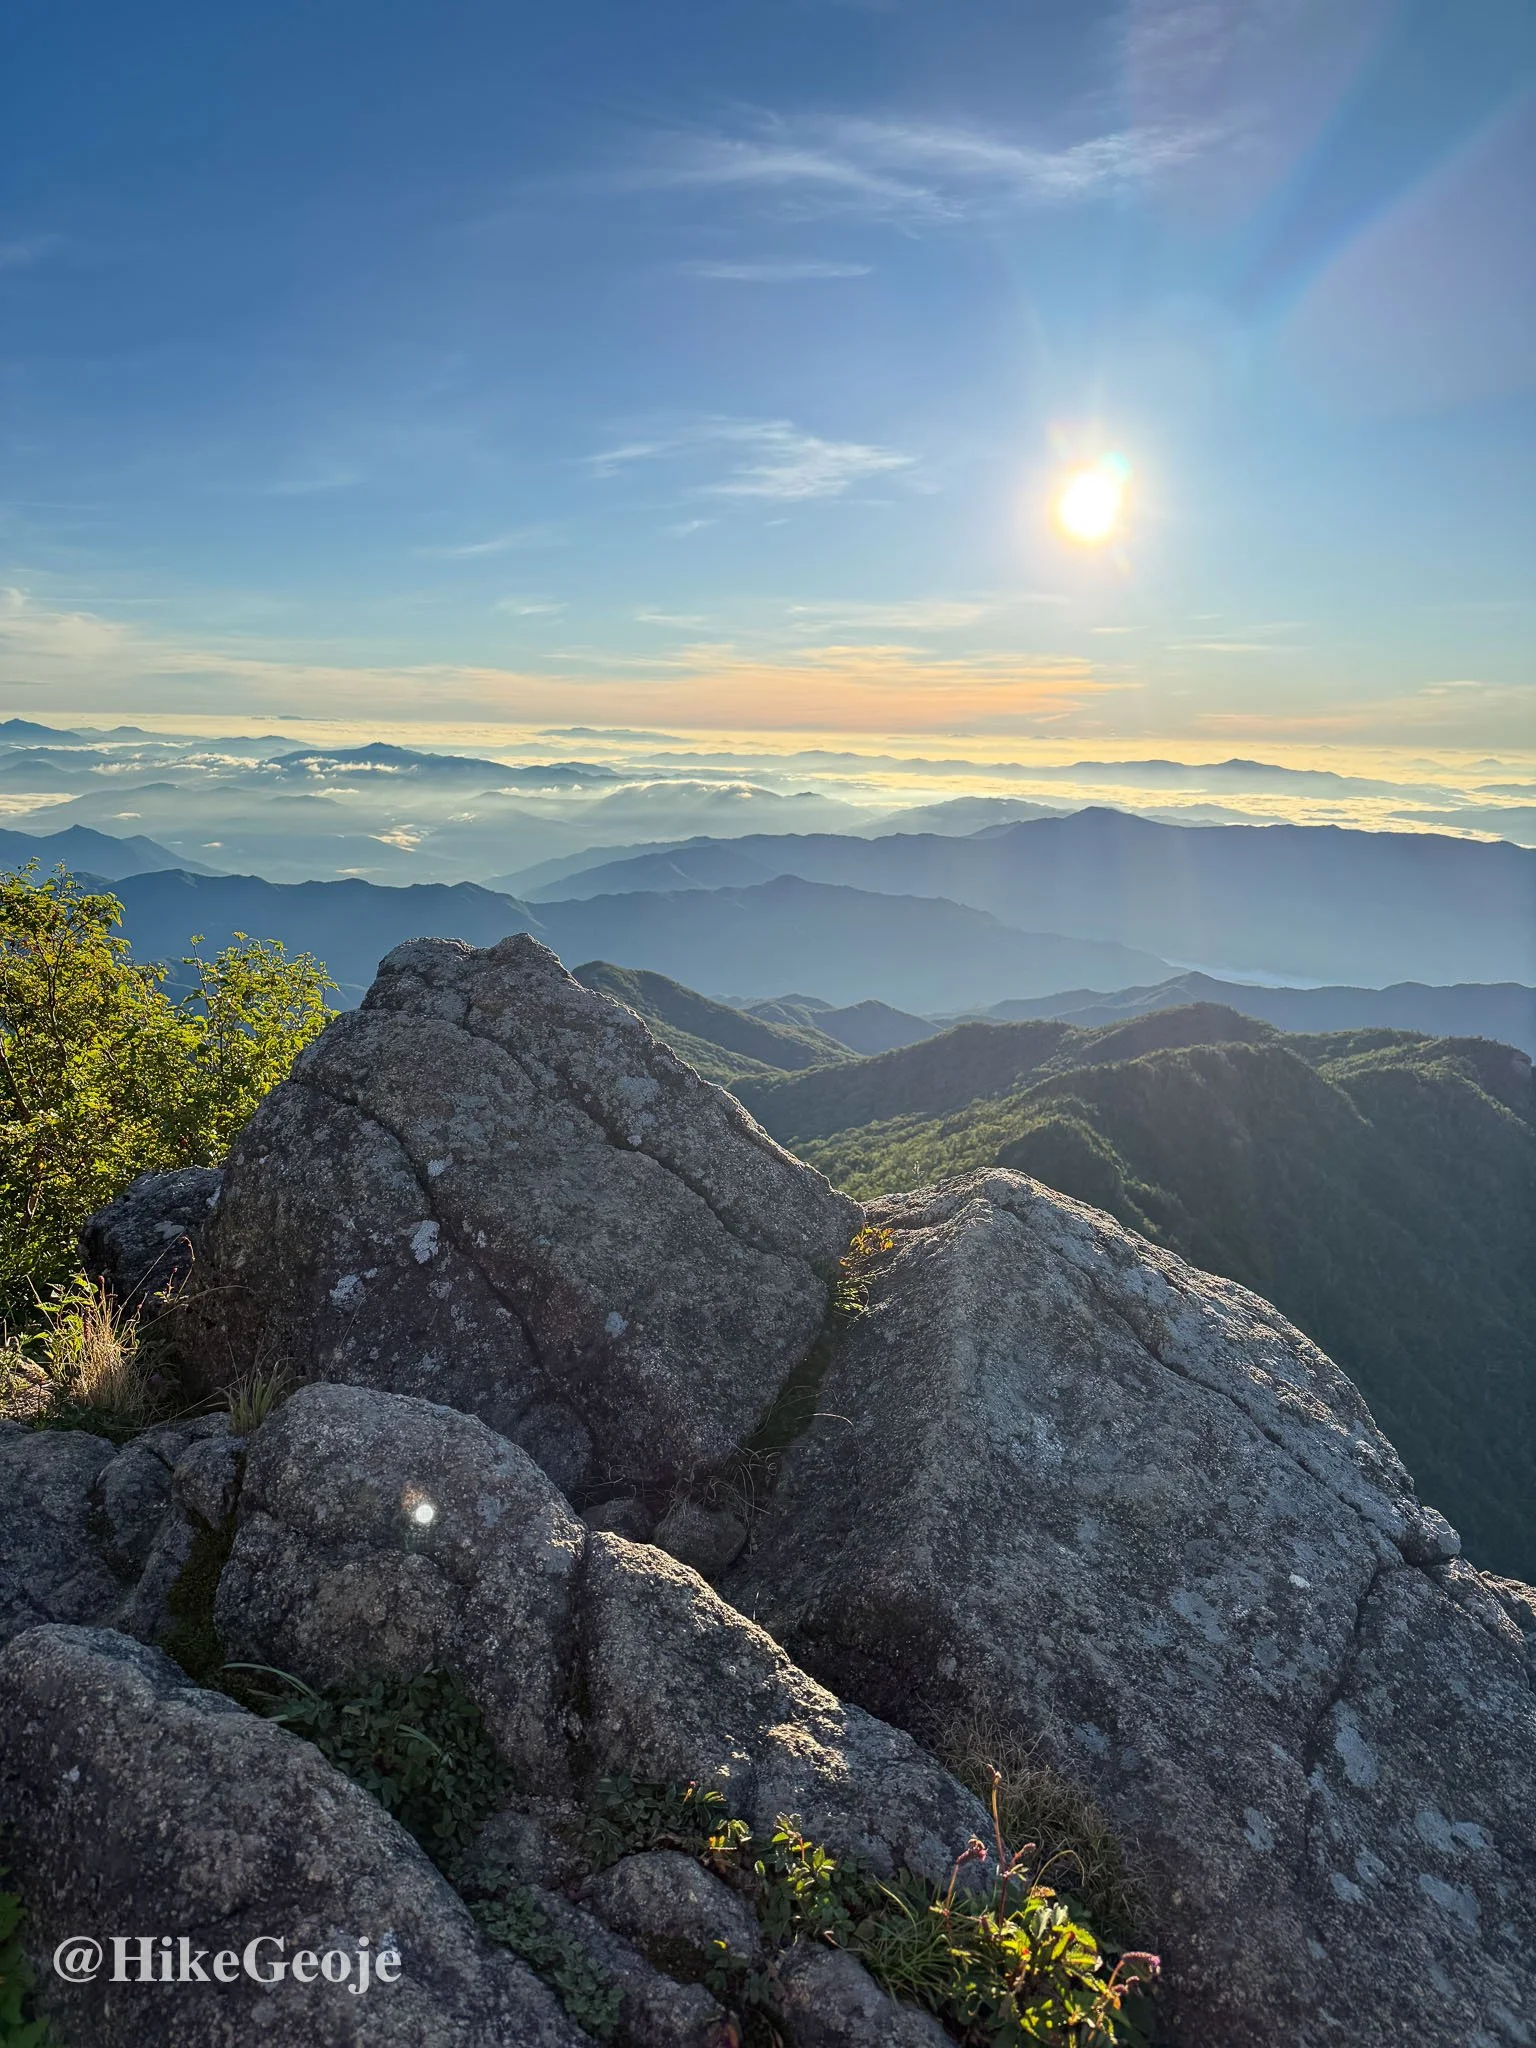
I woke at 3:30 am to a sky so star-filled it made me cry. Yejin was happier to get a later start, so we decided to meet at the peak for sunrise. The 45-minute climb to Cheonwangbong (천왕봉, 1,915m) was steep but full of anticipation. Only one hiker beat me to the summit, so I had my pick of spots.
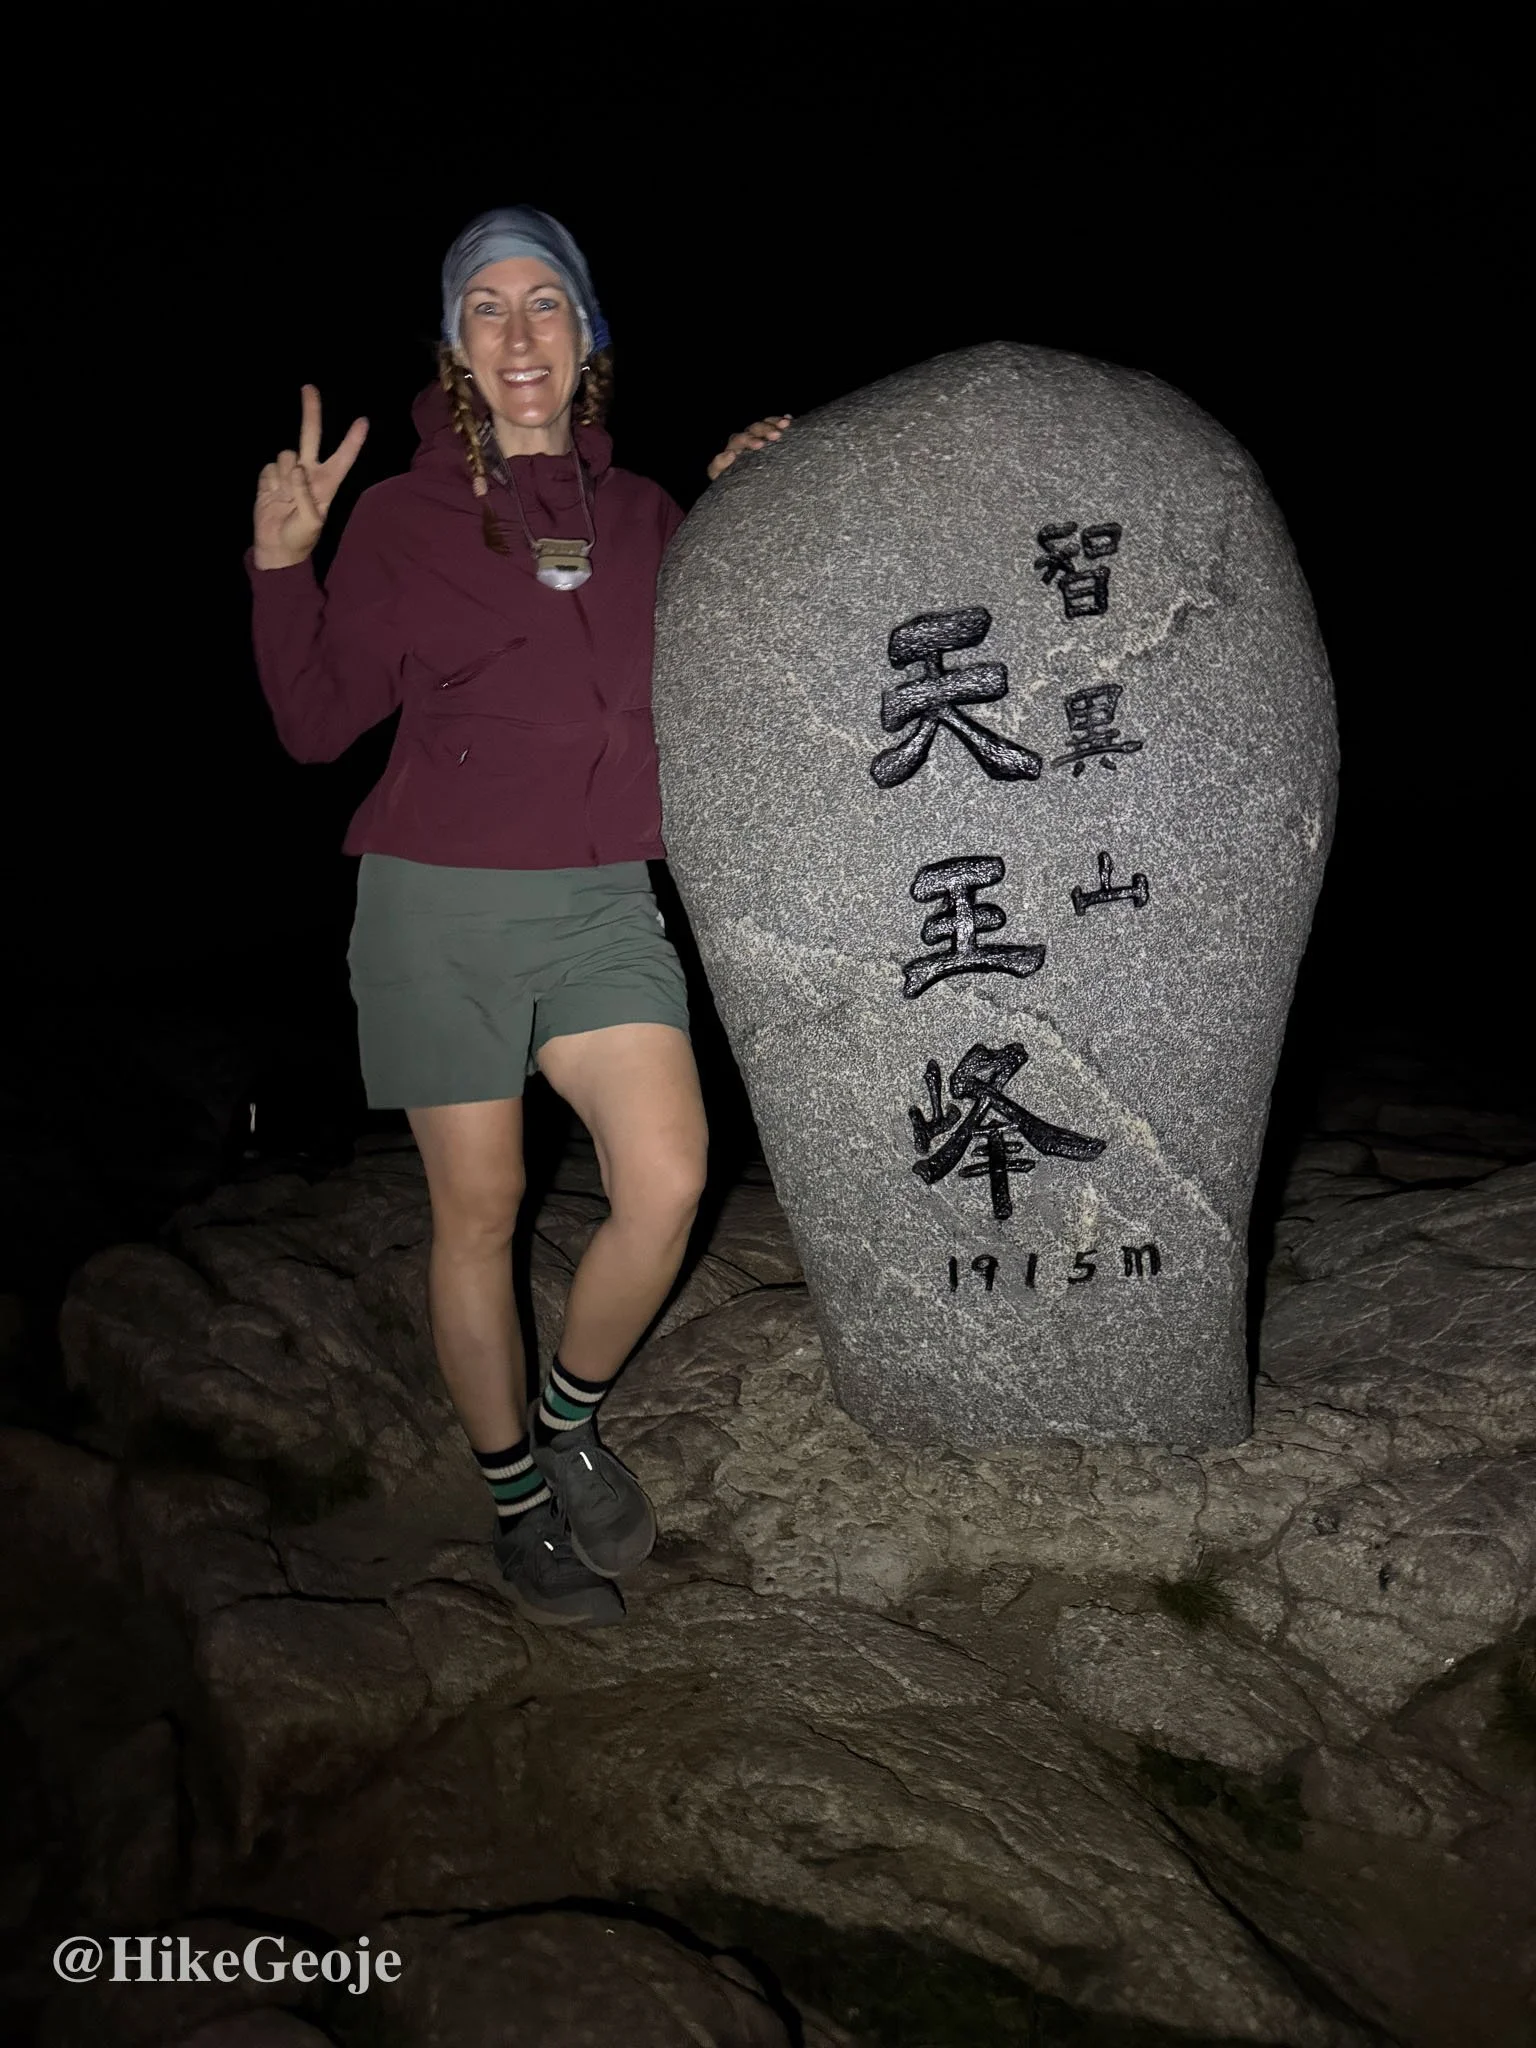
Cheonwangbong
Korean lore says that seeing a clear sunrise from Cheonwangbong is rare - and if you do, it means your ancestors lived virtuously. Mine must have been saints, because I witnessed the most breathtaking sunrise of my life. The horizon was clear all the way to the sea. I wrapped myself in my sleeping bag against the cold and shed my second set of tears that day.
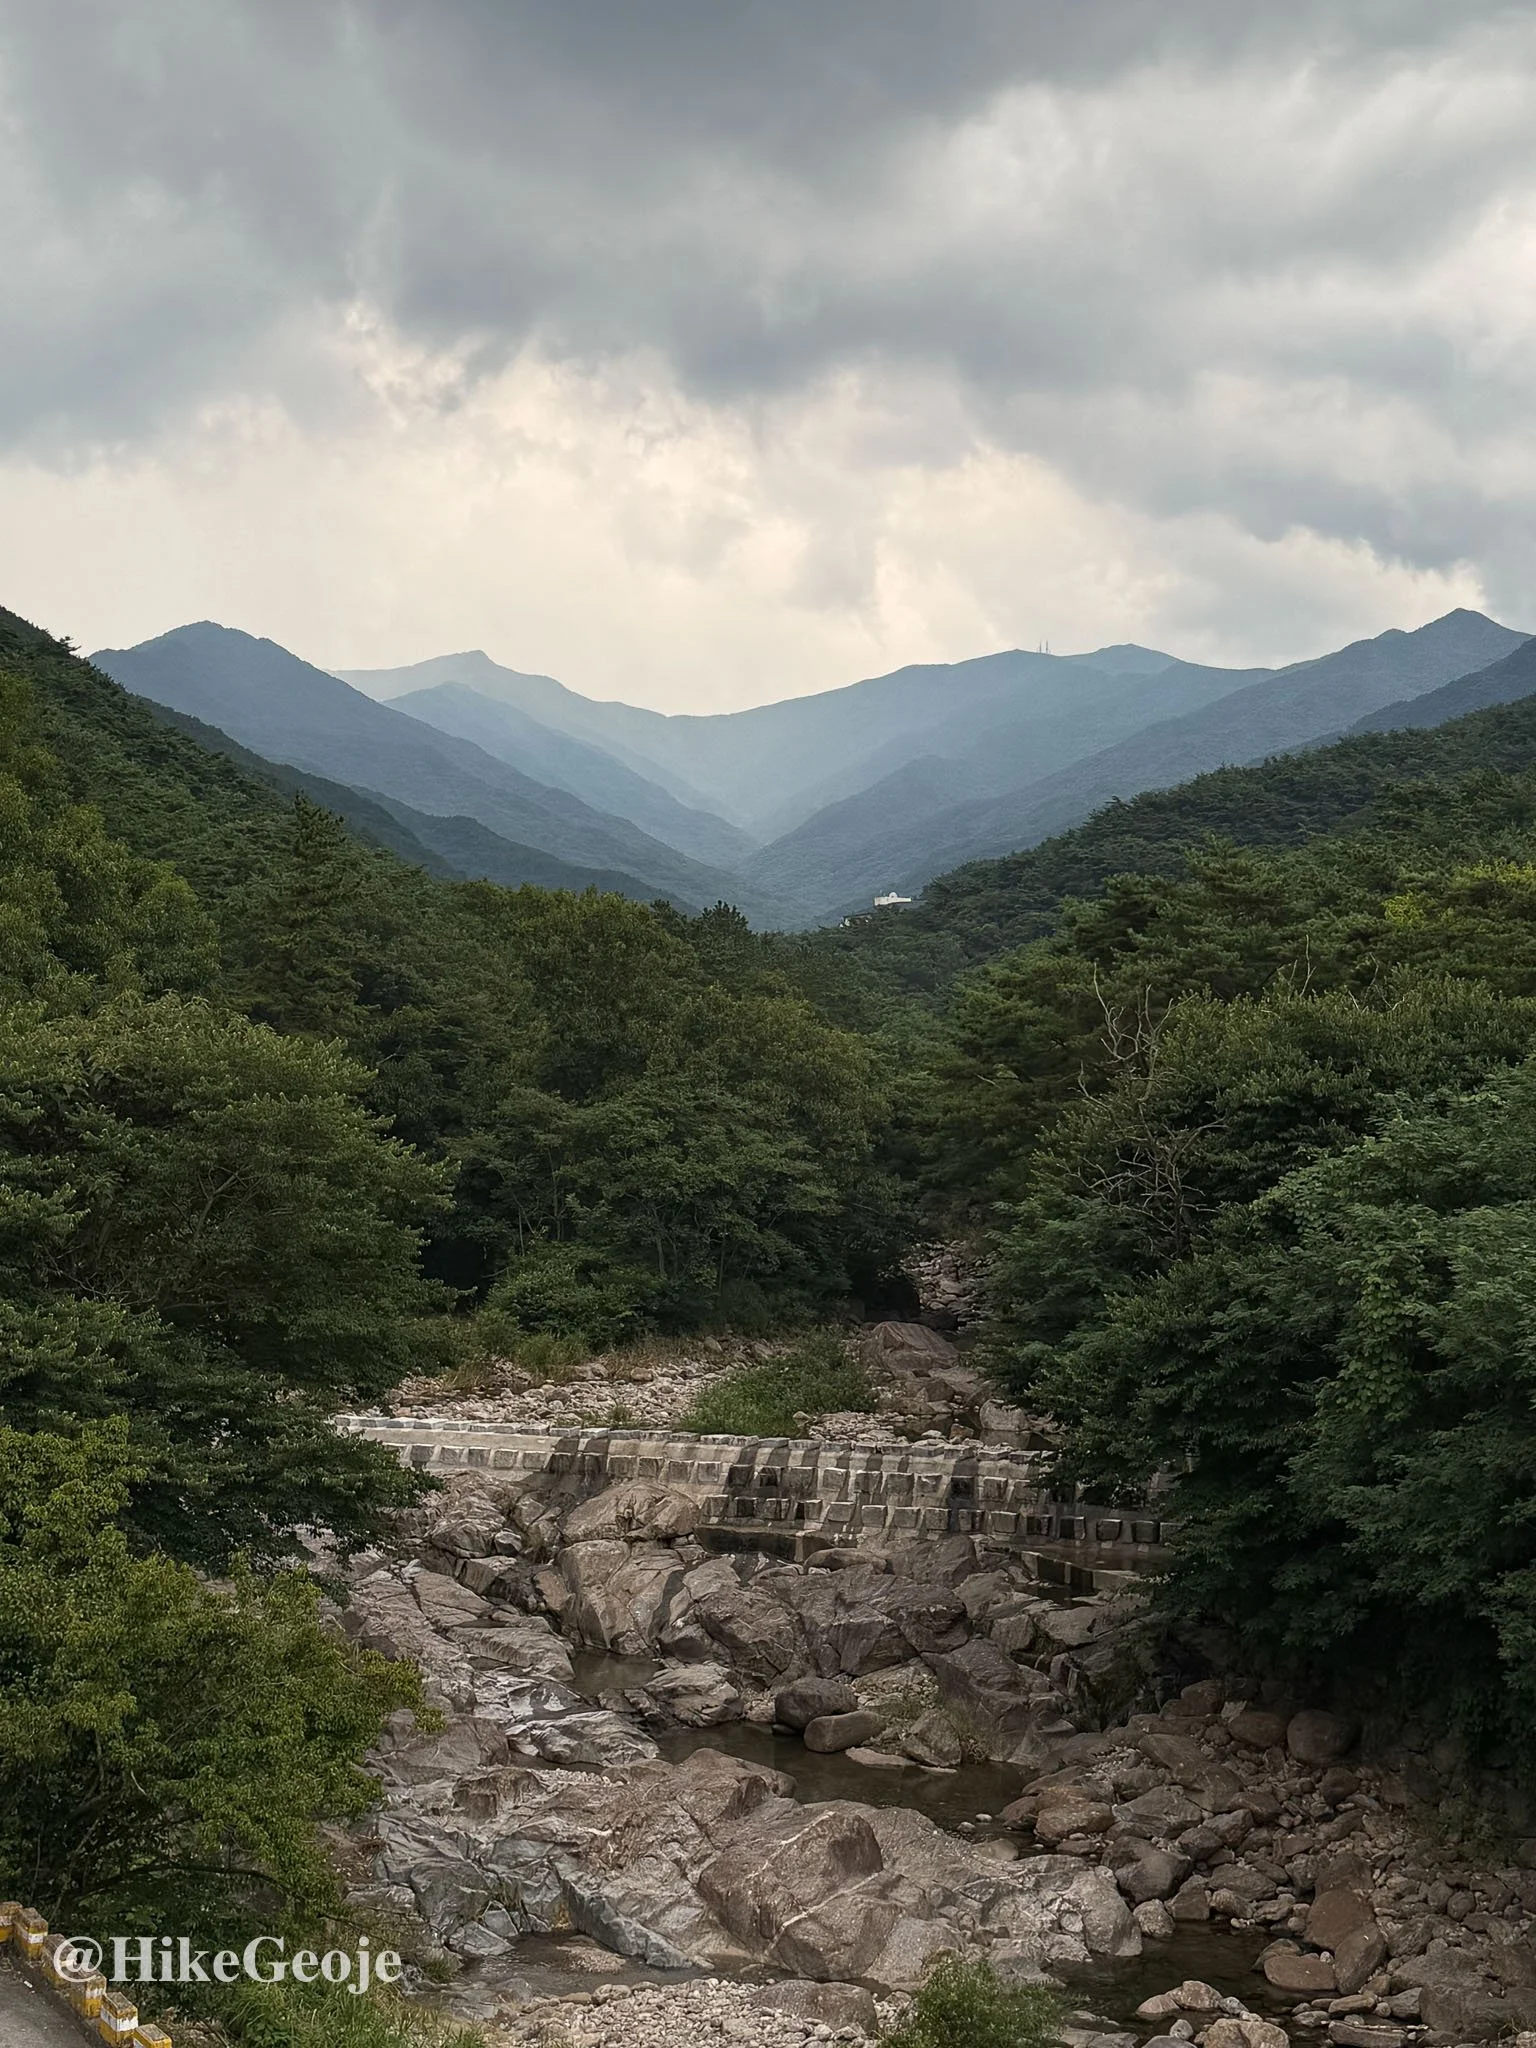
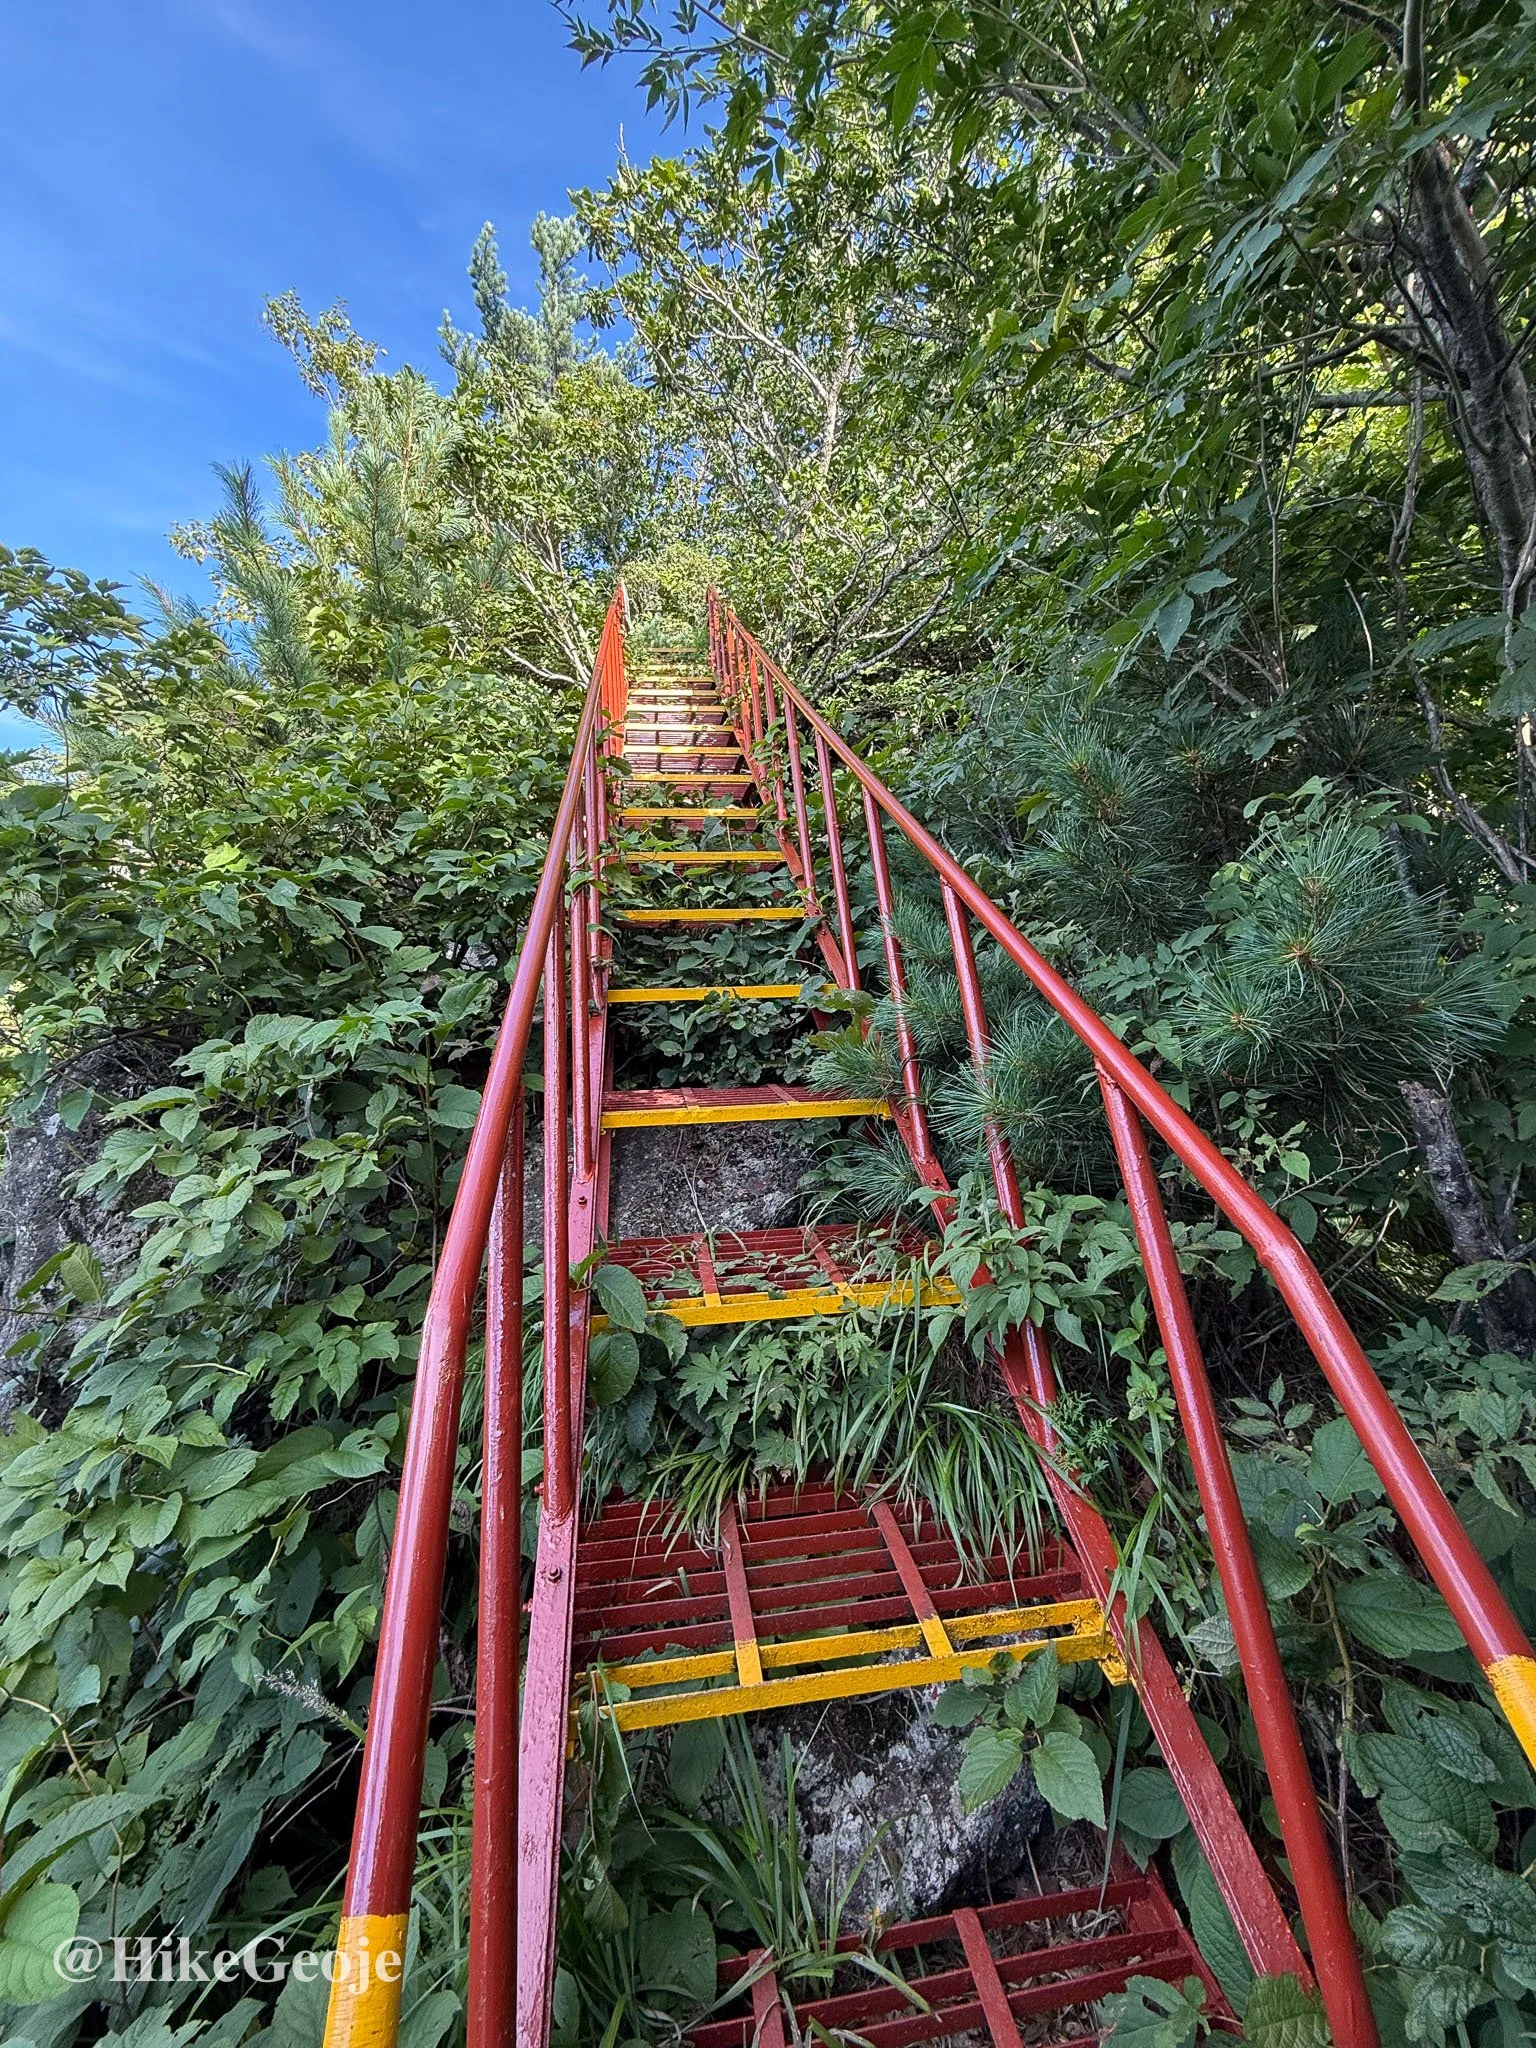
From there, the descent began. The first section was lovely in morning light, but the trail soon became overgrown and jungly.
I stopped briefly at Chibanmok Shelter (my least favorite: outhouse squatties, drinking water a long hike away), though the best part was bumping into Yejin one last time. We said our goodbyes, knowing we’d made a friend for future adventures.
Chibanmok Shelter in the background
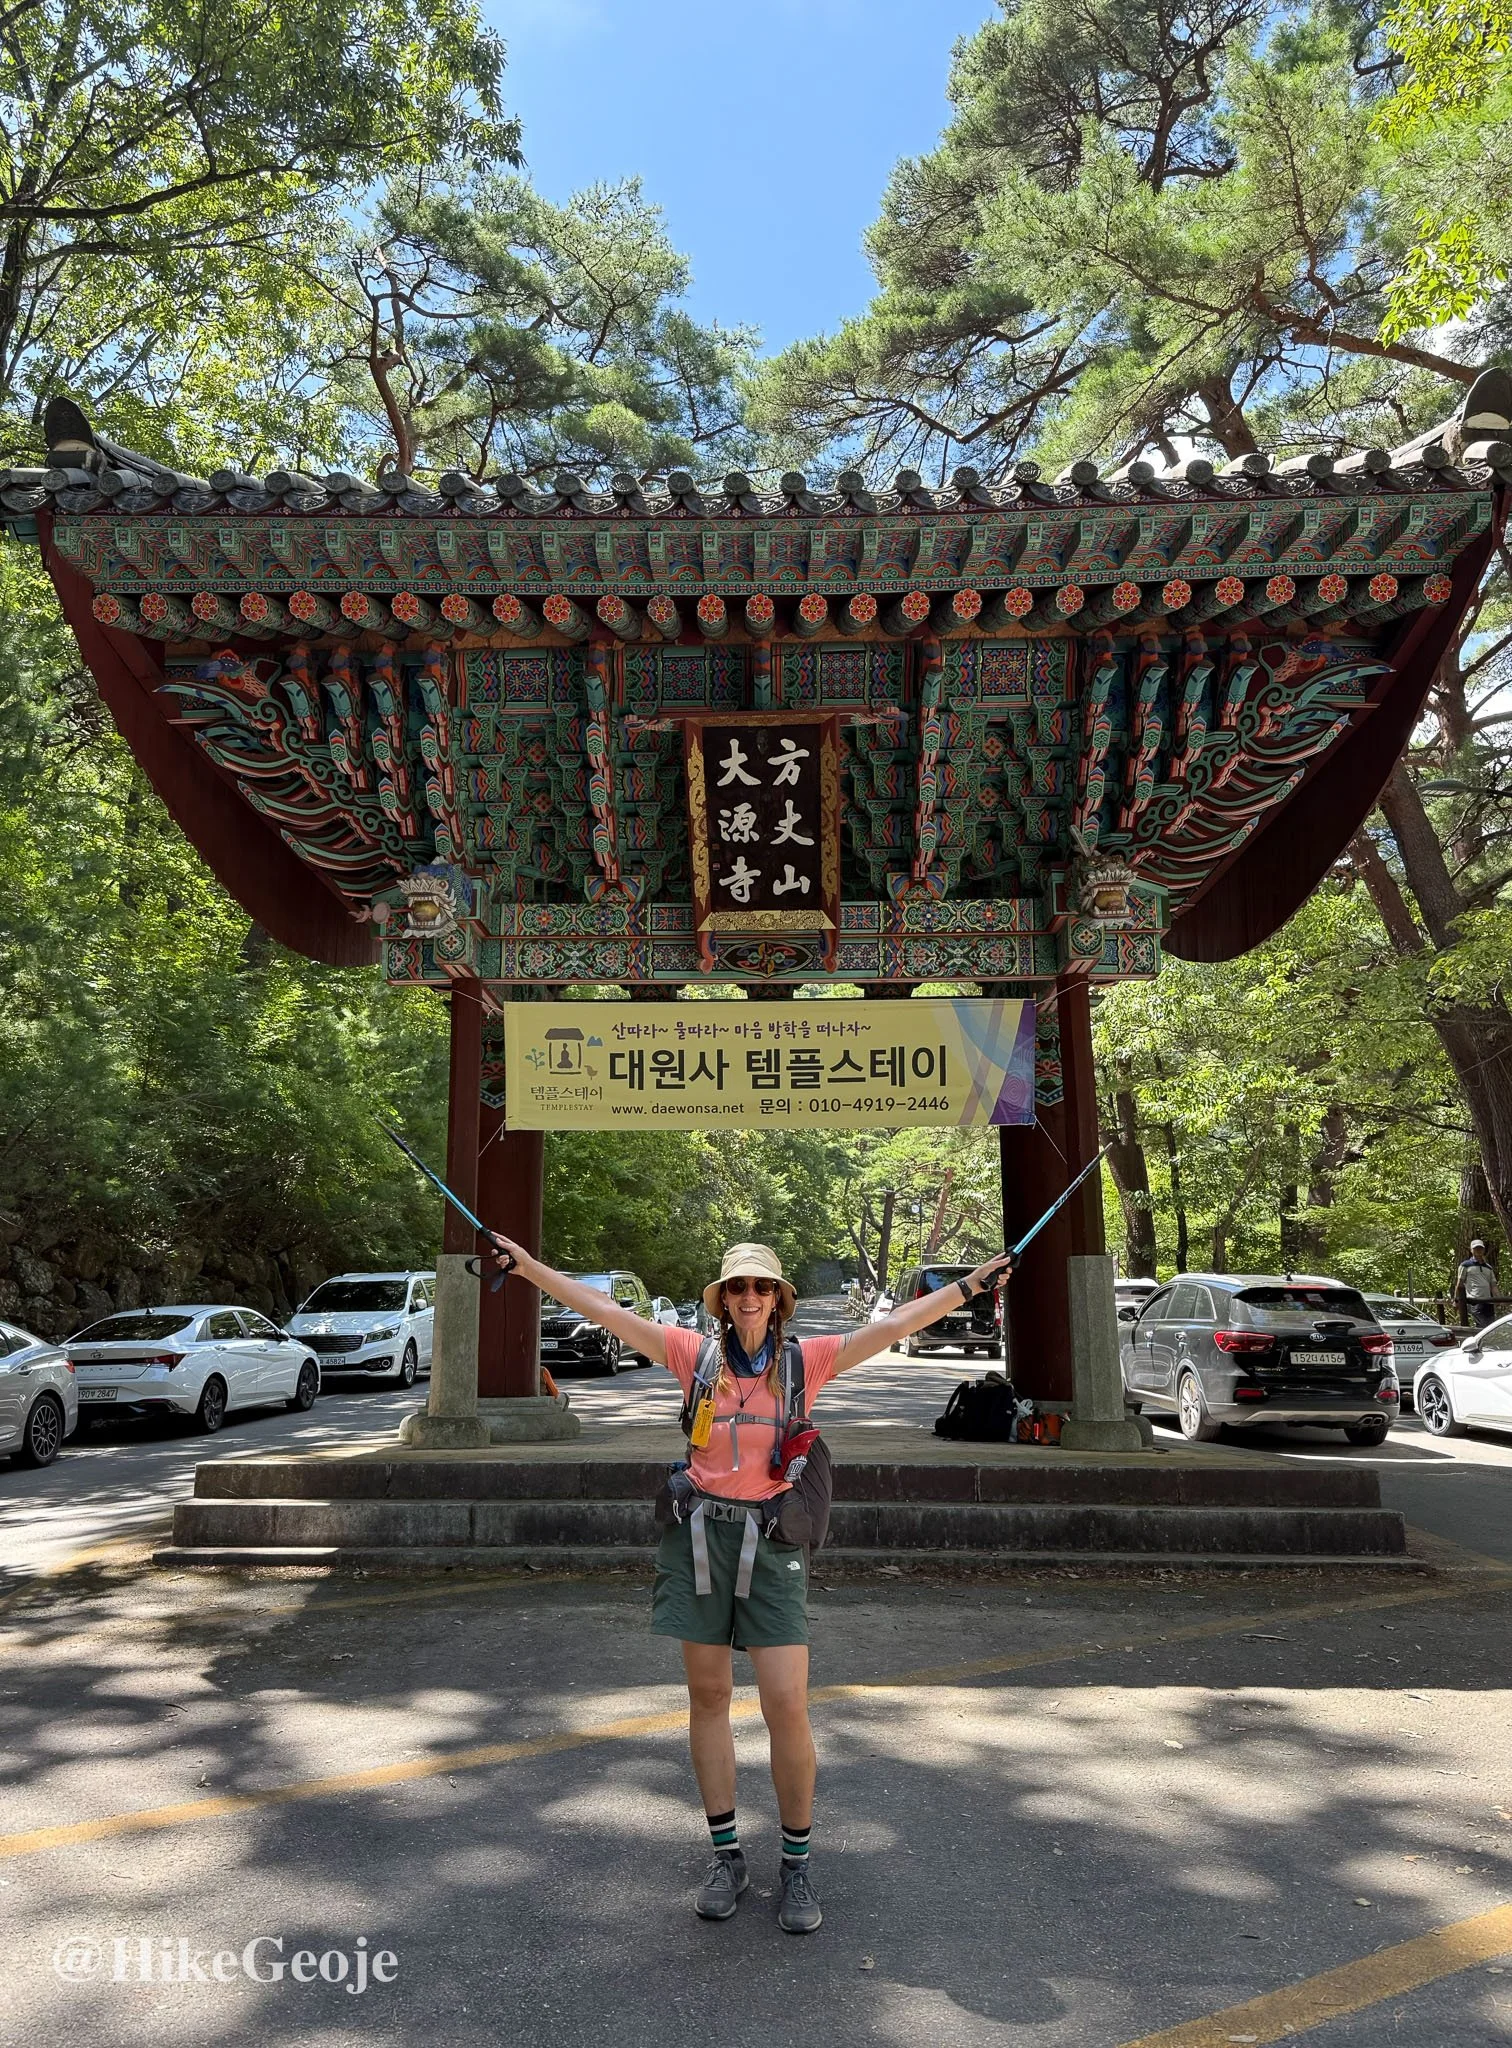
By afternoon, I finally passed through the gates of Daewonsa Temple — tired, sweaty, and elated.
Reflections
Getting back to my car took three bus rides and six hours (plus a 3 km walk), then a 2-hour drive back to Geoje. Exhausted, I swore it was a “once in a lifetime” hike.
But writing this now, I know that’s not true. The Hwadaejongju is too special not to repeat. Looking back, I’m proud of the kilometers, the elevation, and the effort - but what I remember most vividly are the little things: the vending machine coffee, the laughter with Yejin, the stench of the outhouse at sunset, the stars before dawn, and the tears at sunrise.
It was, without question, one of the most unforgettable experiences of my life.
If You’re Planning This Hike
Shelter Reservations
Book through the National Park website (1 month in advance).
They sell out quickly, especially weekends and holidays.
Shelters I stayed at: Yeonhacheon + Jangteomok (great balance).
Shelter overview
Nogodan Shelter – Very fancy: capsule-style rooms assigned in gender-segregated wings, flush toilets, vending machine (cold drinks), and picnic tables out front. Great for a comfortable first night.
Yeonhacheon Shelter – Decent sleeping spaces and friendly rangers; no views and outhouse-style bathrooms.
Byeoksoryeong – Fairly spacious inside, outlets for charging, nice outdoor seating for dinner/rest stops. Exposed outside (no shade), so on hot days it can feel very sunny.
Seseok Shelter – Large shelter with a huge deck and a roomy kitchen/cook area. Has a nice fresh water spring nearby for refills.
Jangteomok – Very narrow sleeping slots (bring a slim pad), outhouse toilets that can smell bad, but excellent positioning for sunrise views toward Cheonwangbong.
Chibanmok – My least favorite: no views, long walk downhill to the water spring, and squat/outhouse toilets.
Shelter essentials
Bring your own toilet paper — it’s not stocked.
Since the pandemic, shelters do not rent sleeping pads or blankets. You must bring your own lightweight pad and blanket/sleeping bag.
All shelters have charging stations, but outlets can be in high demand — a power bank is useful backup.
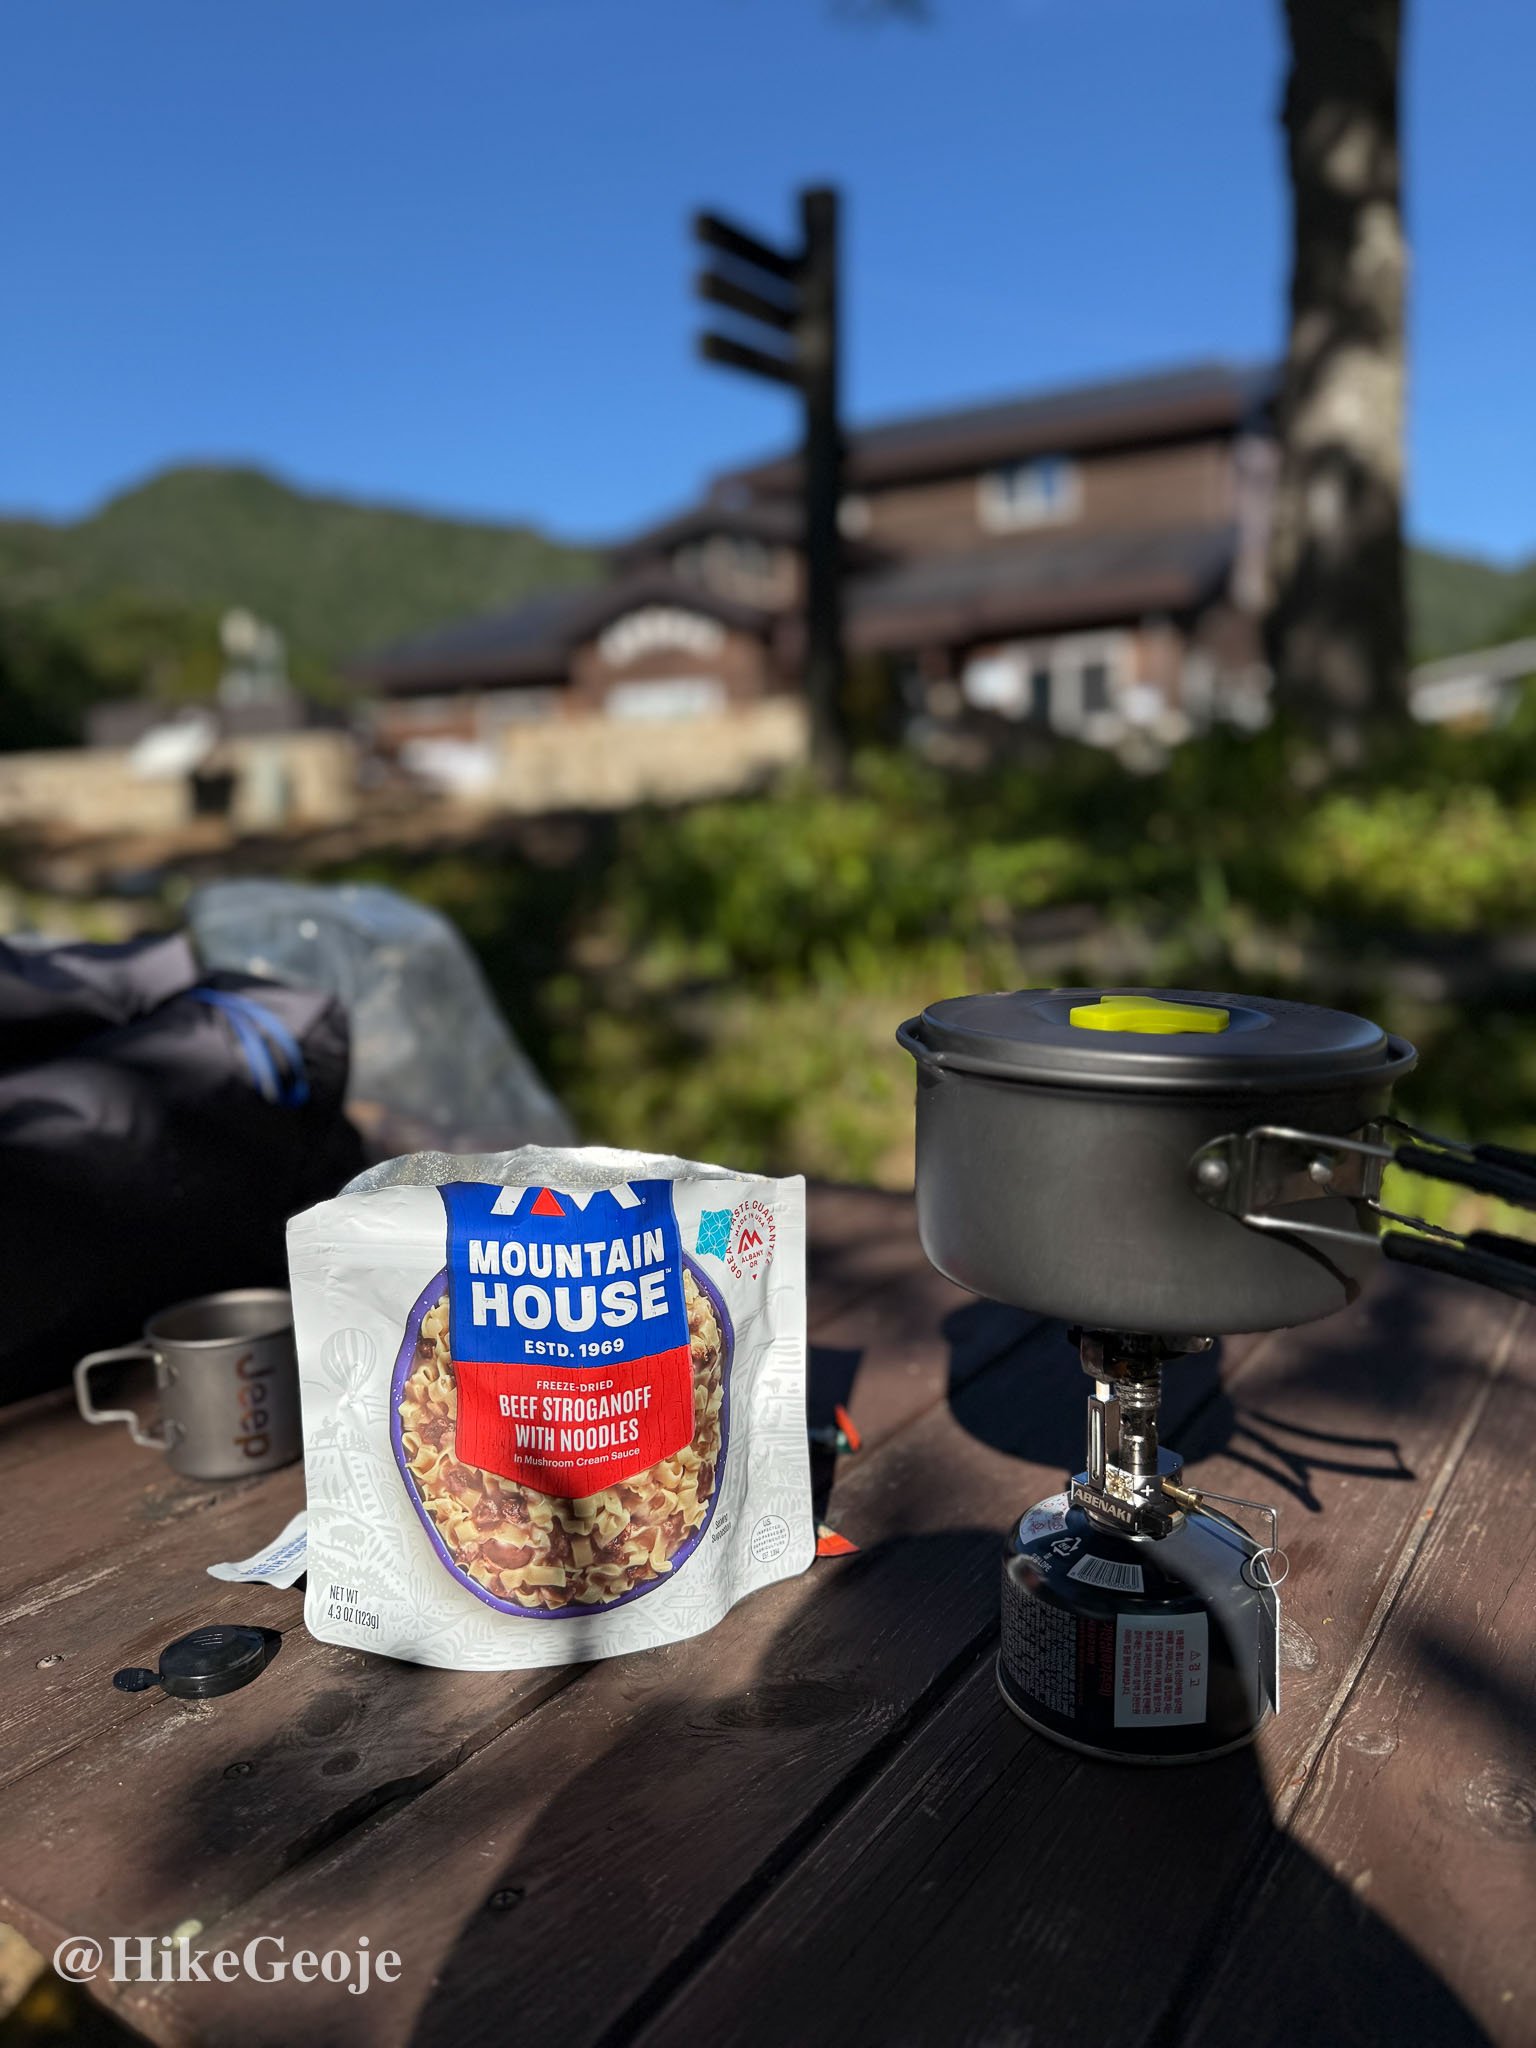
Food & Water
Bring your own meals and snacks.
Shelters sell microwaveable rice and water (don’t rely on them for full meals). You have to pack-out the trash.
Water sources: Imgeollyeong spring (last chance before Yeonhacheon), shelter springs and bottled water for sale.
Difficulty
Not technical but physically demanding.
Expect ~50 km over 3 days with steep climbs and long descents.
Three days = more manageable; two days = very tough.
Best Season
Spring/fall: best balance of weather and views.
Summer: hot, humid, thunderstorms (my experience).
Winter: requires extra gear and experience.
Getting Back to the Start (Daewonsa → Hwaeomsa)
Expect 6+ hours and multiple transfers.
Buses I took:
Daewonsa → Jinju (1.5 hrs / 6,700₩)
Jinju → Hadong (1 hr / 6,000₩, assigned seating)
Hadong → Hwaeomsa (about 1 hr / 6,000₩)
From the last stop, I still had a 3 km walk back to my car at Hwaeomsa.
Tip: If possible, arrange a pickup or leave your car at the finish.
What I’d Do Differently
Pack even lighter - every extra kilo matters over 50 km.
Consider swapping first shelter night to Byeoksoryeong for better views.